Color. Character. Vibe. Whatever you want to call it, it’s an essential, if often elusive, ingredient that all home–recordists strive to wrangle out of their DIY productions.
Engineers pay plenty of attention to tricking out guitars, drums, and keys with special mic’ing techniques, boutique pedals, amp simulators, and plugins. But what about the vocals? No one ever seems to have much to say beyond, “Stick a great voice in front of a great mic running into a great pre. It’s just that easy!”
The upshot to the lack of vocal experimentation is often recording sessions that hum along just great until it comes time to lay the vocals down. Then, suddenly, the life seems to get sucked out of the entire tune because the vocals “sound flat” or “just aren’t sitting right.”
But it doesn’t have to be this way. Yes, it helps tremendously to have a great vocalist who really understands how to use his or her instrument, but the buck doesn’t just stop there. Today, let’s explore a few basic ideas for adding color, flair, and personality to the vocals you’re recording at home. No $10k signal chain required.
Different Mics for Different Folks
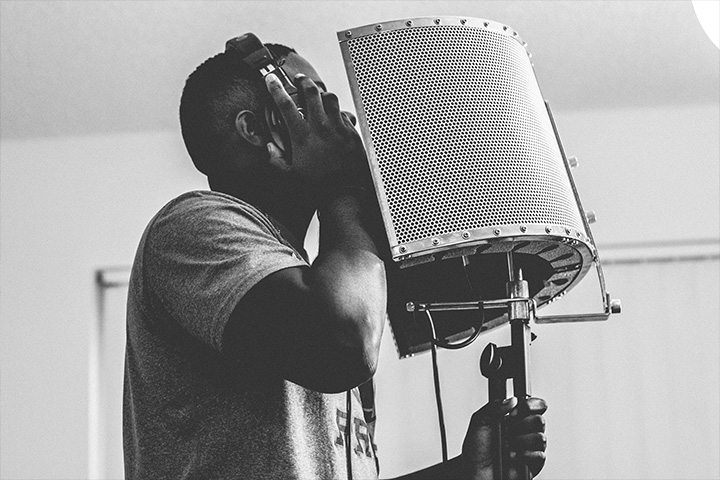
Fist, every singer’s tone is completely unique. The same voice will sound vastly different depending on what mic it’s singing into, not to mention which preamp that mic is plugged into.
So try mixing it up. Just because you’ve got that shiny, large–diaphragm condenser in your collection doesn’t mean that it should always be your default vocal mic.
Personally, I hate “default” mics. I have used everything from a U 87, to a large ribbon mic, to a cheap tube condenser, to an SM57, to a cassette tape recorder to track vocals, and everything I’ve used has been awesome.
Sometimes you’ll have an incredibly nuanced singer whose range or power or sibilance benefits from a super sensitive, super clean mic, and sometimes pushing an unpolished howl through an RE20 rules.
If you’ve got a “dependable” vocalist on your hands, you can even experiment with having him or her sing alternate passes on different mics each time. Then, when you’re using doubles to thicken up a chorus or bridge during mixing, you can employ a subtly different “flavor” that might make your whole vocal mix sound more three–dimensional.
A good tip to help minimize the total time–suck that could ensue is to set up a few different general “classes” of microphone — a condenser, a ribbon, and a dynamic, for instance — before the vocal session starts, and then have the singer sing a pass in front of each one. You can do the same thing with the mic pres that you’re pairing the microphones with, too.
Remember, a mic’s retail value is a poor predictor of how well it’ll match someone’s actual voice. Use your ears, gauge the singer’s enthusiasm and comfort level, and experiment.
If You Can't Decide, Use Both
Once I’ve found one or more mic/preamp options that the vocalist and I both like, one of my favorite ways to trick out the vocal sound is to keep two of those mics up and record through them both.

You can finagle them next to each other behind a single pop screen, position one a foot or two behind the other (mind your phase, of course), or put one of them five or six feet behind the singer’s head for a little more ambience.
Later, you can pan the two tones, use completely different plugin settings for each of them, or offset one of them in your DAW to create a strange vocal delay.
Sometimes I’ll take whichever mic is farther away and — per the reamping techniques I wrote about a while back — send it through some pedals before it even hits the DAW. I can then go nuts adding extra distortion and echo to the singer’s performance on this secondary track, which adds a cool element of real–time unpredictability without necessarily committing to the results since the “clean” track is always unaltered.
RELATED ARTICLE

Save All of Those “Throwaway” Takes
Don’t have a ton of gear options to mess with when tracking vocals in the first place? No problem. Here’s a cool trick you can try that’s completely independent of what mics, pres, and effects boxes you have access to: try using spare and/or alternate takes of the vocal pass in the mix.
Instead of having a vocalist double his or her part or add harmonies, sometimes I’ll grab a discarded take and either load it onto a new track or send it to a buss that has some weird EQ and time–based effect on it.
Often, an early “warm up” take is good to use for this purpose because the subtle imperfections of timing (and even pitch, within reason) sound really cool when contrasted with the more polished take.
Experiment with chopping it up, pitch–correcting or pitch–shifting it (if you’re into that kinda thing), hard–panning it against the original to get that hip John Lennon effect, or anything else you might dream up.
And finally, a cautionary note: not all of these ideas will work with every kind of singer. Moreover, vocals can often be touchy in a way that other mix elements aren’t.
For instance, some singers sound absolutely fantastic when they double, triple, or even quadruple their vocals. But for others, this effect can seem to completely cancel out what is cool and unique about their voice in the first place.
And then there’s the fragile psychological element. Some singers will be much more open to the idea of having their tone messed with than others. But just like budgetary constraints, that needn’t stop you from finding interesting ways to capture and present the voice so that it can take its rightful place as the centerpiece of any vocal–driven pop tune.
Home Vocal Recording Gear