Changing your guitar strings is an important skill to have as a player. Not only that, but getting rid of those grimy old strings in favor of a shiny new set will show just how much your strings affect tone and sustain. There are a number of ways to approach this process, but we here at Reverb use a tried-and-true method.
The Tools

Our friends at D’Addario sent us a few tools that make changing strings a breeze. Here’s what you’ll need:
- Strings
- Headstock stand
- String winder
- String cutter
- Tuner
The Process for Changing Electric Guitar Strings
First, loosen the tension on the strings and grab your string cutters. Put your hand over the strings where the neck meets the body and cut the strings halfway between your left hand and the bridge. Make sure you keep your hand over the strings to prevent them from popping up and poking your eye out.
Remove the strings from the bridge and unwind the other end from the tuning machine.
Grab your new set of strings. Most string packs will give you a helpful color guide. Match the ball-end color with the string color chart provided. Feed the string through the bridge.
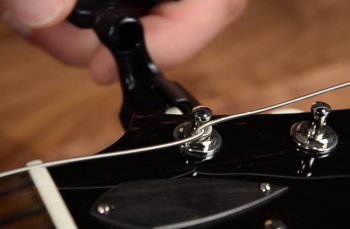
Point the eye of the tuning machine perpendicular to the headstock and parallel to the nut, then feed the string through the eye from the inside. Pull the string tight, but leave about an inch of slack.
Turn the string back towards the headstock, loop it under the string and fold it around and over top of the string. This will form a locking connection that will keep the string sturdy and in tune.
Grab your string winder and start turning the tuning machine until it’s tight, making sure the string winds below the knot you made. Keep your other hand holding the string the entire time with the string in the nut so you don’t lose tension - the knot might slip if you don’t. Repeat this process for the remaining strings and make sure the string winds on the inside of the tuning machine when you’re tightening.
Line up your eye and feed the string through from the inside. Loop the string back towards the headstock. In the same manner as before, loop it under, up, and over the string, and tighten the string up.
Clip off the excess string with your string cutters leaving just 1/4”. You can bend this around on itself, but it’s not necessary.
Now grab your tuner and tune up each string.
When you’re in tune, pull up on each of the strings individually, first around the 12th fret and then around the 5th. Make sure you keep your hand on the strings just in case something snaps.
Give it one more tune up and commence rocking.