Before computers were commonly seen in recording studios, engineers managed their sessions with a pen. Each channel on the console was labelled using tape. Detailed track sheets were kept with every reel of tape, and interns kept recall sheets with extensive notes in case a mix needed to be revised.
In those days, it took a village to make a record, whereas today, many engineers work entirely by themselves. Still, it can be overwhelming trying to manage all of the tools for recording, editing, mixing, and mastering without any help.
Thankfully, Pro Tools provides a number of useful shortcuts that can help you manage your sessions without the extra stress. Today, we’re going to explore a few of them.
Use the Workspace Browser
Let’s assume that you already have a solid understanding of the basics of Pro Tools. You should already be using session templates, but you may still find the need to import additional tracks into your session.
To do this, simply select File > Import and choose to import Audio, MIDI, or Video files. You’ll have to navigate through the standard folder hierarchy, which prevents you from selecting files from multiple locations at once.
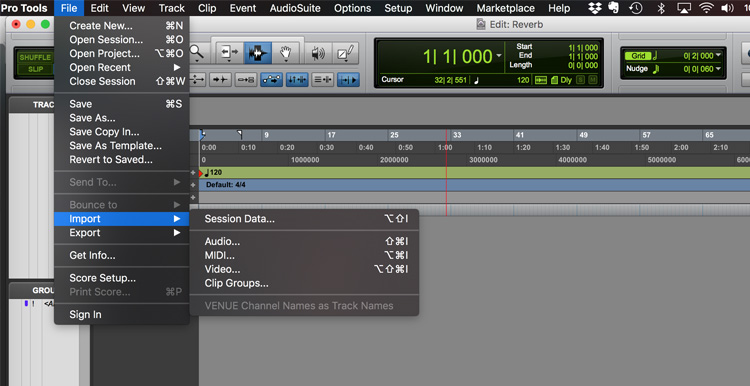
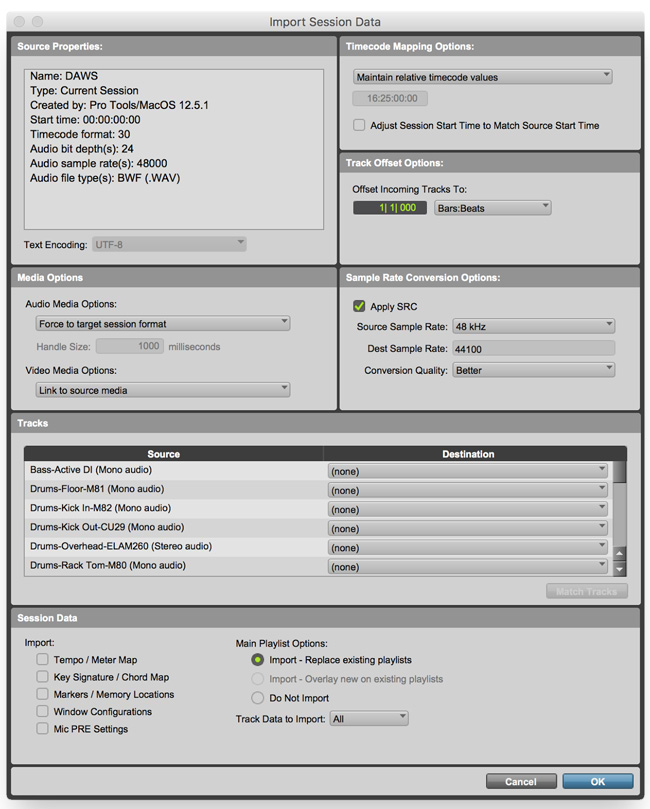
You also have the option to import tracks from another session. This allows you to import the clips or tracks themselves, as well as session tempo, key signature, markers, and more.
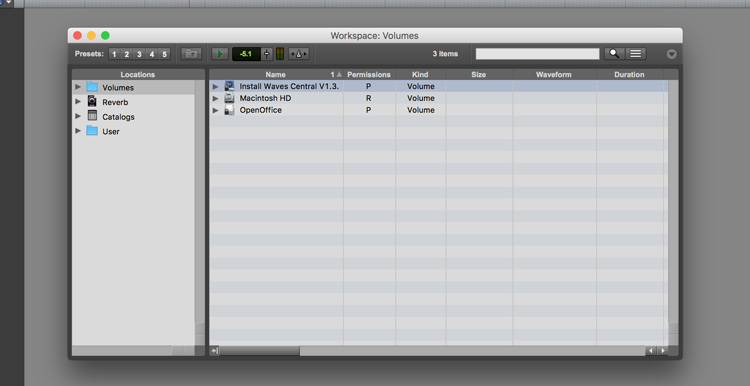
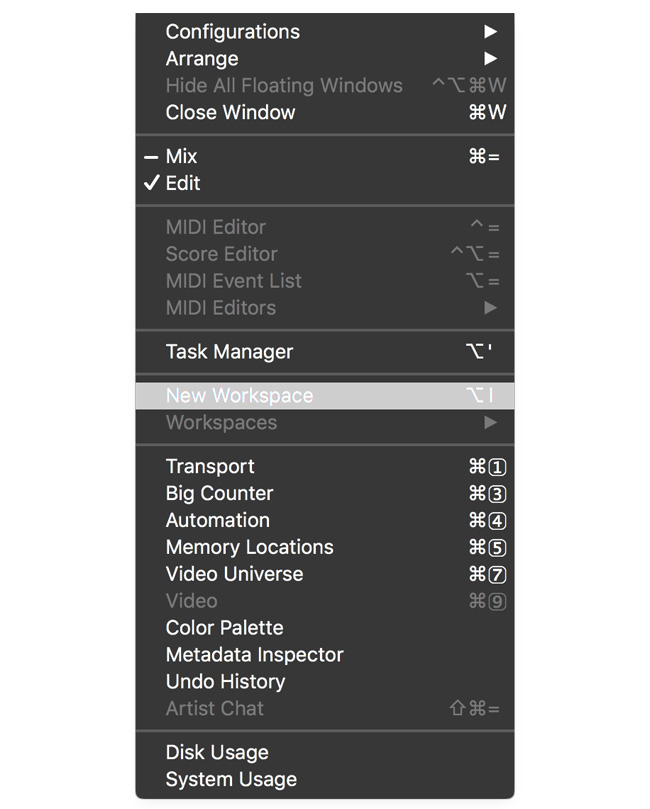
For a more integrated workflow, try using the Workspace Browser by selecting Window > New Workspace (or Option+I).
The Workspace Browser lets you browse through different locations across all of the different drives on your system. It even lets you browse from within the session itself. You can also create shortcuts for frequently used locations.
If you don’t know where the file you’re looking for is located, the Workspace Browser features a built-in search engine. When browsing, you can even audition files before importing them. After finding the right file, simply drag it from the Workspace Browser into the edit window or clips list, and continue browsing.
Get Your Instruments Organized
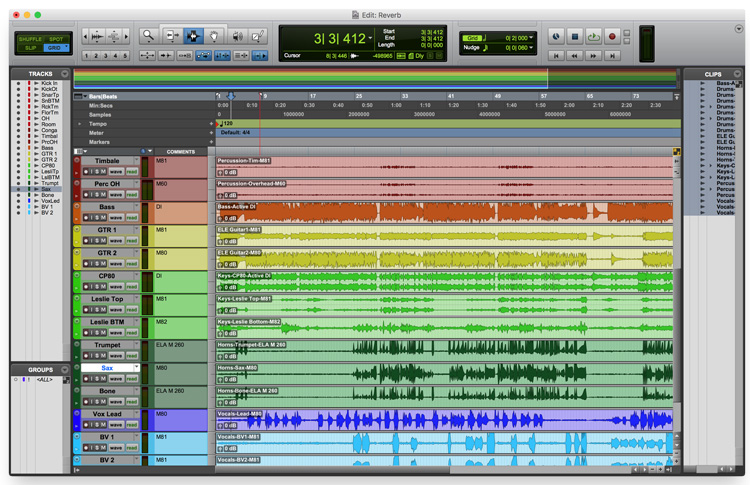
After all of the files are imported to the session, it’s time to get organized. Start by grouping similar instruments together. Everyone has their own way of doing things, but many engineers follow something similar to this format:
- Drums
- Percussion
- Bass
- Guitars
- Keyboards / Horns / Strings / Etc.
- Vocals
- Backgrounds
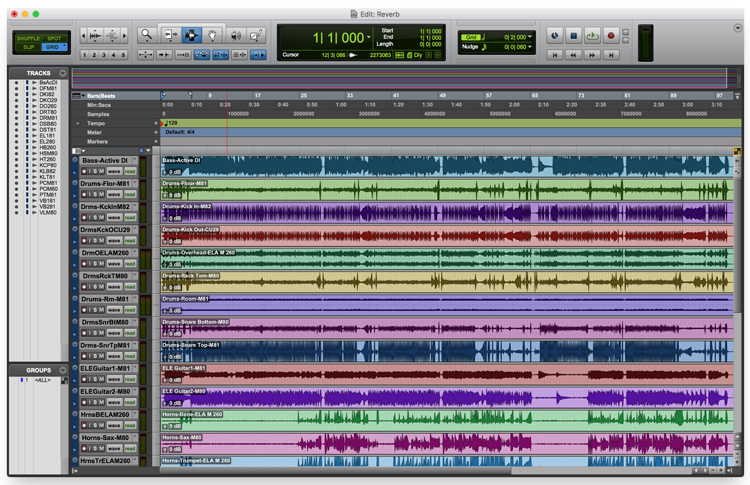
Start by renaming the tracks so that they make sense to you. "D112 Take.04-Dup2" isn’t exactly helpful when trying to find the kick drum. Simply double-click on the track name to rename it something more legible, like "Kick" or "Kick In."
To speed up the naming process, simply push Command + right arrow to tab to the clip name editor for the adjacent track.
Leave Yourself Track Notes
If you do have relevant track information that you’d like to keep handy—for instance, what mic was used, what preamp, what position, etc.—you can leave notes in the track comments section. To enable track comments in the mix and/or edit windows, select them in the View menu.
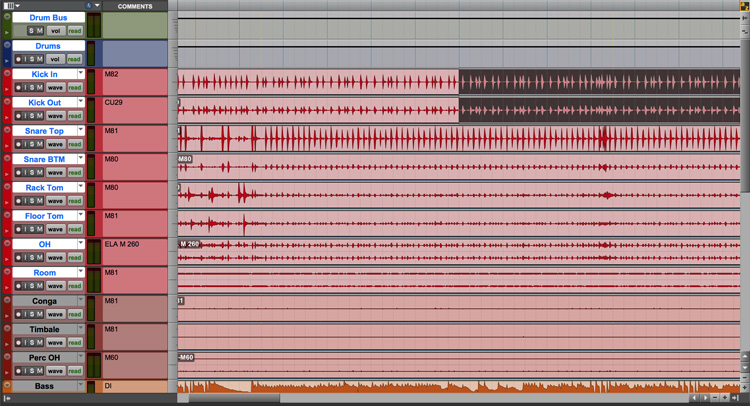
Color-Code Your Tracks
Once you have all of your tracks named properly, try color-coding them based on which group they fall into. It’s not important which colors you use for which instruments, just that you develop a system and stay consistent.
To change the color of a track, first make sure Track Color is enabled in the Mix and/or Edit Window iews. Then, either double-click on the track color tab for the track you want to modify, or open the Color Pallet in the Window menu.
The Color Pallet will allow you to select the Track Color from a variety of different presets. You can also adjust the "saturation," which controls whether the whole channel changes color or just the Track Color tabs.
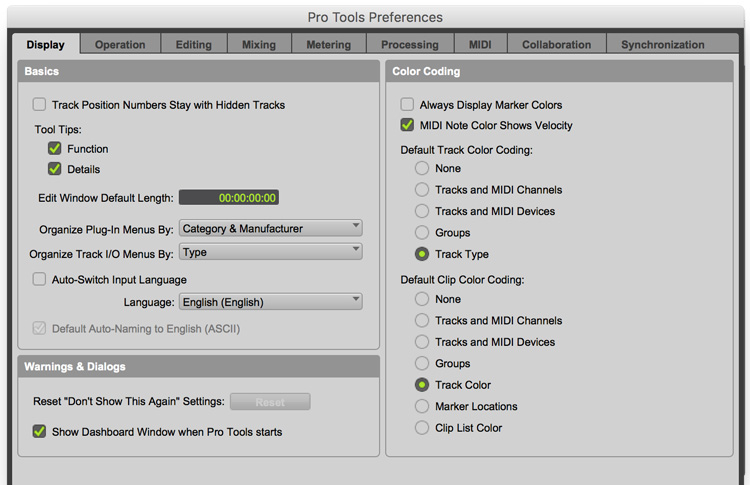
Clip color can also be changed from the Color Pallet window. However, default color schemes can be set from the Preferences tab (Pro Tools > Preferences), under Display. Default Clip Color Coding can be be set to change based on the Track Type, Group, or Track Color, meaning that it automatically changes to whatever color you choose for the track.
Use Groups to Edit Multiple Tracks
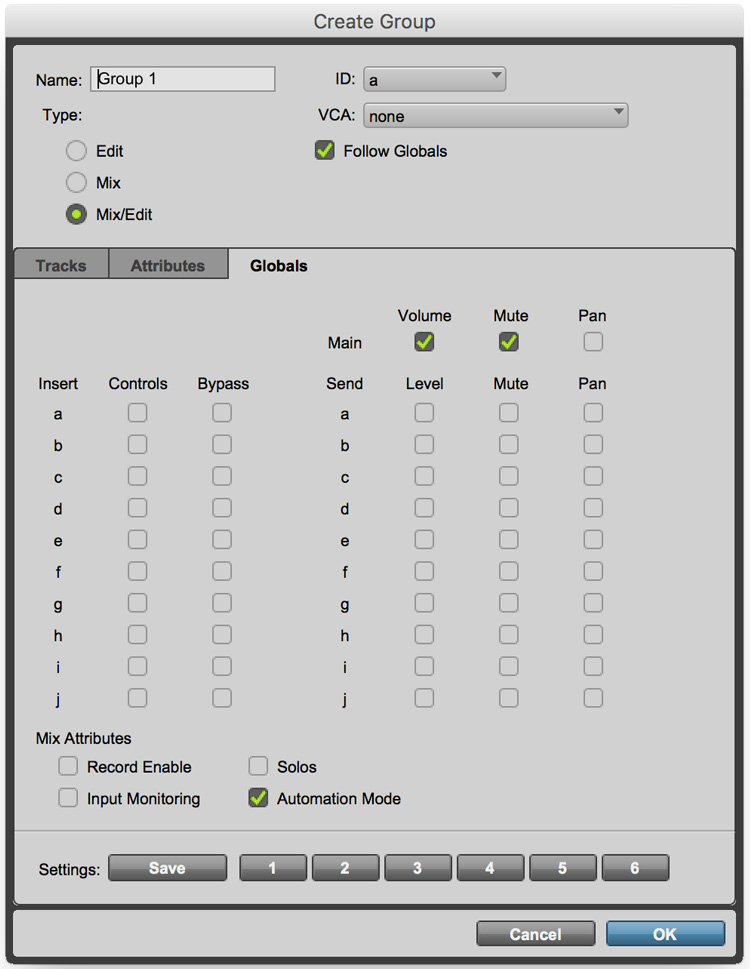
Now that you have all of your tracks grouped the way you want them, you’re going to control those groups. You could create a Mix/Edit group for each group of tracks by selecting them and creating a new group (Track > Group, or Command + G).
Aside from naming the group of selected tracks, you can choose whether your actions in the mix window, edit window, or both will affect the grouped tracks. You can toggle group controls for Volume, Mute, Pan, Inserts, Sends, Solos, Record Enabling, and more from the group window.
If you want to make an adjustment to a single track without affecting the other tracks in the group, simply hold Control before making the adjustment. Groups can also be toggled on and off using Command + Shift + G.
Use VCAs for Group Level Control
Once multiple tracks have been grouped together, they can be assigned to a VCA fader, which can be created through the New Track Window (Track > New, or Shift + Command + N). After a VCA track is created, it can be assigned to a group through the Group Window.
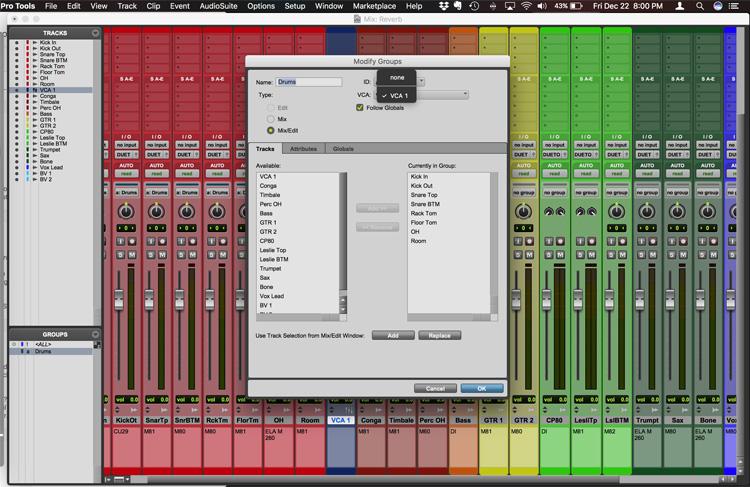
VCAs are faders with no inputs or outputs. Rather, they control the level of any channel assigned to them. Essentially, they’re a group volume controller. This allows you to make adjustments on individual channels, while still having a "master volume fader" for the group.
No inputs or outputs means no headroom, so you don’t have to worry about clipping a VCA. However, you also can’t add any inserts or use any sends. For that, you’ll need buses.
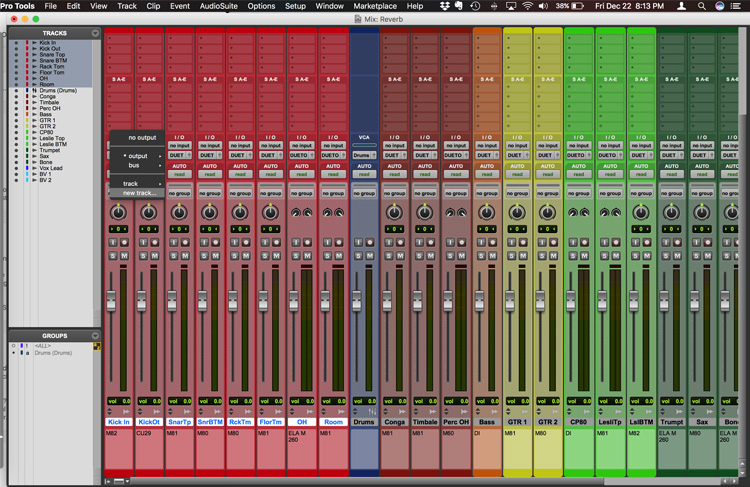
Use Buses for Group Processing
Buses (or SubGroups) are Aux Tracks used to control the level of multiple channels or add additional processing to them.
Aux Tracks can be made through the New Track Window (Track > New or Shift + Command N). A simpler solution, though, is to select the tracks you wish to route to the "Bus," then hold Shift + Option, click the output for one of the selected tracks, and select New Track.

This will bring up a modified New Track Window and allow you to name the Aux Track and correlated Aux Send I/O. This also removes the need to set the input on the newly formed Aux Track.
This allows you to make independent volume adjustments on each channel, control the level of the grouped tracks pre-drum bus using the VCA fader, and control the level of the grouped tracks post-drum bus using the drum bus fader.
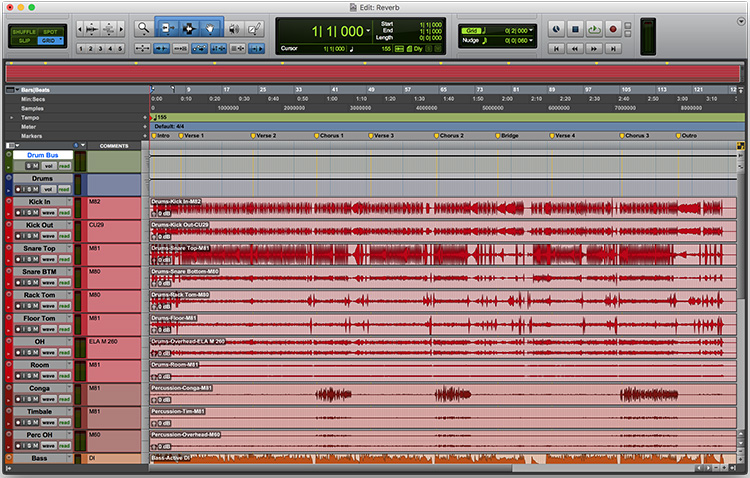
Make Markers at Key Points of the Song
Markers are helpful visual cues for navigating throughout a session. Insert Markers at the different sections of the song or at key points to give yourself a reference point.
Remember, these are for you—not for anyone else. If you can’t tell the pre-chorus from the chorus from the bridge, that’s okay—you can name them whatever you want. A, B, and C work well, but if it helps you to keep the session straight by naming them "breakdown," "chugga-chugga," and "whisper section," make it so.
To add Markers, first make sure they’re enabled under View > Rules > Markers. Then push the "+" icon on the Marker ruler. If you’re using a full-sized keyboard, you can press Return on the keyboard pad during playback to drop markers live.
Use Keyboard Focus Mode
Now that you’ve got your session mapped out, it’s time to start editing. That means zooming in and fine-tuning clips, trimming unneeded parts, separating and crossfading clips, and generally flying around the edit window.
It may not seem like much, but Keyboard Shortcuts can seriously increase your workflow by saving you a few seconds at a time. More specifically, Keyboard Focus mode allows you to use single-key shortcuts—no more holding Command.
Keyboard Focus mode can be enabled for the Edit Window, the Clips Window, or the Groups Window by clicking the a/z button in the upper-right side of respective window. Alternatively, you can use the following keyboard shortcuts to enable Keyboard Focus mode:
- Option + Command + 1 — Edit Window
- Option + Command + 2 — Clips Window
- Option + Command + 3 — Groups Window
Depending on which window is selected, the single-key shortcuts change. For instance, when Keyboard Focus is enabled in the Edit Widow:
- 1 through 5 on the keyboard control zoom presets
- 6 through 9 controls pre- and post-roll settings
- QWERT keys control zoom and view settings (with T and R zooming in and out, respectively)
- Left and right brackets—[ and ]—control playback from timeline and edit selections
- P and ; move the selection up and down
- L and ‘ tab forward and backward
- A and S trim from the start or to the end of a clip
- D, F, and G control fade options
- X, C, and V are still cut, copy, and paste
- B separates clips
Set Default Plugins
When it comes to mixing, it’s easy to waste time scrolling through menus trying to find a particular plugin—especially if you have a robust plugin library. This can be particularly tedious if you routinely use the same few plugins. (No shame—use what you know.)
If you find yourself reaching for the same EQ or compression plugins, you can set them as your "default" plugins under the Mixing tab of the Preferences Window (Pro Tools > Preferences). After you select your default plugins, they’ll show up at the top of the insert menu.
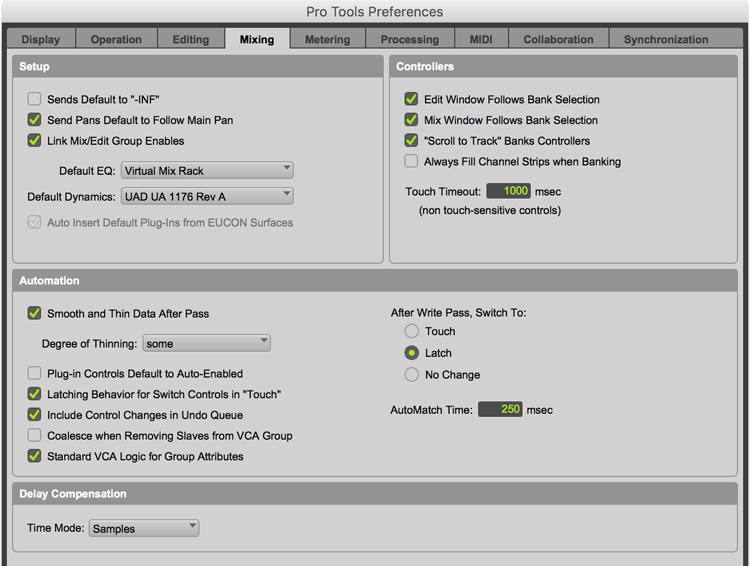
Pro Tip: The plugins don’t actually have to be EQs and compressors, they can be anything you use frequently. But you only get two, so choose wisely.
Put Your Favorite Plugins in One Drop-Down Menu
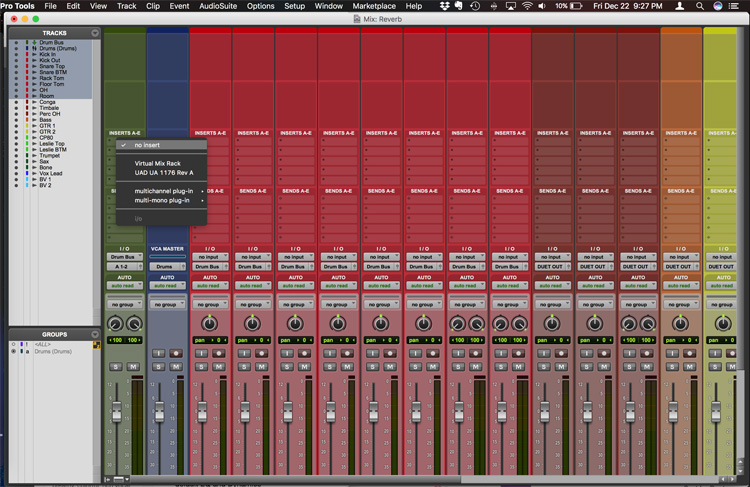
But what if you frequently use more than two plugins? In that case, Command + Click when selecting the plugin from the insert menu to add it to the top of plugin drop-down in the insert menu.
Just keep in mind that you'll have to select stereo and mono plugins separately, since they show up under different menus.
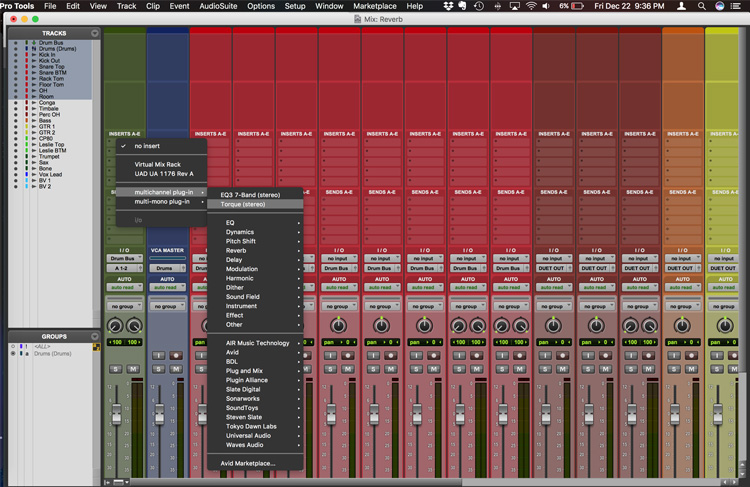
Your "favorites" can be any type of plugin as well—EQ, compression, time-based effects, virtual instruments, anything.
With these tips under your belt, you should be able to significantly improve your workflow, reduce the amount of time you spend doing tedious tasks, and increase the amount of time you get to spend being creative.
Just remember: the trick is to start implementing these tips sooner, rather than later. When they become part of your routine, that’s when they become the most effective.