Radial Studio-Q Studio Talkback Controller with Built-In Mic and External Input
Price$289.99
Free Shipping
Free Shipping
from Brooklyn, NY
Listed:over a month ago
Views:312
Watchers:7

Brooklyn, NY, United States
Free Shipping
from Brooklyn, NY
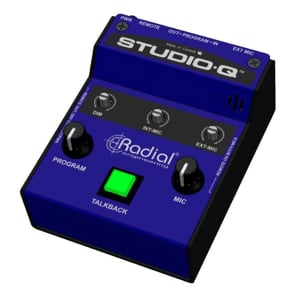
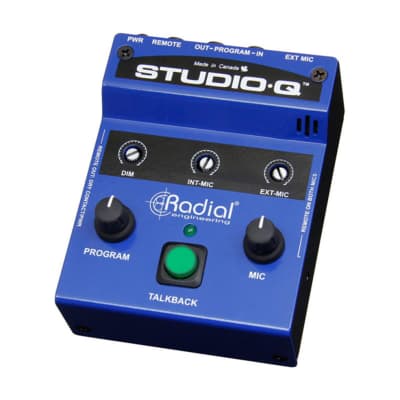
Studio-Q - Desktop Cue & Talkback Controller
The Studio-Q is a compact studio talkback controller designed to provide a simple yet full-function cueing system that allows easy communication with artists in a separate booth or on the other side of the control room glass.
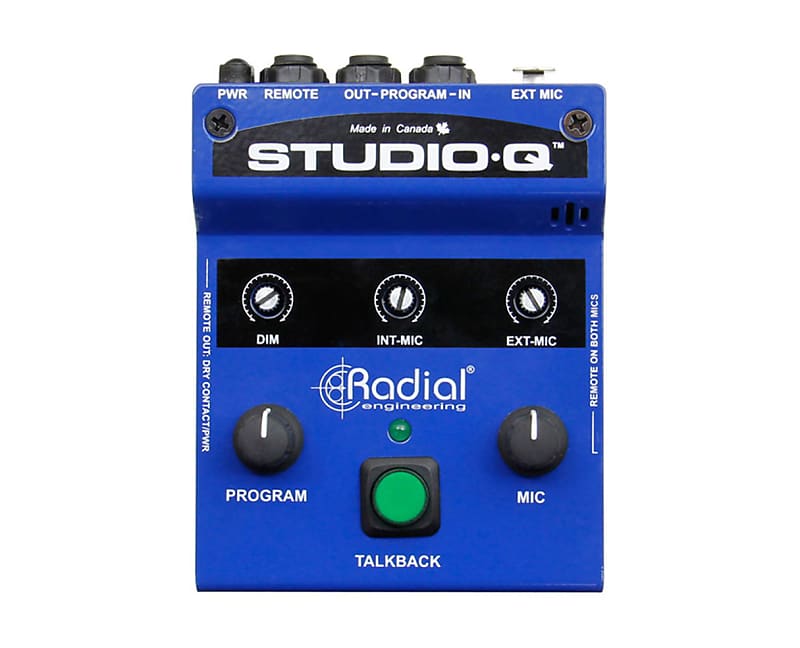
The Studio-Q begins with a centrally located talkback switch that activates the built-in microphone, illuminating a bright LED to indicate that the talkback channel to the artist is active. This is supplemented with an external mic input for a dynamic microphone, allowing a stand-mounted mic to function as the main talkback source, or act as an additional talkback mic for a producer. Both the internal and external microphone levels are set via individual trim controls along with a master mic volume. A Radial JR1 remote footswitch can be connected for hands-free activation of one or both talkback mic's. When the Studio-Q talkback is active, the signal is routed to the studio headphone system while it automatically dims the program to the desired level. A separate program level control allows instant access to the playback volume feeding the headphone mix.
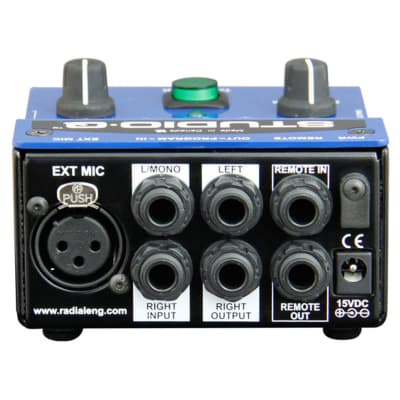
Connecting audio to the Studio-Q is straightforward with balanced ¼"" TRS program inputs and outputs. The external mic input features a standard XLR for a dynamic microphone, while the JR1 remote connects via ¼"" jack. An additional 'remote out' ¼"" jack allows you to send a dry contact signal to an external device when the talkback switch is depressed. This can also be set to carry DC power and accommodate a remotely powered LED beacon to attract attention when the artist isn’t wearing headphones or is in the middle of a take.
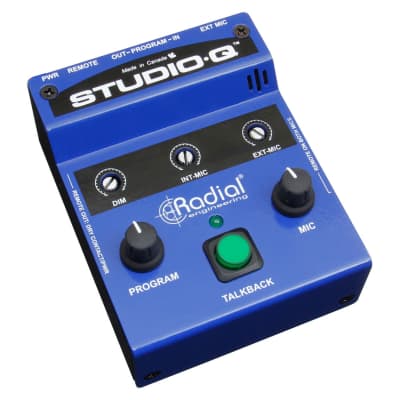
Following Radial’s pedigree for robust manufacturing, the Studio-Q is made from heavy 14-gauge steel for added durability and shielding against stray magnetic fields. A compact chassis size reduces the footprint on your desktop, with rubber feet that protect the work surface while keeping it firmly in place. The Studio-Q is powered by a 15VDC supply which may be locked in place using a cable clamp.
The Radial Studio-Q... a simple talkback system that improves communication and adds professionalism to your studio.
Studio-Q - Applications
Home studio setup
Use the Studio-Q to add talkback functionality to your system. Now you can communicate seamlessly with an artist on headphones in a separate room.
Adding a Beacon
The remote Beacon can be connected via ¼"" cable, illuminating whenever the talkback button is pressed. This gives an additional visual indication that the engineer or producer is trying to communicate over the cue system.
Using An External Microphone
The XLR mic input on the Studio-Q allow a second microphone to be used so a producer or band member can also communicate with the artist in the booth. This can be controlled with a separate footswitch for easy hands-free operation.
Studio-Q Develop
With more and more recording happening in smaller studios, the need for a simple talk-back system has become evident.
Over the years, console manufacturers have chosen to remove the talkback system from their work-surfaces. Not because it is not needed... but due to their trying to be as competitive as possible with others. The premise for this train of thought is that most recording today is done in a single room studio and communication between the artist and the producer or engineer does not need to be done remotely. Although this is certainly true, major improvements in the quality of home recording equipment has elevated the prowess and production value to where today, much of the pre-production for major albums is done in the comfort of the home studio. With this has come an emerging awareness that isolating ‘studio noise’ from the control room is the next logical evolutionary step to producing even better recordings.
During a recent dealer visit with a studio specialist, the need was expressed that 'Radial should produce a solution'. We responded by asking 'Why?' From our perspective, there are already a number of solutions in the market. Does the world really need Radial to enter into the fray? Turns out... although there are others available, most either have too many features, too difficult to use, are too costly, or are too large. The Studio-Q presents a desktop solution that manages to do it all in a super-compact design.
Establishing The Layout
The Studio-Q had to be small, yet be able to handle balanced signals. This meant using stacking stereo ¼"" TRS connectors to interface the program output from the recording system to the headphone amplifier. XLRs, although preferable, require significantly more space. We then wanted an easy-access knob that would allow the engineer to quickly set the level for the phones. As the Studio-Q will be used in the heat of the moment, the top surface had to remain minimalistic for maximum efficiency.
Next, we researched finding the right talkback button. It had to feel right, and be the right size – not too big, not too small. Once depressed, we felt that it would be essential to have the Studio-Q automatically reduce the program level, to allow the engineer to talk over the music. We chose to recess this control so that it could be 'set & forgotten'. This way, as soon as the talkback button was activated, the mic would go on, the program level would be dimmed and the communication line would open up.
Managing The Talkback Mics
Next question had to do with the control room mics. Would one mic in the Studio-Q be enough? What about when a guest producer was in house, how would he communicate to the band? To address this situation, we added an XLR input for a dynamic microphone. No, it is not equipped with phantom power for a condenser as we felt this would be overkill. We then added a remote control input that would enable the producer to connect a Radial JR1M footswitch to activate the talkback. This can be any momentary or latching type, depending on the preference. Since the built-in mic and the remote mic will have different outputs, we made sure to have two 'set & forget' level controls – one for each mic – and then a master mic control that is readily available for quick overall adjustments.
Attracting Attention
When some musicians get into the zone, getting them to stop playing and retake a track can be frustrating. For this, we added a remote output that can be used to illuminate a beacon. As we intend to produce such an item we decided to make this output wet (with power) or dry (simple contact closure) so that we could address any eventuality.
Using The Studio-Q
The Studio-Q is a clever box that is designed to provide a basic talkback system for those that have a recoding studio, but may not have a large console with built-in talkback in the control room. It easily integrates with recording workstations by connecting an available output. Once connected it allows the engineer to speak on top of the program material to the artist using either the internal mic or an external one. The mic may be turned on using the main switch or activated remotely with a footswitch for hands-free operation. Once in use, you will ask yourself how you ever managed without it!
Making Connections
As always, turn off your audio equipment or turn down all volume controls before making connections. This will help you avoid plug-in and turn-on transients that can damage more sensitive components like tweeters. There is no power switch on the Studio-Q, simply connecting the power cable from the 15VDC supply will automatically turn it on. Check for power by depressing the MIC switch. The LED above will illuminate. A handy cable clamp is provided to lock the cable and prevent accidental disconnection.
Connect the output from your recording system to the Studio-Q using either balanced ¼"" TRS or unbalanced ¼"" TS cables. A balanced connection will typically yield about 6db more gain. From the Studio-Q, connect the program output to your headphone amplifier.
Testing The Audio
We suggest you set the Studio-Q controls to the start position as follows:
To begin, set a track to play and slowly increase the master PROGRAM volume on the Studio-Q until a comfortable setting is found. Depress the TALKBACK switch, talk at a normal level and slowly turn up the master MIC level until you can hear your own voice comfortably over the music. You can also adjust the DIM control so that when the talkback mic is on, the program material is reduced to a comfortable background level or even off.
The Studio-Q is equipped with a second mic input that will also feed the headphone system, allowing a producer or band member to speak to artists. This is designed for a standard dynamic microphone. Turning on the producer mic can be done via a remote footswitch like the JR1-M. To use the talkback button to activate an external mic, engage the REMOTE ON BOTH MICS recessed switch on the right side of the Studio-Q. To test, follow the same procedure as above. Then set the recessed EXT-MIC level to 7 o’clock (off) . Press the TALKBACK switch and speak into the external microphone while slowly bringing up the EXT-MIC level. You will now want to compare the output between the INT and EXT (internal and external) microphones to make sure they are reasonably well balanced. You will then use the master MIC volume control to set the final gain. If you wish to only hear the output of the external microphone, simply turn the INT-MIC control fully counter-clockwise to mute it completely.
Using the Remote Control
There are two reasons to have a remote footswitch. The first is that for some studio engineers, they prefer to switch the talkback mic on or off using a footswitch, as this allows them to be twisting knobs and pushing a mouse around while talking. The other is for the producer. He may be sitting at the back of the room talking into an external mic where he cannot reach the Studio-Q, and being able to turn on the mic using a footswitch makes this easy. In both cases, the footswitch input improves productivity!
Radial makes a footswitch called the JR1-M. This momentary footswitch is able to control the Studio-Q remotely by connecting a simple ¼"" TS cable. The JR1-M can be set up in two modes, one with LED and one without. For use with the Studio-Q, you must set the footswitch to operate without LEDs as they will not receive power from the Studio-Q.
The difference between a momentary and a latching footswitch is that the momentary switch will automatically turn the mic off once it is released while the latching type requires a second foot-stomp. Both types will work with the Studio-Q.
Using a footswitch with the Studio-Q is as simple as plugging it into the REMOTE IN ¼"" connector on the back of the unit. In normal operation, the footswitch will only activate the external microphone, allowing a producer at the back of the room control over their microphone only. When the REMOTE ON BOTH MICS recessed switch on the side of the Studio-Q is activated, then any connected footswitch will activate both microphones simultaneously.
| Condition | |
| Brand | |
| Model |
|
| Finish |
|