Editor's note: In our video above, Jessica Burdeaux and Matt Jordan show you how to tune and mic a drum set for five different genres. Continue reading Brad Pack's article below for more information, especially if you're interested in the most affordable ways to get these mic setups.
Many engineers get their start the same way: They join a band and save up enough money to record in a professional studio. But the record doesn't sound the way it does in their head, so they decide to do it themselves.
Recording isn't exactly a cheap hobby. There's the computer, the interface, the microphones. Oh, the microphones…
Especially when it comes to drums, it's easy to rack up a few thousand dollars in recording gear when daydreaming about the perfect setup. But gear doesn't make good recordings—engineers make good recordings. And good engineers can make great recordings, even on a budget.
When recording drum kits, there are many go-to mic placements, from the traditional Glyn Johns method to close-mic'ing each individual drum. The cost of those many and varied microphones can add up quickly, especially alongside an interface with enough channels to handle them. Below, we'll walk through some of the most common mic placements and affordable ways to achieve them.
The key to recording drums on a budget is minimalism. There's a certain ethos to using minimalist mic'ing techniques. It requires you to listen more. You have to find a way to make it work with what you have.
But what if you don't have anything?
Since drums tend to require the most inputs, many engineers choose to build their studio around how extensive their drum needs are. Unfortunately, that can be tough to determine. Your approach is going to vary greatly depending on the genre you're recording.
The biggest consideration is how many inputs you'll need. With some genres, you may be able to get away with using a single mic. But others will call for a bigger, wider drum sound—in which case, you'll need two mics to utilize stereo recording methods.
Even still, some genres call for a punchy, in-your-face sound that requires close mic'ing the individual drums, which will require a 4- or 8-channel interface.
The following brands and series offer 2-, 4-, and 8-channel interfaces with surprisingly high sound quality for the price. For more info, check out Reverb's audio interfaces buying guide.
- Behringer U-Phoria
- Focusrite Scarlett series
- PreSonus AudioBox series
- MOTU Audio Express
- Roland Capture
Author's note: Regardless of the situation, I would go with the Focusrite Scarlett series. In my experience, they tend to offer the most bang-for-the-buck in terms of sound quality vs. price.

Suggested Gear:
- A pair of Cascade Fathead BEs
- A Shure Beta 52A
- A PreSonus Audiobox 44VSL 4-channel interface
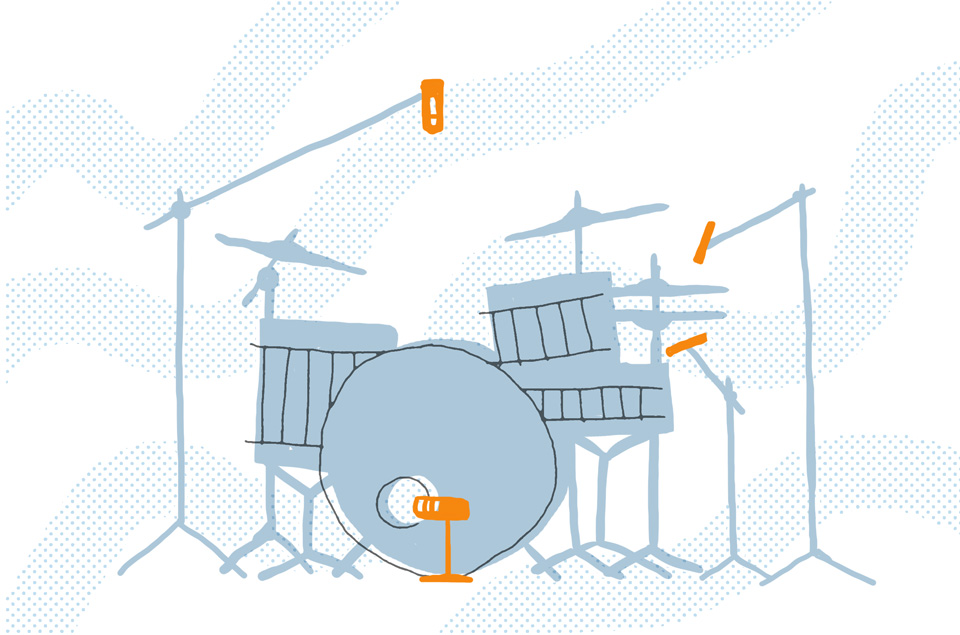
Glyn Johns is a legend in the music business. He produced and engineered acts like Led Zeppelin, The Rolling Stones, The Who, and even The Beatles. He's also responsible for pioneering the sound of classic rock with his drum mic'ing technique, known as the Glyn Johns Method.
The Glyn Johns Method uses three microphones to capture the sound of the entire kit—one dedicated kick mic and two uniquely placed stereo mics. Of the stereo mics, one is placed above the kit 40" to 60" from the snare, and the other an equal distance to the side—just above the rim of the floor tom, pointed toward the hi-hat.
Traditionally, Johns used a matched pair of ribbon mics. The Cascade Fathead BEs are a great budget-friendly option. But, a pair of large diaphragm condenser mics like the Aston Origin will provide more clarity in the high-end, if you're looking for a more modern sound.
The dedicated kick mic is typically placed right at the drum's resonant head. The Shure Beta 52A is always a good budget option. Often, Johns practitioners will use a fourth a mic dedicated to the snare, but as you can see in this video of Glyn Johns himself teaching his method, the snare mic is not necessary.
If you only have two mics and a 2-channel interface, like a Focusrite Scarlett 2i2 or (if you can splurge) the Universal Audio Apollo Twin MKII Solo, try the Johns Method with your overheads. The mic above the floor tom will pick up on the batter-side of the kick, so you may be able to get a cool kick sound even without a dedicated kick mic.
If you still feel the need for a kick mic, you'll have to upgrade to a 4-channel interface.
Suggested Gear:
- An Aston Origin or an Audio-Technica AT2020 large diaphragm condenser
- An Electro-Voice RE-320
- An Audio-Technica AT2021 small diaphragm condenser
- A Shure SM57
- A PreSonus Audiobox 44VSL 4-channel interface
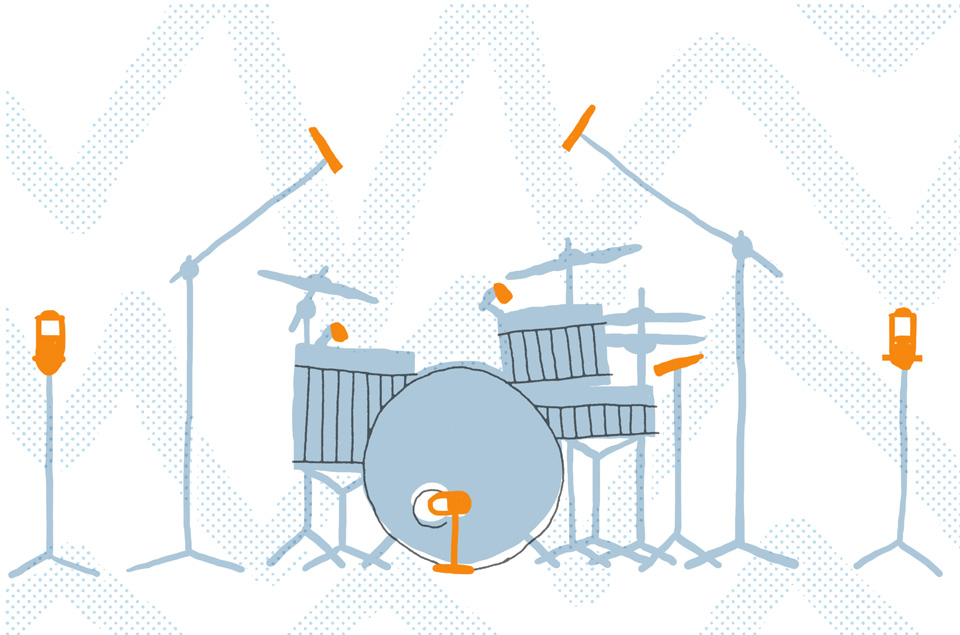
This genre varies quite a bit based on the style of the song. If you're going for a vintage Motown sound, the Glyn Johns Method will do the trick. But, if you want a more modern sound, you may want to upgrade to a four-mic and 4-channel interface setup.
To get a solid R&B drum sound, start with a single large diaphragm condenser overhead to capture the sound of the kit.
Next, you'll want to add a second large diaphragm condenser as a “kick out" mic. Alternatively, you could use a large diaphragm dynamic mic like the Electro-Voice RE-320 or Sennheiser MD421. The goal here is to capture the thump and body of the kick.
To find the placement for a large diaphragm condenser on the kick, have the drummer start playing and put your hand in front of the kick drum. You should feel the shock wave when the drummer hits the kick. Step back until the shock wave dissipates—that's a good starting point for the kick mic.
There's going to be a lot of bleed with this set up, but that's OK. That's just part of the charm.
Author's Note: If you're recording jazz, stop here. This setup is pretty common for small jazz kits. And since it only requires two mics, you can upgrade your equipment. The 2-channel Apogee Duet works well for jazz recordings, especially when paired with a nice set of large diaphragm condensers.
Next, you'll want to add a close mic on the snare. Depending on the drummer, you may want to use a different style of mic. For soft drummers (especially those using brushes), use a small diaphragm condenser like the Audio-Technica AT2021 to capture the details. For loud drummers and heavy-hitters, use a dynamic mic like a Shure SM57 or Audix i5 for more headroom.
Place the mic about one inch above the rim, angled toward the snare at about 45 degrees. Point the mic toward the center of the snare for more attack or toward the edge of the snare for more tone.
Finally, R&B is all about the groove, so you'll want a dedicated hi-hat mic. Most engineers use a small diaphragm condenser for the clarity and detail, but during the disco era, it was common to use a Shure SM57 on the hi-hat.
Mic'ing the hi-hat from the top will provide more attack and stick noise. Mic'ing from the bottom will sound more diffused, but there's less bleed. Mic the edge of the cymbal for more “air" and “wash," or mic the bell for a tighter, thicker tone.
Suggested Gear:
- A pair of Rode M5 small diaphragm condensers
- A Shure Beta 52A
- A Shure SM57
- Two Sennheiser e604 clip-on mics
- One or two Audio-Technica AT2020 large diaphragm condensers
- Roland UA-1010 Octa-Capture 8-channel interface
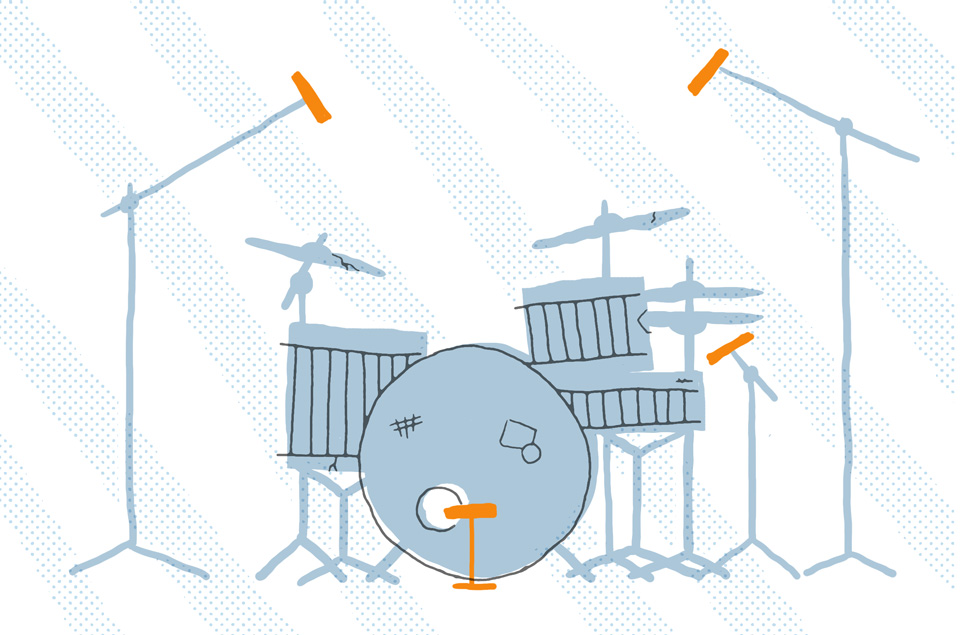
With this approach, you're going for maximum punch. The goal is to highlight the attack of the drums, which means close mic'ing each piece individually. For that, you're going to need an 8-channel interface. Out of all the genres, this is the hardest to accomplish on a tight budget, though there are inexpensive options for all of the various types of mics you'll need.
Start with a pair of Rode M5 small diaphragm condensers over the kit, either in a spaced pair or in an XY formation. Focus on capturing the sound of the cymbal more so than the kit as a whole. You'll have other mics to supplement the other drums.
Next, add a “kick in" mic to capture the attack of the kick drum. Any large diaphragm dynamic mic (AKG D112, Audix D6, Shure Beta 52A, etc.) will do the trick.
Since you only have one dedicated kick mic, you may want to use a boundary condenser mic like the Shure Beta 91A to capture both the high-end snap and low-end thump, but if you can't afford it, don't sweat it.
Next, add a dynamic mic for the snare. A Shure SM57 or Audix i5 should do. Placement should be similar to before—about one-inch above the rim, angled toward the snare at about 45 degrees.
If the toms are featured heavily in the song (and if they're not, is it really a hard rock song?), you should give each their own close mic as well. Many studios use large diaphragm condensers or Sennheiser MD421 dynamic mics to close-mic toms, but that can get expensive quickly. The clip-on Sennheiser e604 mics are a great alternative.
Finally, with your remaining channel(s), use a large diaphragm condenser or two to capture the sound of the kit in the room. Move the mic(s) around the room to find the best position.
Suggested Gear:
- A pair of Cascade Fathead BEs
- An Apogee Duet 2-channel interface
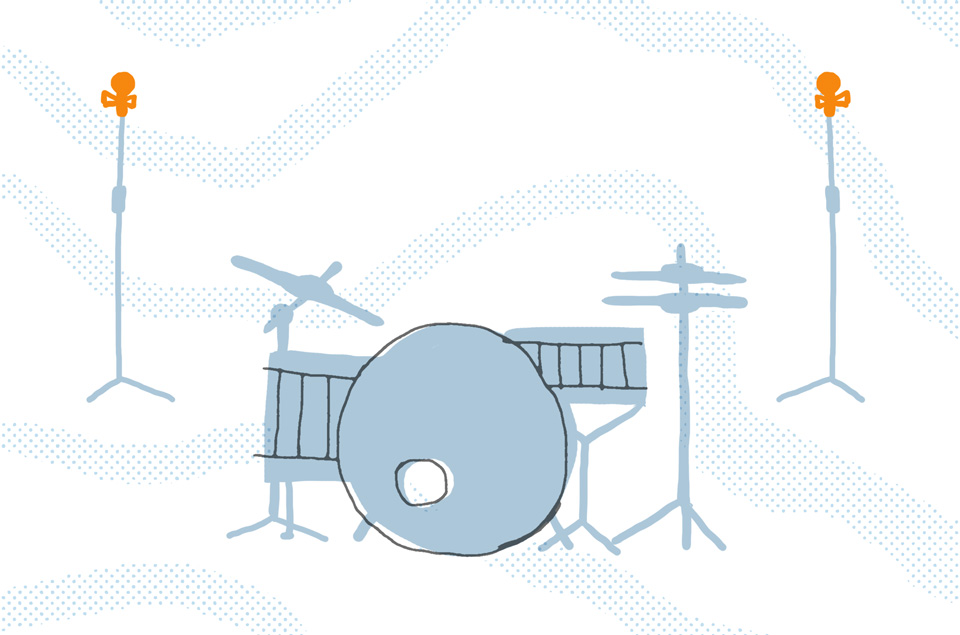
Indie and folk music tend to focus more on the sound of the room than the sound of the drums themselves. That means you should only need one or two mics and a 2-channel interface. Since this is a particularly minimalistic setup, you may be able to splurge a little on the gear.
For an interface, the Apogee Duet works well for natural recordings, and is known for being remarkably clean and neutral-sounding.
For microphones, you may may want something vibey like the Cascade Fat Head ribbon mics. Or, something bright and modern like the Warm Audio WA87.
To find the best mic placement, walk around the room as the drummer performs and listen for where the kit sounds the most balanced. You can add a second mic for a stereo perspective, but if you're still not happy with the sound you should experiment with different placement before reaching for a third mic.
Suggested Gear:
- Four Shure SM57s
- A PreSonus Audiobox 44VSL 4-channel interface
Punk rock isn't exactly known for its fidelity, but that doesn't mean you should phone it in when it comes to recording. Punk is more of an attitude than anything, so that should be the way you approach the recording session. A standard 4-channel interface should be able to get you through most punk sessions.
But, if you really want to live like an anarchist, you can save some money by picking up an Allen & Heath ZED-10FX mixer. It still connects to your computer via USB, but it only records a stereo print of the main outputs—not direct outputs for each channel. That means you have to commit to the balance before pressing record.
You can get a surprisingly good drum sound on a shoestring budget with a little effort. Legend has it that The Red Hot Chili Peppers recorded all of the drums on Blood Sugar Sex Magik using only Shure SM57s. If it's good enough for the Peppers, it's good enough for Scum Bucket—or whatever awesome punk band name you chose.
Start by placing your overhead mics as a spaced pair. Try to get the kit to sound as balanced as possible. But, pay special attention that the cymbals don't sound too harsh or nasally through the 57s.
Place your next SM57 inside the kick drum to capture the attack of the beater hitting the drum. Don't worry about low-end, the bass will fill out whatever you're missing. Finally, place your last SM57 on the snare as you normally would—about one-inch above the rim, angled toward the snare at about 45 degrees.

Suggested Gear:
- A pack of Ddrum triggers and Ddrum interface
- A pair of Rode M5 small diaphragm condensers
- A Focusrite Scarlett 2i2 2-channel interface
Metal drumming has gotten so technical over the years that some producers/bands/engineers plan to use samples from the beginning. But computers don't make good music. So, even if we don't rely on the sound of the drums, we still rely on the sound of the drummer.
The most human element in drumming comes from velocity, or how hard the drummer hits the drum. Have you ever heard the saying, “It's all in the wrist"?
Ddrum and other companies make drum triggers that are used to capture the velocity of a drum performance without capturing the sonic qualities of the drums. If you plan on sample-replacing the drums in a metal track, pick up a set of drum triggers and an 8-channel interface. The only mic(s) you'll need to place are the cymbal mics.
Some metal engineers choose to close-mic each of the cymbals individually, but that can put your track count through the roof depending on the kit. A semi-close spaced pair of small diaphragm condensers over the drum kit will do the trick.
These setups are tried-and-true, but the most important thing—whether you're recording in a basement or in an expensive studio—is to listen. Replicating a classic mic arrangement with the best mics in the world can still sound muddy or harsh if you don't listen closely and adjust accordingly. If you're a novice engineer trying to make your first recording, these setups are a great place to start—but from there, follow your ears.
- Classic Rock: Shure Beta 52A, Shure KSM313s
- Jazz: Beyerdynamic MC 930s, Shure KSM353
- Indie Rock/Folk: Shure KSM313s, Shure KSM353, Shure SM57
- Smooth '70s: Shure Beta 52A, Shure SM57, Beyerdynamic TG-D50D, Beyerdynamic MC 930
- Modern Rock: Shure Beta 52A, Shure SM57, Beyerdynamic TG-D50D, Beyerdynamic MC 930s, Shure KSM313s