Learn more about how to record music at home on our Basics of Home Recording homepage.
Let me paint you a picture. You spent hours in the studio slaving over a new track and, finally, you're happy with it. The next day you, bring the demo to band practice, excited to show it off, only to discover it now sounds like absolute garbage.
This is called translation, and it's something that we all struggle with. Even though your track sounds good in the studio, it doesn't translate well to other speakers. This is most likely because the speakers you're using aren't accurately recreating the sound.
An essential part of the recording process is listening to what you just recorded, or monitoring. While you can technically use the stock speakers than came with your computer to do this job, it isn't recommended. Professional–grade studio monitors, on the other hand, are designed to accurately and reliably recreate a full range of frequencies.
Sure, you can use headphones when tracking. But during the mixing phase, you need to be able to accurately judge what's happening to the sound, which is hard to do with headphones. Likewise, using consumer–grade speakers to mix audio is like doing surgery while wearing tinted glasses: it's going to negatively alter your perception of what's actually going on.
So, treat yourself to some good studio monitors. There are some great affordable options out there these days, like JBL LSR305s and LSR308s or Yamaha HS8s.
It's important to note that most studio monitors are sold individually, so that you can easily replace one if it breaks without having to buy a whole new set. With that said, many sellers do offer pairs—sometimes, at a slight discount.
Near, Far, Wherever You Are
The first consideration when buying a pair of studio monitors is the size of your room. Monitors are designed to be used in a specific listening configuration. Near–field monitors are optimized for a close listening distance and work better in smaller rooms, while far–field monitors are designed to accurately recreate a sound over longer distances.
Near–field monitors are usually the best choice for home studios, due to their compact design. They're usually positioned on a desk and allow you to monitor the sound directly, without interference from reflections in your control room.
If you have a larger room that requires the monitors to be farther away, you may want to consider mid– or far–field monitors, although this will require additional acoustic treatment in your control room to reduce undated reflections.
Most studios with far–field monitors also have a pair of smaller near–field monitors, for reference.
Active vs Passive
Studio monitors are typically broken into two groups: active and passive.
Active speakers have their own internal power amps, and simply need to be plugged into the wall.
Passive speakers, on the other hand, require you to pair them with an appropriate external power amp.
While using a separate power amp does offer more control over the components affecting the quality of the audio signal, it typically comes at a much higher price point.
Driver Size: Bigger is Better
Your next consideration when picking studio monitors is the size of the drivers. Most studio monitors have two drivers, a woofer to handle the low frequencies, and and a tweeter to handle the high frequencies. Some models feature a third, mid–range driver.
Most studio monitors are listed by the size of their woofer. Typical sizes include 3-inch, 5-inch, and 7- to 8-inch drivers. Remember, a larger driver means the monitor is capable of outputting more bass frequencies, not more power.
The power of a studio monitor is measured in watts. More watts means more power, and more power means more volume.
Remember, active monitors will come with their own internal power supply, but passive monitors will not because all of the power will come from the power amp.
Frequency Range: To Sub, or Not To Sub?
Like I mentioned briefly before, the frequency range of a studio monitor is usually directly related driver size. Larger drivers can more accurately recreate bass frequencies, so if you purchase a smaller set of monitors, you may want to consider purchasing a subwoofer to help supplement the low–end as well.
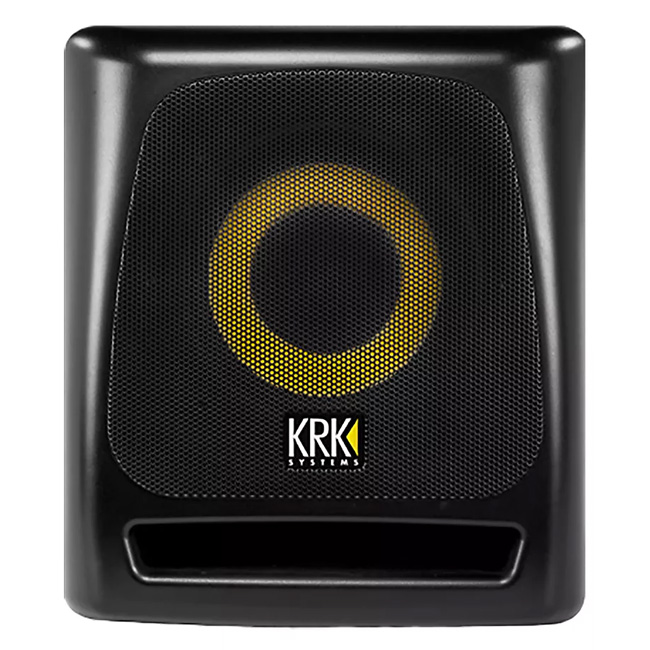
With that said, purchasing a subwoofer should be one of the last things on your list of studio needs. They're expensive, bulky, and incredibly annoying for those of us in apartments. If your control room is untreated acoustically, it will almost definitely make your mixes worse.
On top of all of that, most speakers can't recreate the frequencies a subwoofer can. So while your track may sound great in the studio, it's not likely to translate well to a cell phone, laptop, or car system.
So if you do purchase a subwoofer, don't leave it on all the time. Use it as a reference to make sure the low–end of your track is doing what it's supposed to do when the sub is on, as well as when the sub off.
Monitor Placement: Intro to Trigonometry
Now that you've got your fresh new studio monitors out of the box, it's time to set them up. First, if placing your studio monitors directly on a desk or console, be sure to use isolation pads to help make sure your monitors aren't causing your desk to shake or any harmonic ringing.
If possible, you should place your monitors on their own independent stands with isolation pads. This will further isolate the monitors, allowing them to more accurately recreate frequencies.
Once you've got your monitors isolated, it's time to get the placement down. Near–field monitors should be 3 to 5 feet from the listening position, with the tweeters at ear level. The monitors should be an equal distance from each other and the listening position, and they should be angled at roughly 60˚ to create an equilateral triangle with your head.
It helps to use a 3- or 6-foot XLR or 1/4" cable to measure the distance from one woofer to the other, then from the woofer to your head. Your measuring will help you make sure the monitors are the right distance from your head.
The Acoustic Treatment
While you certainly can start recording and achieve great results without treatment, taking the time and effort to treat you're room will absolutely take your mixing to the next level. Most control rooms feature 50 to 75% coverage. Most isolation booths are 75% or more covered. While live rooms vary quite a bit, most feature 25 to 50% coverage.
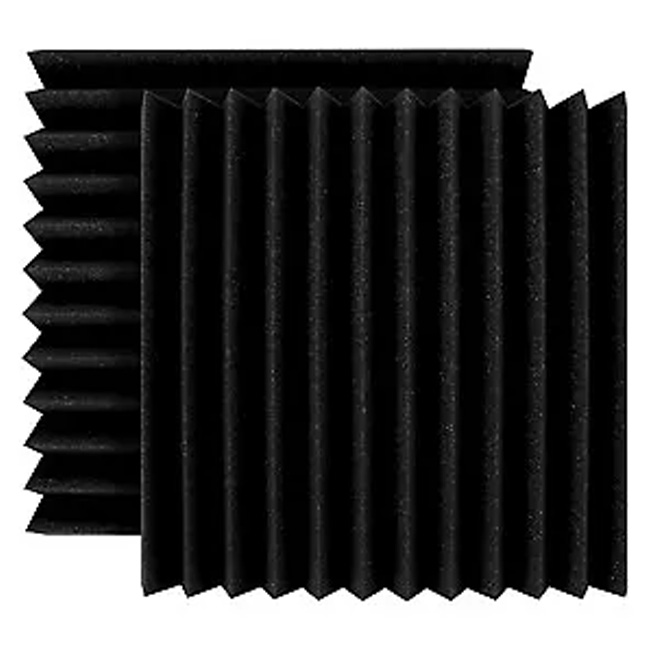
So, a safe bet for any home studio is to use at least 50% coverage. But with so many different kinds of acoustic treatment, where do you start?
The most basic form of acoustic treatment is absorption. This is the standard foam you see lining the walls of most studios. It's used to absorb frequencies and help reduce standing waves or "flutter echo."
Unfortunately, foam panels do little to prevent unwanted bass frequencies from bouncing around the room. Because of this, most studios benefit from using bass traps in the corners that specifically target low–end frequencies and prevent them from lingering.
Some engineers aren't looking for an isolated sound, but still need to remove standing waves. That's where diffusion comes in. Instead of absorbing frequencies like foam padding, wooden diffusers are often used to help disperse the those frequencies around the room, while keeping them from creating standing waves.
If you can't afford the full acoustic treatment, you may want to opt for a portable vocal booth to improve isolation during vocal recordings. This relatively inexpensive option works great when paired with traditional foam padding, too.
This is only scratching the surface. There's an entire science behind acoustically treating a room accurately, but this should definitely help improve your home studio recordings. Just remember, there's always room to grow. What's important is getting started.
Editor's Note: Check out every installment in Brad Pack's series on home recording.
- Home Recording Basics I: Setting Up Your Studio with Monitors and Acoustic Treatment
- Home Recording Basics II: Choosing Your First Audio Interface and DAW
- Home Recording Basics III: A Guide to Microphone Types and Placement
- Home Recording Basics IV: How to Record Acoustic Guitar and Vocals
- Home Recording Basics V: Mic'ing a Drum Kit From Start to Finish
- Home Recording Basics VI: How to Mic Your Electric Guitar
- Home Recording Basics Part VII: Recording Vocals in Your Bedroom
- Home Recording Basics Part VIII: Basics of MIDI and MIDI Controllers
- Home Recording Basics Part IX: How to Prep Your Tracks for Mixing
- Home Recording Basics Part X: Equalization
- Home Recording Basics Part XI: Compression and Dynamics Processing
Learn more about how to record music at home on our Basics of Home Recording homepage.