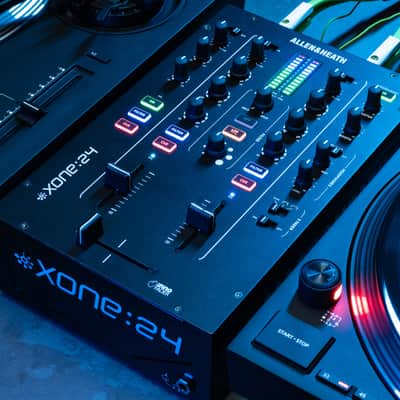
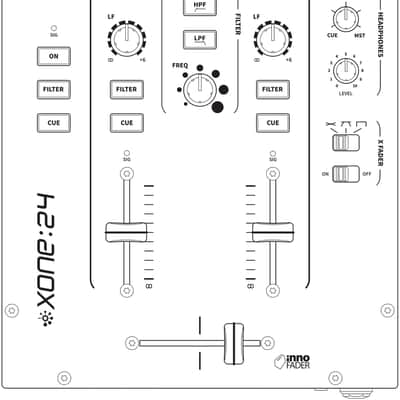
Allen & Heath Xone:24 | 2+ 1 Channel DJ Mixer. New with Full Warranty!

Only 1 left
Grab it before it's gone

Our users rate Reverb
INTRODUCTION
Xone:24 is a compact 2+1 channel all analogue mixer designed for DJs who value professional sound and hands-on control in smaller setups.
Whether you're spinning vinyl, playing from digital media players, or simply looking for high-quality analogue performance, Xone:24 offers club-grade sound in an easy-to-use package.
REAR CONNECTORS
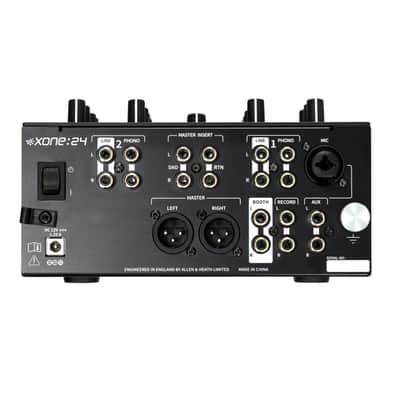
1. Mains Power switch
Turns the mains DC power supply to the mixer ON ( I ) and OFF ( O )
Ensure the DC connector plug is pressed fully into the rear panel socket before switching ON.
ⓘ It is standard practice to turn connected power amplifiers, or active speakers, down or OFF before switching mains power to the mixer ON or OFF to prevent any potential damage to speaker systems due to switch-on transients.
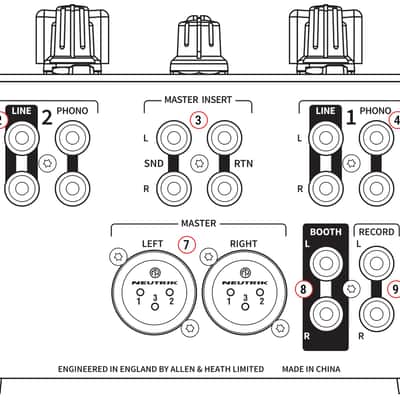
2. LINE Inputs, CH 1 & 2
Unbalanced (RCA). Connect stereo LINE level media players or other audio sources in to the LINE input.
You can also connect other unbalanced LINE level sources using RCA adapters.
ⓘ Do not connect turntables requiring RIAA equalisation. And avoid using low grade cables such as those often supplied with domestic equipment as these can impact on the signal path quality and quickly prove unreliable in use.
3. MASTER INSERT
Unbalanced (RCA). Connect the inputs of your external effects hardware to MASTER INSERT SND and its outputs to MASTER INSERT RTN.
Use the MASTER INSERT IN button on the top panel to send audio to your external effects or dynamics processing device.
Alternatively, you can also use the MASTER INSERT to connect dynamics hardware, such as signal limiters or graphics equalisers etc, for inline signal processing before the main mix output stage.
ⓘ MASTER INSERT jumpers, connected between MASTER INSERT SND L / RTN L and MASTER INSERT SND R / RTN R, maintain the continuity of the master signal path when the MASTER INSERT IN switch is enabled but no external hardware is connected. This prevents unintended audio interruption in the main output.
4. PHONO Inputs, CH 1 & 2
Unbalanced (RCA). Plug in turntables with magnetic cartridges requiring RIAA equalisation.
Plug non-RIAA turntables into LINE inputs.
NOTE: Do not plug in LINE level sources to the PHONO Inputs as these will overload the preamp and cause severe, high level, signal distortion.
5. MIC Input, Auxiliary channel
Balanced Combi (XLR or 1/4” TRS Jack). Use a good quality low impedance dynamic microphone.
The XLR connection is wired; Pin1=Ground, Pin2=Hot(+), Pin3=Cold(-)
TRS Jack connection is wired; Tip=Hot(+), Ring=Cold(-), Sleeve=Ground
ⓘ Do not use high impedance, or condenser microphones that require phantom power. And avoid unbalanced mics wherever possible.
6. DC Mains Input
Connect the (supplied) DC power supply unit to power the mixer.
Check the correct IEC cable with moulded plug compatible to local AC mains supply has been provided with your mixer.
The external power supply unit accepts mains voltages within the range 100-240V without changing any fuses or settings.
7. MASTER Outputs
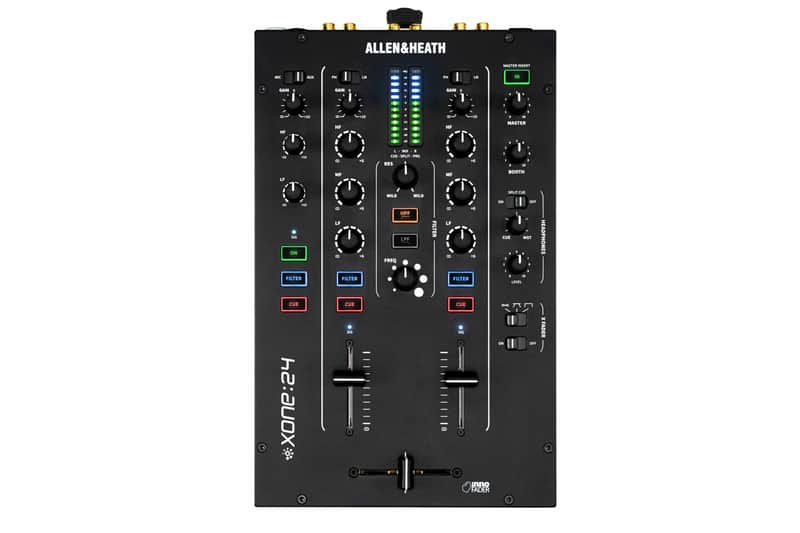
Balanced (XLR). The main stereo LR MIX outputs that feeds the club PA system, or balanced active speakers. Wired; Pin1=Ground, Pin2=Hot(+), Pin3=Cold(-).
8. BOOTH Outputs
Unbalanced (RCA). LINE level stereo output feed with a dedicated level control to the DJ’s local monitor.
9. RECORD Outputs
Unbalanced (RCA).
Pre-MASTER level, LR MIX output for connection to external hardware recording devices.
10. LINE Inputs, Auxiliary channel
Unbalanced (RCA). Connect auxiliary stereo LINE level audio sources to the AUX input.
11. Chassis Earth Terminal
A robust ground screw terminal is provided for connecting the earth straps from turntables to prevent ground hum.
ⓘ Avoid ‘self-grounded’ turntable
TOP PANEL
limiter, compressor, or graphic equaliser, connected to the rear panel MASTER INSERT sockets IN or OUT of the MASTER mix output.
ⓘ By default, MASTER INSERT jumpers are connected between INSERT SND and RTN sockets. If no FX or processing hardware is connected, these must be left in place in order to prevent the main mix audio from cutting out if the MASTER INSERT switch is activated inadvertently.
35. MASTER Level Control
A rotary MASTER control adjusts the level of the main, MASTER 1 and MASTER 2, rear panel outputs feeding the house sound system.
This does not affect BOOTH output level or the meters.
36. BOOTH Level Control
Adjusts the level of the signal to the stereo BOOTH RCA output. This does not affect the headphones level.
The BOOTH output can be used for a DJ Booth monitor, or as an additional zone feed or recording output.
37. SPLIT CUE
Selects the way the CUE bus operates.
Normally, pressing a Channel CUE switch overrides both left and right monitor program signals with the active CUE signal. With SPLIT set ON, the CUE bus overrides just the left channel, leaving the program in the right channel.
L MIX meter displays CUE signal level and R MIX meter displays PRG (LR MIX level) signal. This is very useful when beat mixing using headphones.
38. CUE / MST Control
Allows the MASTER mix output (MST) to be blended with the CUE signal. Turned fully anticlockwise, only active CUE Channels are heard through the headphones outputs. Gradually turning clockwise introduces the MASTER mix output to the headphones, together with the active CUE.
ⓘ Switching SPLIT CUE, ON automatically overrides the control.
39. HEADPHONES Level Control
Adjusts the level of the audio in the stereo headphones.
ⓘ This does not affect the level of the local booth monitor.
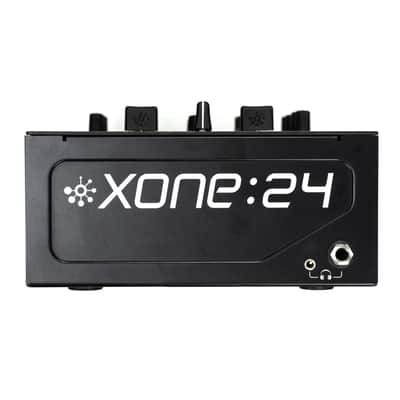
40. Headphone Outputs
Stereo 1/4” TRS jack and 3.5mm mini-jack sockets are located on the front of the mixer.
Plug in good quality stereo headphones designed for DJ monitoring.
Use closed-ear headphones to provide maximum acoustic isolation when cueing your sources.
Refer to the Operating Levels section for more information.
CUE MODES
Two options are also available to configure how the CUE buttons can function:
- CUE MODE 1: Non-latching - Is the mixer's default setting, one CUE remains on until the button is pressed again or another channel CUE is selected.
- CUE MODE 2: Latching - Enables CUE switches to remain active when selecting another channel CUE. Any active CUE is deactivated by pressing the button again.
ⓘ CUE MODE options can be configured ‘on-the-fly’ while the mixer is on, using the red Channel 1 and Channel 2 CUE buttons following the POWERED-ON Setup method below.
POWERED-ON Setup
- Press and hold down both Channel 1 and Channel 2 CUE buttons for 5s
- The AUX channel’s CUE button blinks red rapidly to show that the mixer is in its setup state. And the flashing red Channel 1 or Channel 2 CUE button shows the current CUE MODE, described above.
- Press the Channel 1 or Channel 2 CUE button for the required CUE MODE to change the CUE button function. CH 1 CUE = Non-latching CUEs
CH 2 CUE = Latching CUEs - Press the AUX Channel CUE button to store the changes and exit the POWER-UP Setup process.
ⓘ When POWERED-ON Setup is active, the headphones output is muted. And restored on exiting the POWERED-ON Setup process.
ⓘ If a CUE button is active when you enter the POWERED-ON Setup process, the same state is retained on exiting POWERED-ON Setup, and the changed CUE MODE is available following the next CUE button press.
ⓘ The last selected CUE mode remains stored in the mixer when powered off, and are recalled when the mixer is next switched on until subsequent changes are made.
SPECIFICATIONS
Technical Specification
Model Xone:24
Type Analogue
Channels 2 + 1
- CH1&CH2 Phono/Line
- AUX CH Mic/Line
Line Inputs 3 x RCA Stereo Pair (CH 1 & 2 + Aux CH)
Phono Inputs 2 x RCA Stereo PairCH 1& 2) RIAA
Gain +42dB @ 1kHz, 6mV RMS= 0VU @ 1kHz
Mic Input 1 x Combi (XLR + TRS)
Mic Gain +40dB, EIN = -115dB @ 40dB gain with 150R source
Master Output 1 x XLR Stereo Pair (Balanced) Level +4dBu (Nominal), +22dBu (Max)
Residual Noise -93dBu Mix Noise -83dBu
Booth Output 1 x RCA Stereo Pair (Un-balanced) Level 0dBu (Nominal), +18dBu (Max) Residual Noise -93dBu Mix Noise -83dBu
Record Output 1 x RCA Stereo Pair (Un-balanced) Level -10dBV (Nominal), +8dBV (Max) Mix Noise -83dBu
Stereo Master Insert 1 x RCA Stereo Pair MASTER INSERT Send 2 x RCA MASTER INSERT Return Level -2dBu (Nominal), +18dBu (Max)
Headphones 1 x 1/4", 1x 3.5mm Split Cue Monitoring Frequency response +/-0.5dB from 20Hz to 30kHz (Line In -> Master Out) Internal headroom +18dB Distortion Typically 0.01% @ 1kHz 0dBu Crosstalk < -85dB inter-channel @ 1kHz +10dBu
EQ (CH1&CH2) 3-band, +6dBu / Total Kill HF (Shelving) > 3.5kHz MF 1.1kHz LF (Shelving) < 500Hz Total Kill attenuation: -75dB EQ (AUX CH) 2-band, +/- 12dB HF (Shelving) 4.4kHz (3dB point) LF (Shelving) 160Hz (3dB point)
Analogue Filter 1 x Voltage Controlled Filter HPF / LPF Adjustable Frequency & Resonance Assignable CH 1 & 2 + Aux CH Channel
Faders 45mm Voltage Controlled Amplifier Channel Fader Cut Off < -90dB @ 1kHz +10dBu X-Fader 45mm
VCA mini innoFADER® X-Fader Curve Settings 3 Types (Constant power, Transition, Fast-cut) X-Fader Cut Off < -90dB @ 1kHz +10dBu
Earth Ground Terminals x 1 Headroom +18dB Mix Meters 12 LED (-25dBu to +12dBu)
Chanel Meters Single tri-colour LED GREEN -25dBu to 0dBu BLUE > 0dBu to +12dBu RED > 12dBu
AC Mains 100 to 240V AC 50/60Hz Consumption 35W max Mains Adaptor 2 pin DC socket with cable clamp
This item is sold As-Described
This item is sold As-Described and cannot be returned unless it arrives in a condition different from how it was described or photographed. Items must be returned in original, as-shipped condition with all original packaging.Learn More.
| Condition | Brand New (New) Brand New items are sold by an authorized dealer or original builder and include all original packaging.Learn more |
|---|---|
| Brand | |
| Model |
|
| Categories |
Product safety information may be available here.

