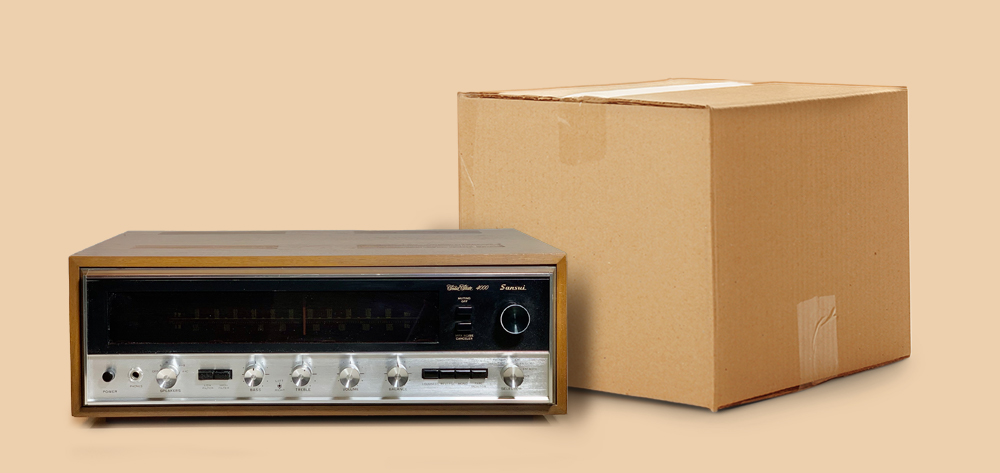
- A box about 4" to 5" larger in each dimension than your receiver
- Bubble/foam wrap.
- Filler (packing peanuts or stiff crumpled paper)
- Zip/twist ties
- Packing tape
- Tape measure
Unplug any external power cords. Fold them several times and secure with a twist tie. Wrap the bundled cord with bubble wrap and tape closed.
For attached cords, fold them up and secure them with a twist tie. You'll want to position the folded cord in a way that won't rub against the receiver during transit. Wrap the bundled cord in bubble wrap and secure with tape.
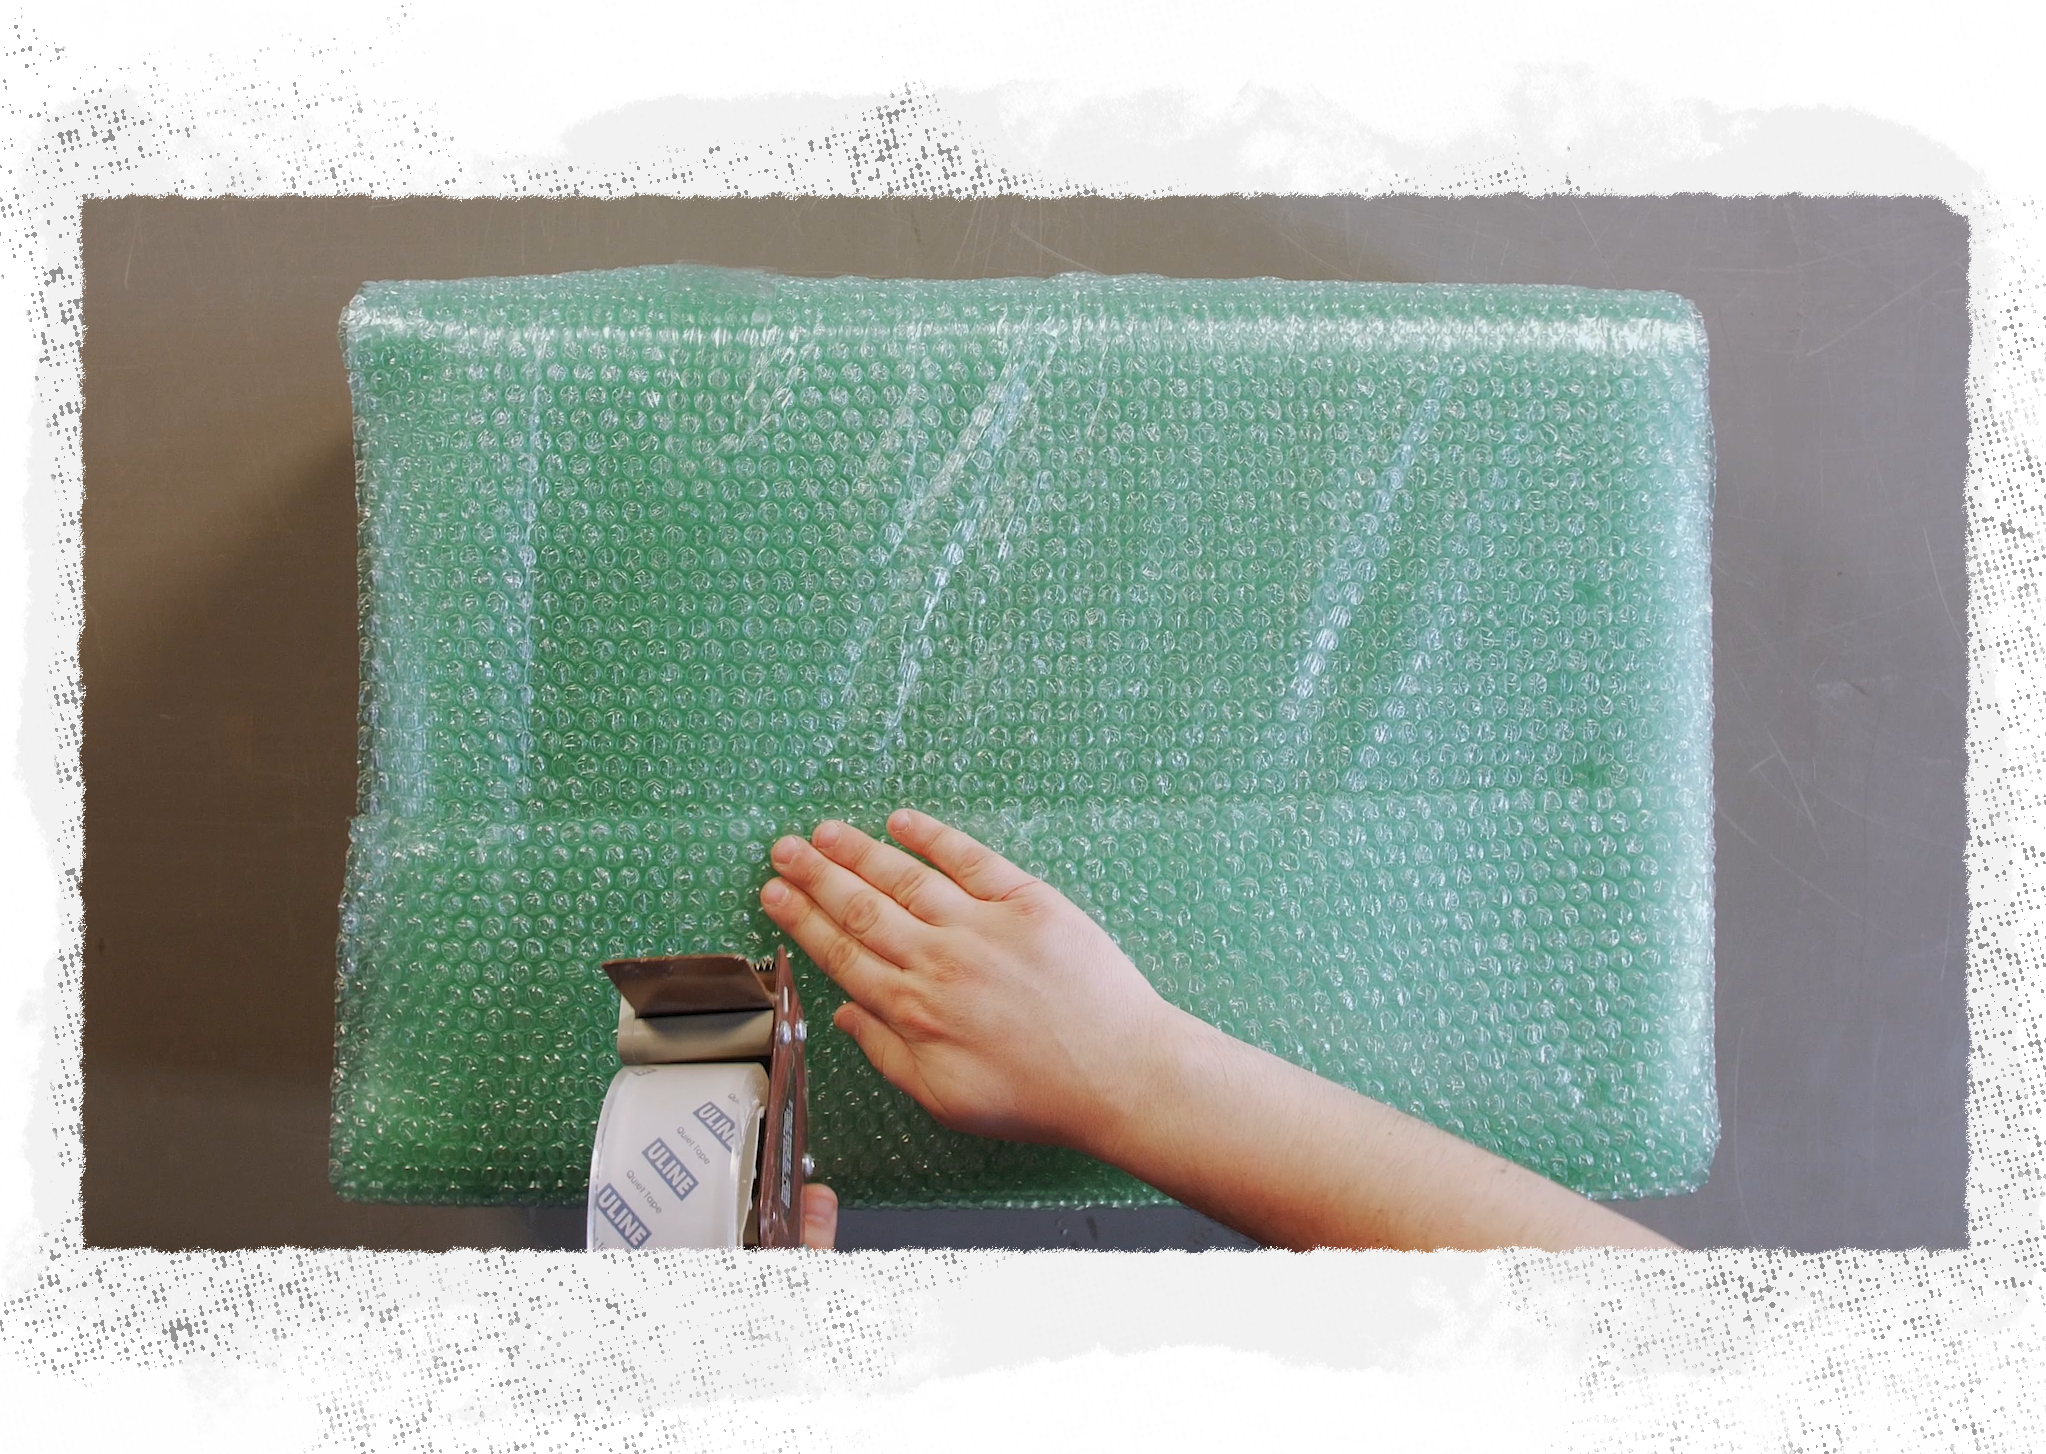
Secure foam blocks onto the corners. The corners are the most vulnerable part, so this part is critical. Re-using styrofoam from other packing jobs can work in a pinch, as long as it is taped together so it securely protects the corners.
Wrap the remaining exposed parts of the receiver in bubble wrap. Secure with tape.
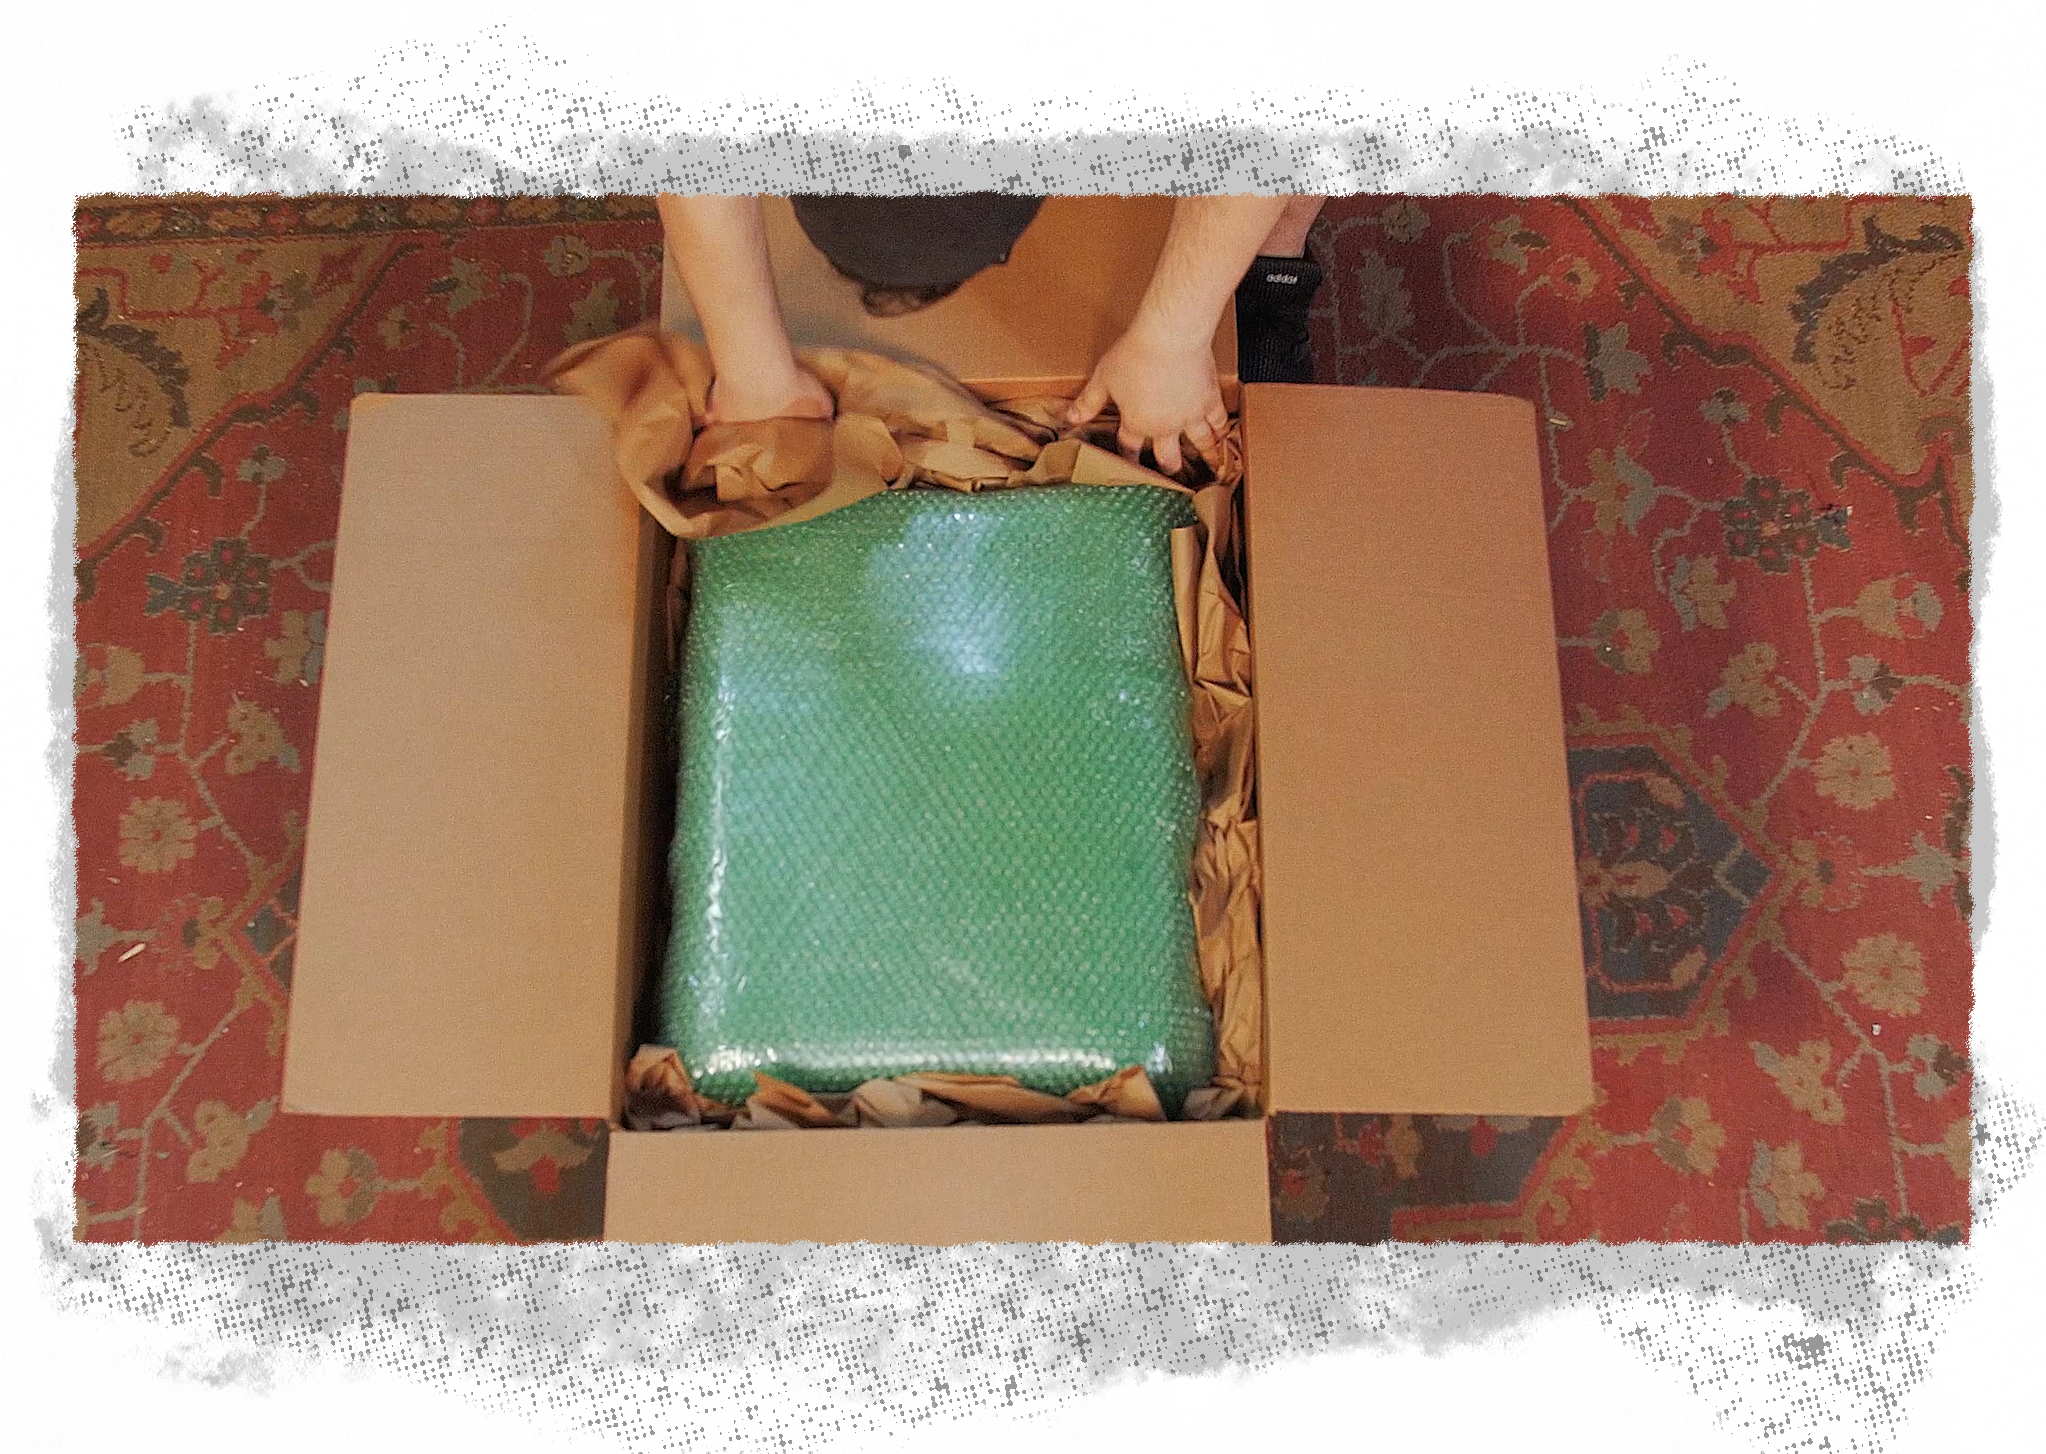
Fill the box with a shallow layer of packing peanuts, or 2" worth of crumpled packing paper.
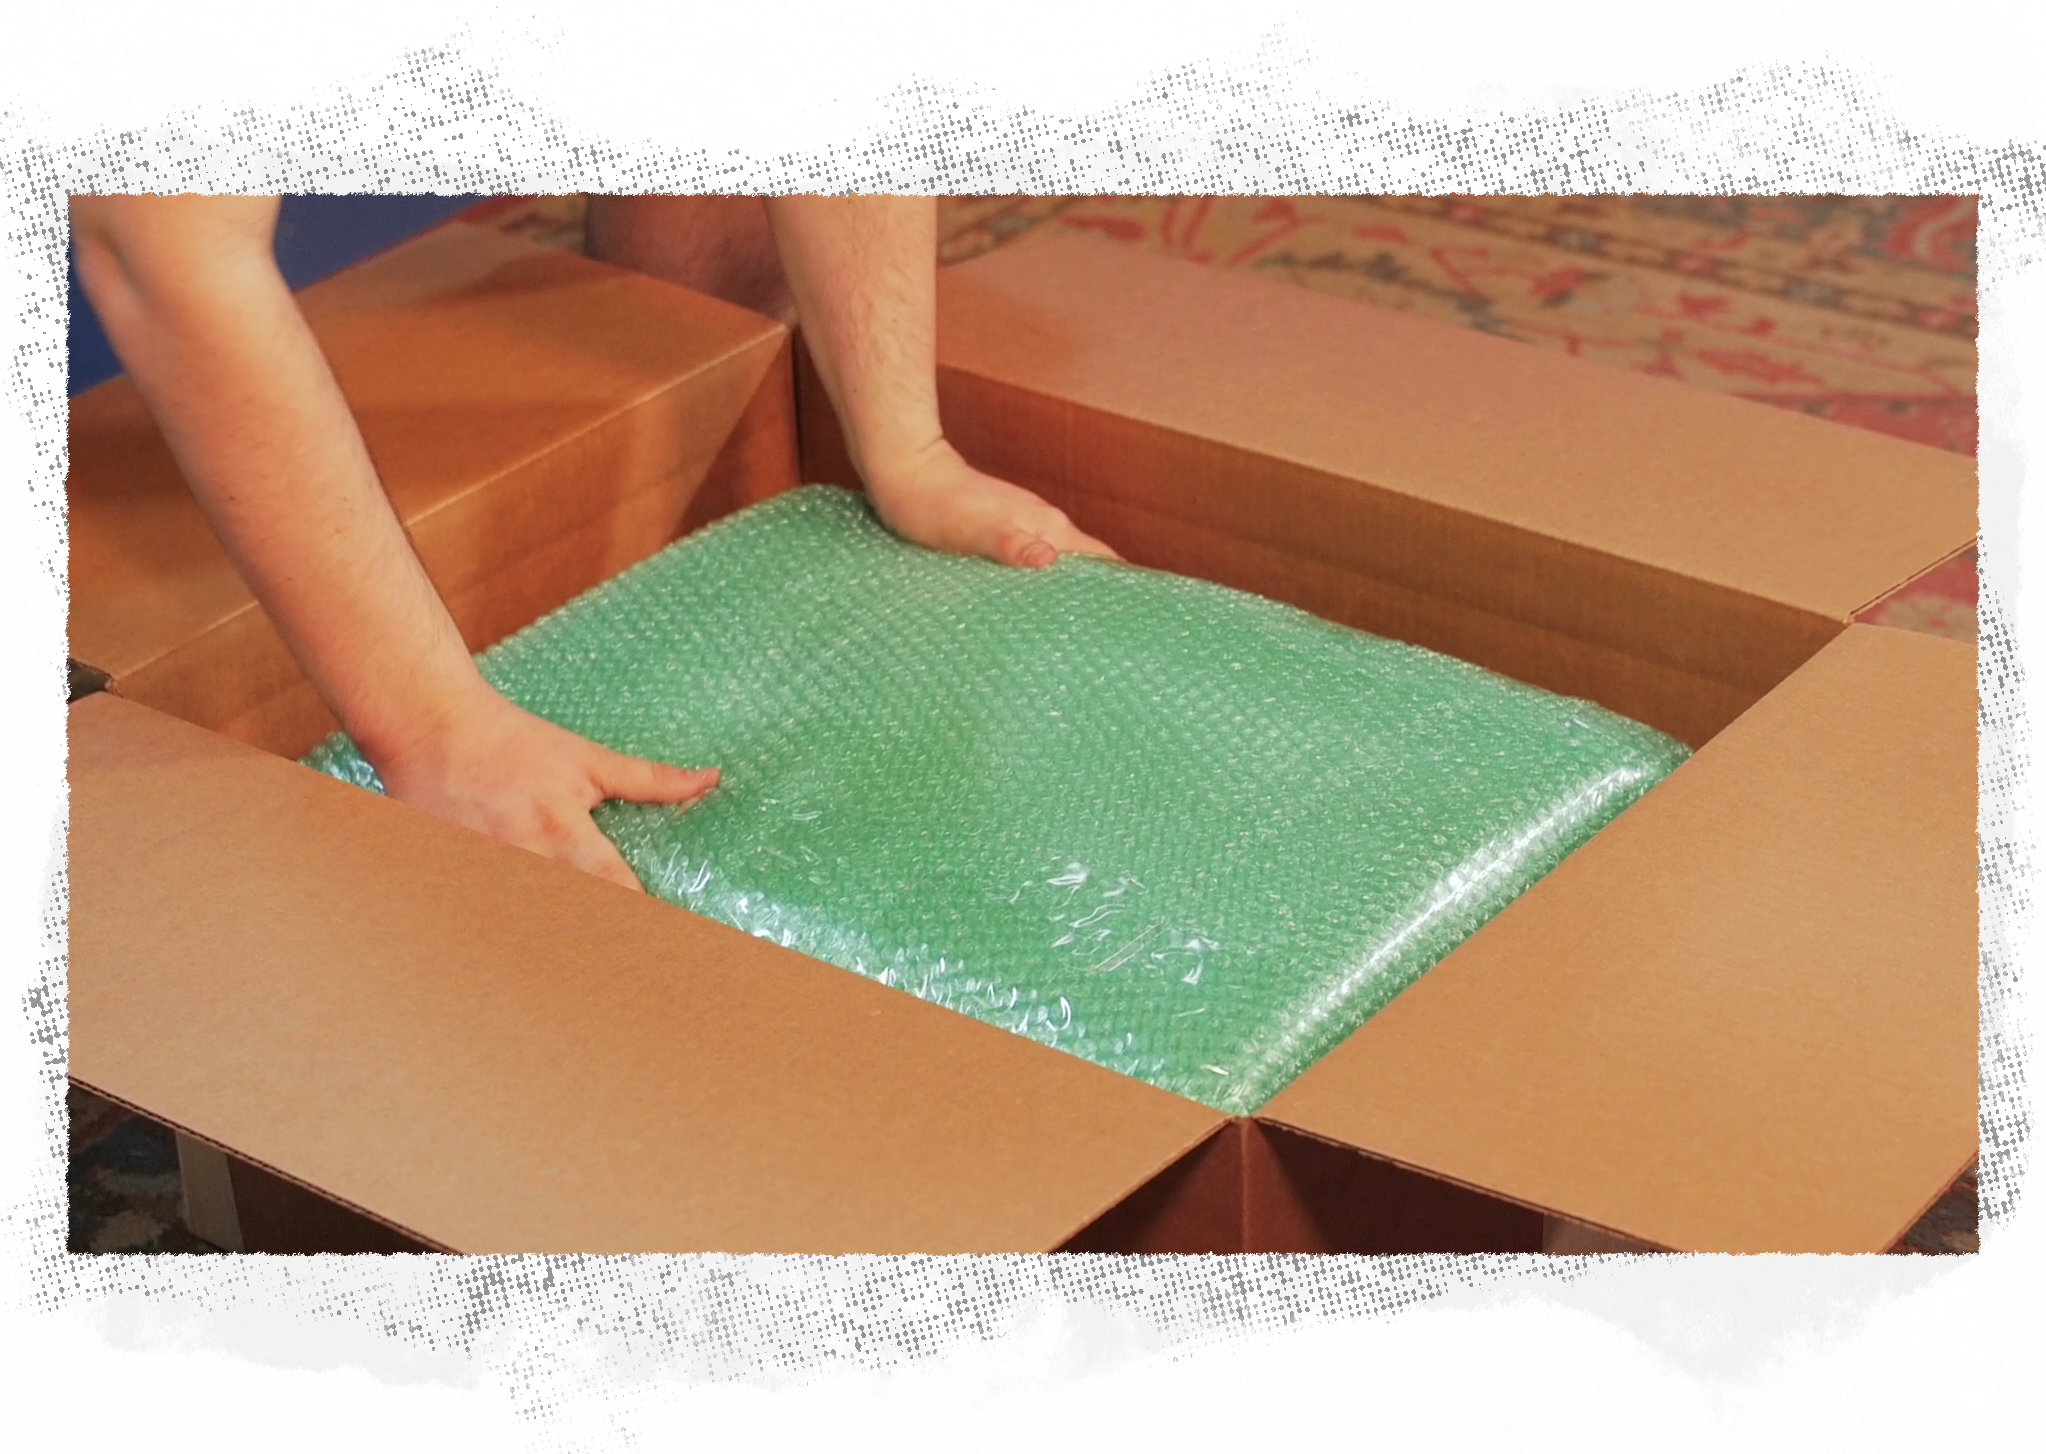
Place the wrapped unit inside the box. Fill all remaining space with packing peanuts or crumpled paper. Paper is less likely to shift around during transit if packed in tightly. When you're done, check to make sure the unit cannot shift when you tilt and move the box.
Close flaps and secure all seams with tape.
Weigh the packed box. Measure its dimensions. Write down the weight and dimensions. You'll need these numbers to determine the shipping label cost.
While Reverb sells boxes that are custom-made for guitars and keyboards, boxes for receivers are bit harder to come by.
We suggest saving any boxes you get when getting new or used receivers in the mail. While you could just take the receiver to UPS, FedEx, or USPS and ask them to package it, keep in mind that this is going to be more expensive, and the quality with which it is packed might vary widely depending on the experience of whomever happens to be working that day.
- Go to your Orders tab on Reverb under your profile icon. Find the order you are about to ship out and click "Get Shipping Label."
- Enter the weight and dimensions.
- We strongly recommend selecting Reverb Safe Shipping. This makes sure you are covered if anything happens to the package, without having to deal with the carrier.
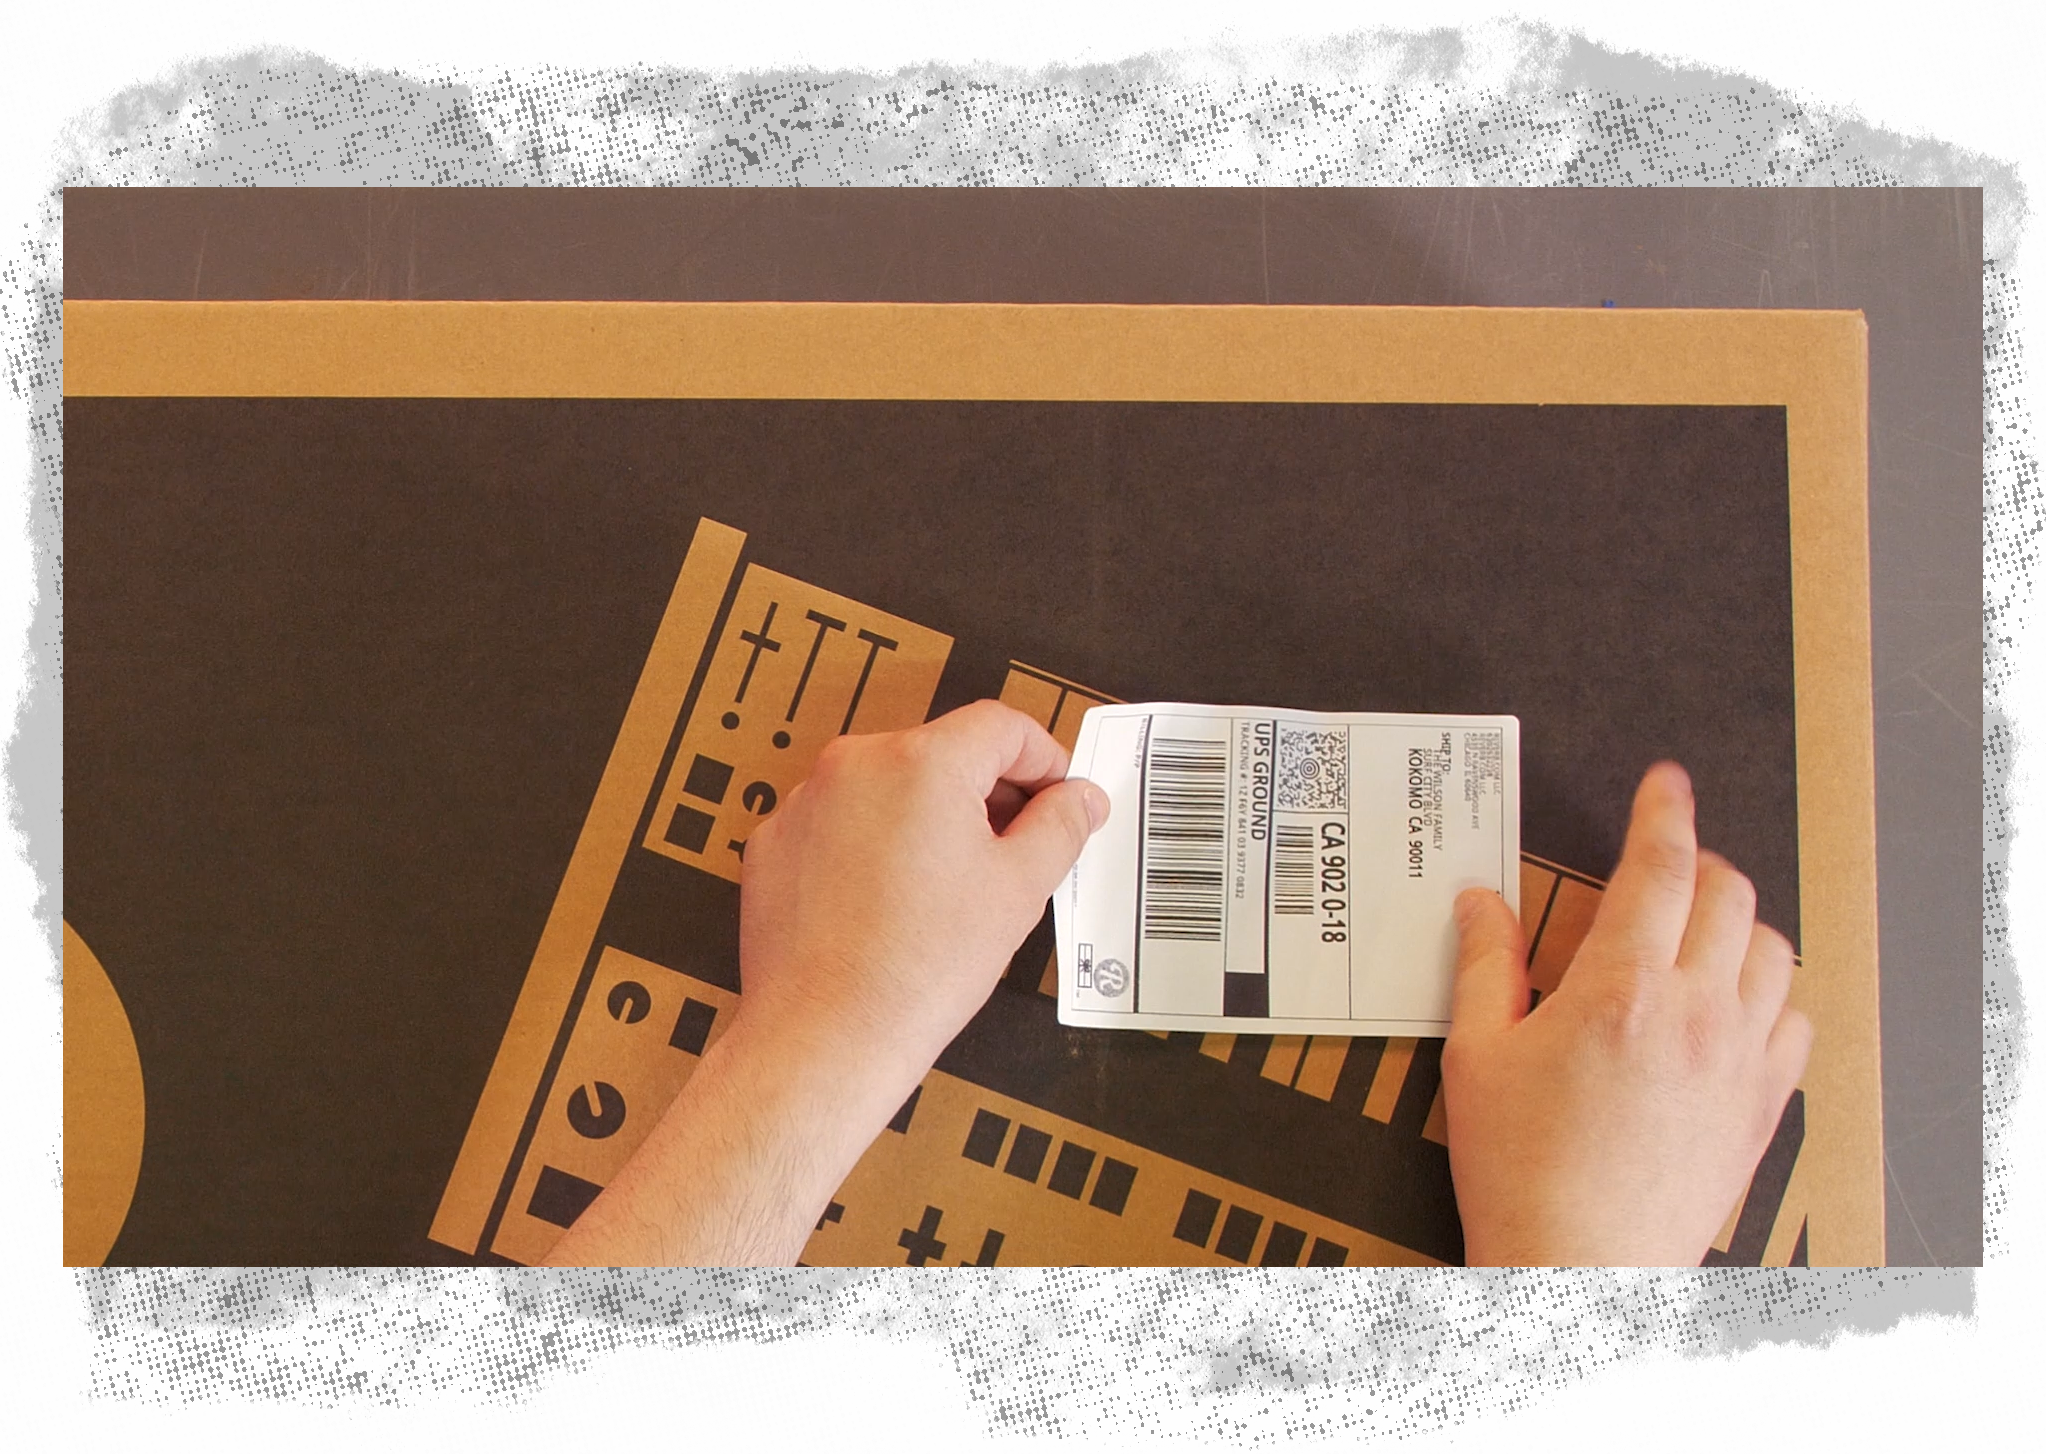
- Print out the label. Cut to size. Tape to the outside of your package, covering the entire label with tape—not just the top and bottom.
- Drop it off with the carrier you chose.
- Make sure you have the weight and dimensions written down or saved on your phone.
- Have the address of the recipient handy, either written down or pulled up on the Reverb app.
- Take the package to your nearest preferred shipping outfit (UPS, FedEx, or USPS).
Once you have the tracking number, add it to the order by clicking on Orders under your profile icon. You'll see the option to "Add Tracking Number." The payment won't be processed until you do this.

Shipping Corner
Shipping materials, discounted shipping labels, and safe shipping–plus tips from our team of musicians–all in one place.
How to Sell on Reverb
This step-by-step guide walks you through listing an instrument for sale, pricing it, and photographing it so that you get more money for your gear.
Reverb Shipping Labels
Don’t let trips to the post office eat up your day and your wallet: Become your own shipping center and print shipping labels right at home.
