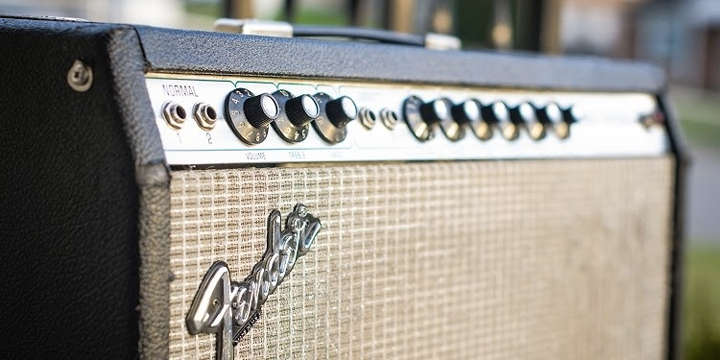
In the previous installment of Dave’s Corner, we looked at basic preamp circuits found in common guitar amps. This time, we push on to the output stage. Put the two together and connect a speaker and voila! You’ve got a guitar amplifier.
Defining the Output Stage
The output stage is the final stage in the signal-handling part of the amplifier. It takes the low-level guitar signal, which the preamp has already increased the voltage of, and converts it into a high-wattage, low-impedance signal capable of driving a speaker.
As it’s responsible for the final amplification of your signal, the output stage tends to contain many of the biggest components in the entire amp, other than the power transformer. In most amps, the output stage is commonly considered to begin at the input of the phase inverter, a tube that splits the signal into two opposite-phase signal strands and sends it on to each of two (or four) output tubes in a push-pull amp.

Vox AC4C1
Small, single-ended amps — such as the Fender Champ, Vox AC4 and Epiphone Valve Junior, which carry just one output tube — don’t require a phase inverter, but sometimes have a driver tube to further increases preamp voltage before the output stage.
After the phase inverter, the output tubes further amplify the signal and send it along to the output transformer, which converts it to a low-impedance signal that can power a speaker. Plenty of other components do various jobs along the way, of course: resistors help to voice certain stages and deliver operating voltage from the power supply; and signal capacitors, also called coupling capacitors, carry the signal from preamp to phase inverter and onward from phase inverter to output tubes. Along with these components, there’s usually also a fair amount of wire used to connect it all together.
Sound Shaping and Infinite Variables
As you might already have begun to imagine, every little variable within each sub-stage of the output stage as a whole contributes to shaping your guitar tone. Add them up differently, or stir a different combination of ingredients into the stew, and your guitar comes out the other end sounding somewhat different.
Coupling Capacitors
For example, beyond simply providing a link to get the signal from one place to another, coupling capacitors are selected according to their value (which can be considered as the size of their functioning elements) as a means of voicing the amp at these stages, since caps of different values will pass or reject frequencies in different ways. That’s not something you necessarily need to worry about as a guitarist out amp shopping, but it’s worth being aware of as one of many variables that any amp designer considers in the course of his or her work.
RELATED ARTICLE

Output Tubes
Different output tubes also will shape your sound somewhat differently, aside from their differing “wattage-producing” capabilities. It’s worth noting that the preamp stage generally plays more of a role in primary tone shaping than the output tubes themselves do, but they are part of the big picture, for sure.
Covering the intricacies of different output tube characteristics would require a guide in itself, but consider this a quick-hit look at the broad sonic signatures of the four most common types of output tubes:
6L6
Fender Super Reverb Silverface
The “big American” tube: Clear, bold, punchy and powerful, with a tight low end. A pair produces roughly 45 to 50 watts max in the right output circuit. Think Fender Super Reverb and Twin Reverb, which uses four 6L6s for 80 to 100 watts.
6V6
The “small American” tube: Softer and juicier sounding than the 6L6, with less low-end solidity and a gritty midrange that many players enjoy. About half as powerful as the 6L6, a pair produces 18 to 22 watts in the right output circuit. Think tweed Deluxe and blackface Deluxe Reverb.
EL34
The “big British” tube: Powerful and punchy with a thick midrange, crispy highs when pushed and a low end that is big but often a little loose. A pair produces roughly 50 to 60 watts max in the right output circuit. Think Marshall Plexi and Hiwatt.
EL84
Vox AC15C1
The “small British” tube: Lots of chime and sparkle, a sweet, chewy overdrive when pushed. Not overly firm lows, but a good balance overall. A pair produces roughly 15 to 20 watts max in the right circuit. Think Vox AC15 and AC30.
Be aware, however, that a good amp designer can coax just about any of the “classic” voicings out of an output stage using any of the above tubes depending on how they put together the preamp and tone-shaping stages and how they configure the output stage to translate that to the speaker.
Output Transformer
The size, design and quality of the output transformer (OT) play a significant part in tone shaping. Makes sense, since it’s the one component that translates the electrical signal from the output tubes to one that the speaker can pump into sound waves in the air, which your ears finally hear.
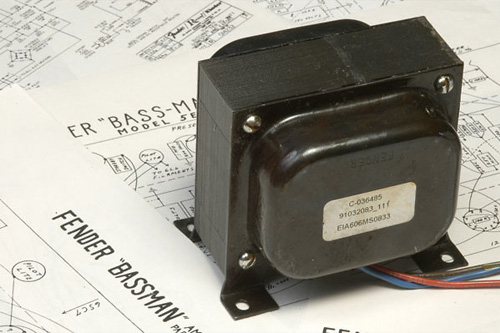
'59 Fender Bassman Tweed Output Transformer
As a rough rule of thumb, the bigger the OT relative to the output tubes, the bolder a sound you can expect and the firmer the bass response. OT size also tends to equate to maximum wattage capabilities, although the OT can only translate what the output tubes provide. There are many other design parameters involved, of course, and these are just the basics.
This doesn’t mean, however, that bigger is always better. An OT needs to be appropriately sized for the tubes that feed it, and must be appropriate to the designer and manufacturers’ overall aims, too. For example, when cranked up, many smaller or mid-sized amps owe some of their juicy, succulent overdrive character to the fact that their output tubes are saturating a relatively small OT; they might sound colder, stiffer, and allow less compression with a bigger and supposedly higher-quality OT installed.
The Invisible Ingredients
In addition to the physical components that make up the output stage, as detailed above, there are a few different ways of putting it all together, each of which have somewhat different sonic characteristics. Let’s consider some major elements of the circuit design itself, then, as the invisible ingredients.
Output Tube Bias
The setting of the output tubes’ bias is a little like setting the idle on a car’s carburetor: it determines how hot or cold they run relative to the voltage supply and signal input that let them do their thing. Rather than getting into the intricacies of biasing, however, which is a complex subject for a more advanced discussion, let’s look at two main circuit topologies that use different types of output-tube bias techniques as their starting point, and which tend to sound somewhat different as a result.
Fixed Bias
Potentially confusing for the noob, many amps using fixed-bias output stages actually require you to check and adjust the tubes’ bias level whenever you install new output tubes; the “fixed” in the term originally stems from a different consideration in the topology, although most of the earliest amps built in this way did have fixed, pre-set bias levels that couldn’t easily be adjusted.

Marshall JTM45 30-Watt Tube Head
Without going into too much detail, know that the fixed-bias amp has a small circuit to apply a DC voltage to an operational part of the tube known as the grid. This is a negative voltage with respect to the cathode, which is usually connected straight to ground in this circuit. The amount of negative voltage applied here sort of “reins in” the tube so it can work efficiently but without going wild, running too hot and burning out.
Using fixed bias is the more efficient of the two common bias topologies because this control element allows the application of higher voltage levels to the tubes without sending them into meltdown. As such, fixed bias squeezes the most wattage from a pair of output tubes while also sounding punchy and tight in the process, relative to cathode biasing. Famous fixed-bias amps include larger tweed and blackface Fenders, Marshalls JTM45 and Plexi, most high-gain amps made today and many others.
Cathode Bias

'55 Fender Tweed Deluxe
Cathode biasing is a much simpler way of providing a bias level for the tubes. It involves connecting a resistor of an appropriate value between the tubes’ cathodes and the connection to ground. This is a less efficient means of achieving an operating bias and often tends to have the tubes running harder and hotter while producing less overall wattage. Cathode-biased amps don’t generally require any adjustment when their output tubes are replaced.
Often referred to as “Class A” (and generally in error, though for technical reasons we won’t go into here), cathode-biased amps tend to sound a little richer and sweeter, with a greater proportion of harmonic overtones in their sound at the same given volume levels (none of these are absolutes, just general tendencies). They also produce less power than the same given output tubes configured as fixed bias, however, and usually have a somewhat softer low end and a less punchy sound over all. Famous cathode-biased amps include Fender’s tweed Deluxe, Vox’s AC15 and AC30, many Matchless amps, and others that follow the Vox platform.
Negative Feedback
Designers also commonly apply a negative-feedback loop around the output stage when they want a firmer, more efficient performance with tighter bass response. This technique is often used hand-in-hand with one or the other of the above biasing topologies to achieve a desired result.

Matchless DC-30R
Really a very simple thing, this loop is usually created by connecting a wire to one of the positive terminals of an output (speaker) jack and running it back to an input point toward the front of the output stage, usually at some connection to the phase inverter, via a resistor of a specific value that determines how much signal is fed from back to front.
But forget all of that. What this loop does, simply put, is to provide a little “whoa, Nelly” to the extremes at the output stage, some damping, allowing you to crank up the amp’s volume without everything getting out of control too quickly with regards to distortion and signal-peak.
Negative feedback is most commonly used in conjunction with fixed-bias output stages to further enhance a firm, punchy performance. It is often not included, on the other hand, in cathode-biased amps unless the designer wants to tighten them up a little. For example, Fender Twin Reverbs, Fender Deluxe Reverbs and Marshall Plexis have negative feedback; tweed Deluxes, Vox AC15s and AC30s and Matchless DC30s do not.
Voltage Levels
The voltage levels that the tubes feed on at various stages within an amp also play a huge part in shaping its sound and feel.
Put simply and in relative terms, the higher the DC voltage fed to the output tubes by the amp’s power supply, the louder the amp will be. Within reason, high voltage supplies at the output stage — when intentional and handled right by the rest of the circuit — tend to equate to a tighter, firmer, punchier amp, and one with a fast, detailed response to your pick and fingers. Relatively lower voltage levels often result in a softer, more compressed playing feel, earlier distortion and lower volume levels over all.
Controls or Lack Thereof
Many amps have no controls whatsoever governing functions in the output stage, other than perhaps an impedance selector connected between OT and speaker outputs. Think of most vintage-style amps, or newer amps that follow that simpler format, where you get just a volume, treble and bass control, or maybe a single tone control. All of that stuff is happening in the preamp stage, as discussed in the previous installment of Dave’s Corner: Basic Low-Gain and High-Gain Preamp Circuits Explained.
RELATED ARTICLE

Some controls that do function within the output stage include many of the more modern configurations of master volume controls; presence controls, which do their thing by tapping into the negative-feedback loop to tweak the highs at the output stage; or resonance controls, which also work in the negative-feedback loop, but at the other end of the spectrum, to fine-tune the low-end response.
Are you a newcomer to all things guitar-gear-tech related and looking to learn more? In addition to his other books, Dave Hunter is the author of “Guitar Amps & Effects For Dummies,” (John Wiley & Sons, Inc., 2014), which covers these subjects at a level gauged for the player eager to explore the subject from the ground up.
ABOUT THE AUTHOR: Dave Hunter
Dave Hunter is a writer and musician who has worked extensively in the USA and the UK. The author of "The Guitar Amp Handbook," "Guitar Effects Pedals, Guitar Amps & Effects For Dummies," "The Gibson Les Paul," and several other books. Dave is also a regular contributor to Guitar Player and Vintage Guitar magazines.