After spending years working in the analog recording realm, switching over to a Digital Audio Workstation (DAW) was pretty daunting for me, with its endless array of plugins and routing options.
While I worked my way through the ins and outs of the DAW, it wasn’t uncommon for me to have 12 of the same reverb plugin on random individual tracks. Like many of us, I was overcomplicating it.
One day, it dawned on me that a DAW was really just a glorified analog mixer, and I should probably start using auxiliary sends and buses.
An auxiliary send is an electronic signal–routing output that is used on multi–channel sound mixing consoles. The signal sent from this output is routed through outboard gear and then directed back into the mixer, creating an effects loop that you can add to a channel within the mixing console.
The less technical explanation is that it’s a way to route your signal to a device or track for further processing — like equalization, compression, delay, reverb, modulation, etc. — so that you end up with one signal that treats everything you need affected at the same time.
Setting Up An Auxiliary Send
Routing an aux send on an analog console is pretty straightforward. You plug your cables into the right jacks, set your knob values, and you’re good to go.
Fortunately, setting up an aux send in a DAW is just as simple. For the purposes of this article, we’re going to look at how to do it in Pro Tools, but these guidelines apply to any DAW, be it Ableton Live, Logic, or anything else. Ableton Live, in fact, has two aux send channels set up in its default session view.
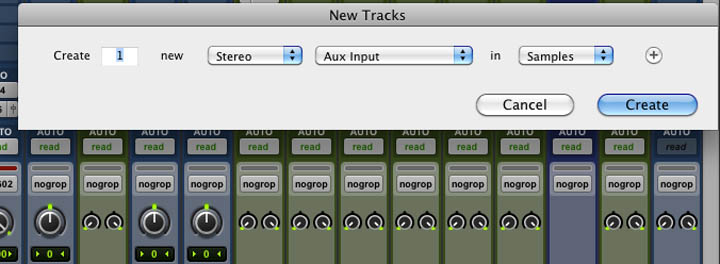
- Open the File drop–down menu. If you want hot key commands to do that, use shift+command+n on a Mac or shift+ctrl+n on Windows.
- A window will pop up giving you options for what type of track you would like to create. Select aux send and either mono or stereo.
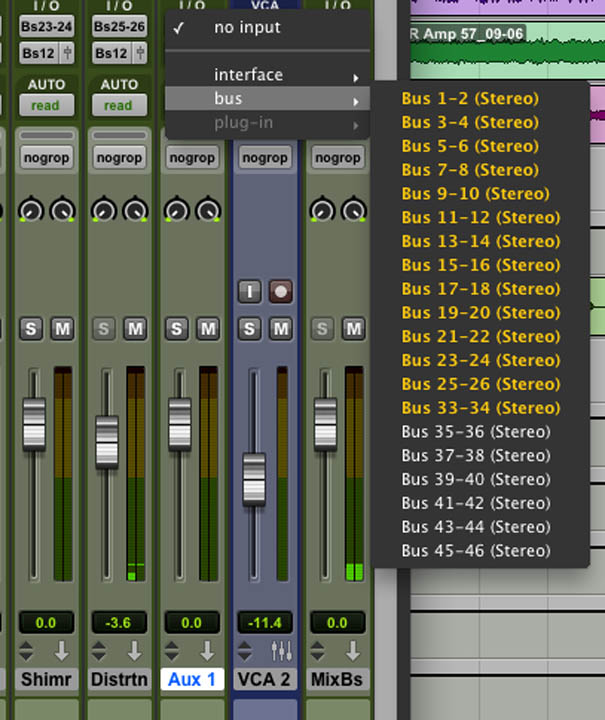
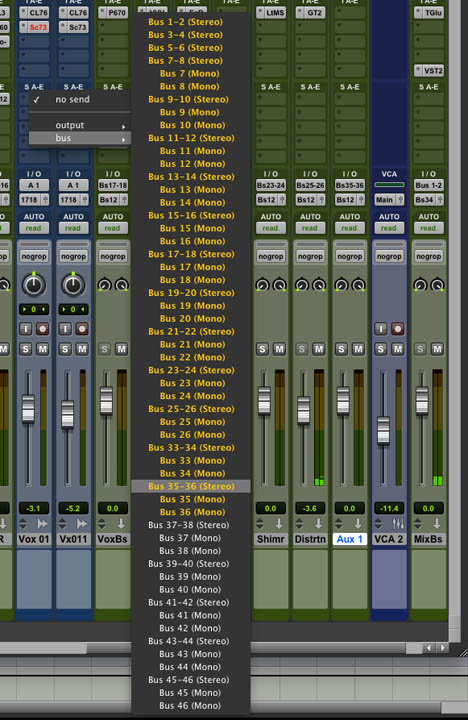
- Route your input. In the I/0 path, select an available bus from the drop–down menu. You can now route any track to this auxiliary track.
- To use an aux send, select the corresponding aux output in the send section of the instrument track. For instance, if you want to send all of your guitar overdubs through the same aux track to apply uniform compression, set all of their sends to that aux track. A new fader will appear, which you will use to assign the signal level you want sent to the auxiliary track.
The Benefits of Using Aux Sends and Buses
While it might seem quicker to open an effect plugin on the track, there are a number of reasons why you should start using aux sends and buses for when you want to apply effects.
Cut Down on Your CPU Load
Running 15 to 20 instances of the same reverb plugin can be taxing on your system’s memory and CPU load.
While this isn’t a huge concern for people with super fast computers, this technique can prove crucial for the folks mixing on laptops or slower systems.
There’s really no need for you to be running the same effect plugin with similar or identical settings on every track when creating an effect return. Routing an aux will accomplish the same exact thing.
Consistent Effects Over an Entire Mix
Treat your effects like you are working on an analog console and only use a handful of effects. This will give your mixes a more unified result.
Sending all of your drum tracks to the same reverb or giving multiple tracks the same delay can keep your mixes consistent and your DAW mixer organized.
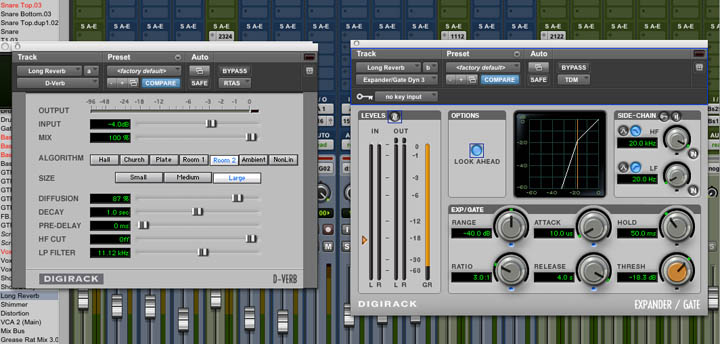
Set up a gate after a large reverb. Adjust the attack and release to tailor the decay of the reverb.
This can also be useful if the room you recorded those drums in is smaller and doesn’t have a long natural reverb, since you’re creating a uniform space with those effects that can help lend your mix some coherence.
Tailoring the Affected Sound with Dynamics and EQ
Using an aux to run your effects allows you to process that affected signal further. This will give you a great opportunity enhance and clean up your mix.
De–essing your vocal reverb will help with getting the sssssss out of it.
Likewise, putting an EQ on your reverb return can help amplify the crack of the snare. Boosting the EQ at around 1k or 2k is a good place to start.
Try using a high–pass filter on your affected signal. This will clean up the low–end buildup that can occur in reverb or delays. Start at 250 hz.
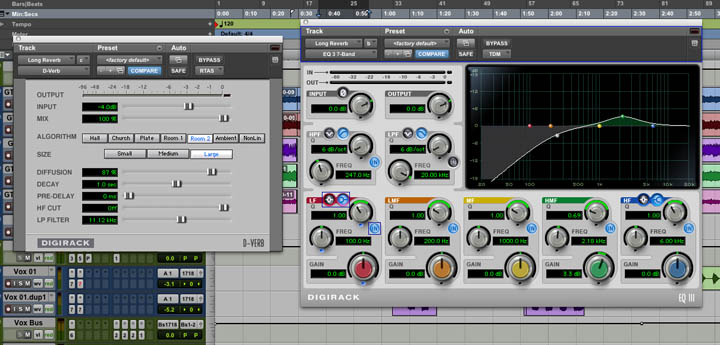
Placing an hpf 250hz before your reverb plugin will cut down low–end rumble in your reverb and mix.
Stacking Multiple Effects on One Effects Bus
A classic example of this is to put a delay before a reverb, which is useful if the reverb you are working with doesn’t have a pre delay. By putting the delay first, the original transient will come through and you will get the bloom of the reverb afterward.
If your effect doesn’t seem to shimmer enough, try putting a modulation plugin (chorus, flanger, phase, etc.) to add some randomness and width to the high–end.
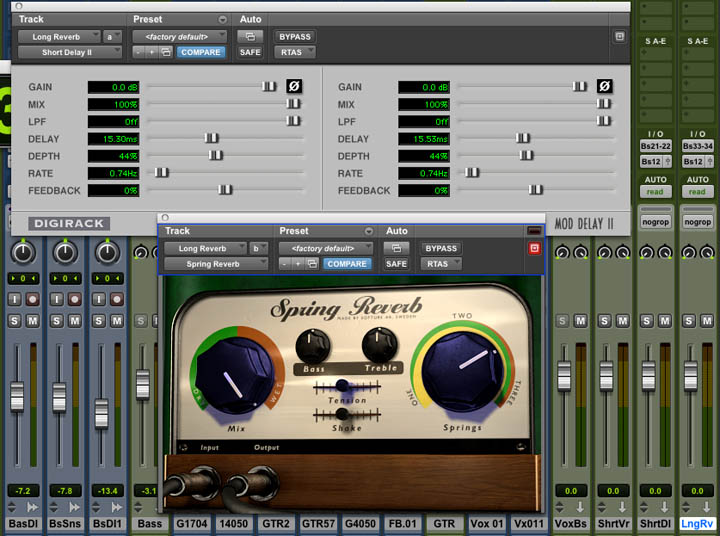
Using a pre delay of 15ms before a reverb that doesn't have a pre delay built in.
You can also experiment with stacking multiple reverbs to achieve a sound not naturally found.
Parallel Processing
Sending a track to a bus also opens up the option for parallel processing, most often used for drums and vocals. This complicated topic warrants its own article, but here we’ll keep things pretty basic.
In parallel processing, you have a dry track and a heavily processed copy of that track. In most cases, on its own, a heavily processed track is not natural–sounding or desirable. With parallel processing, you’re able to mix in the processed track, while maintaining the integrity of the dry track.
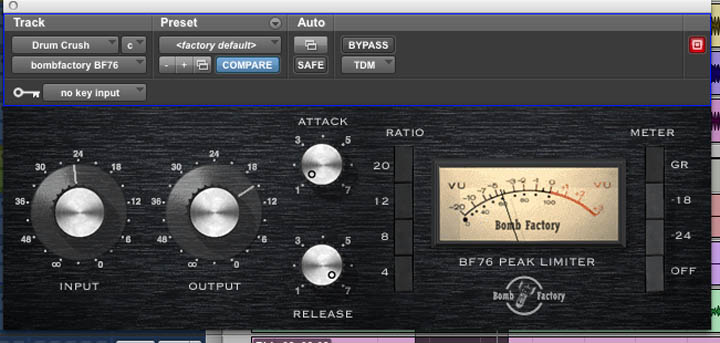
Using an 1176 type plug with "all buttons in" on a parallel aux track.
I’ve found it helpful when dealing with a dense mix and trying to get specific elements to cut through better.
Smashing a drum bus with an extreme pumping compressor and mixing it in alongside the totally uncompressed drum mix has become common practice on hard rock mixes. This can make your drums sound punchy and full of attack.
You can also use extreme compression with vocals, which will help the softer and louder passages become more consistent. If you’re looking to add more bite or aggression to a vocal track, you could try sending a vocal to a distortion plugin and then blending that back in.