Direct In boxes have proven to be one of the key innovations in the relatively short history of recording bass guitar.
Using a DI is a great way to get a full, dry bass tone that can be improved and boosted in all sorts of ways for all sorts of styles. Especially now that amp modeling technology is so excellent, bassists rarely long for the days when hauling an SVT to the studio was a must.
Producers and listeners alike can agree that there’s nothing more satisfying than devastatingly fat bass tone, and these days software makes that easier than ever to achieve with nothing more than a humble DI bass track.
Sure, with nothing but that clean tone sitting in your DAW, it may seem impossible to get the gurgling, thick, sub–tinged bass tone you so sorely desire. But we’ve compiled a list of five essential types of plugins to make both your bass guitar and synth bass tones jump to life and thump your subwoofers.
Automation
The first hurdle in your journey to earth–shaking low end comes in the form of levelling out uneven attack.
A volume automation plugin will do the trick, balancing the levels of individual notes without coloring the recording or changing the attack profile of your notes. It tends to work best before a compressor.

The Waves Bass Rider is by far the best volume automation plugin for bass. It’s optimized for low frequencies and envelopes characteristics of bass instruments to even out your bass dynamics. The Bass Rider will even filter out unwanted background noise.
In addition to Waves’ offering, the Crysonic’s NewB V4 has a very solid reputation and the MeldaProduction MAudioVolume will get the job done, too.
When using an automation plugin, start out by matching its target level to the average level of your bass input for the most transparent response. For crunchier applications, set a higher target level to add higher overall gain and loudness. But beware that it’s always easier to add the dirt you need later in the signal chain than it is trying to wrestle with an already dirty tone.
The detect setting decides how reactive the rider is to your instrument’s attack, sustain, and release, helping to adjust the gain for each individual note with nuance. Sensitivity controls the severity of the effect’s reactiveness. Response determines how quickly the effect releases.
In general, you want to set slower times for slower passages and faster times for when a lot of note attacks happen in quick succession.
The ace up the Bass Rider’s sleeve is the ignore section, which is great for reducing ambient noise.
The controls are straightforward here. Turning the artifacts dial up knob will reduce unwanted noise (e.g. buzzes, pops, or string noise) that may be otherwise amplified by the effect. The spill function is designed to reduce mic bleed or background sound.
The range faders set the minimum and maximum of the effect’s automatic gain change. Generally, I like to set mine to –6 to +6 and adjust to taste. The rider fader gives you a visual representation of the effect in action and doesn’t respond to tweaking. The output controls the overall level that the effect sends out and should be set close to 0db.
Compressor/Limiter
Compression is a key part of smoothing and coloring your bass tone. While the rider will handle your bass leveling, a compressor will shape your attack transients.
Compressors narrow a signal’s amplitude band, reducing levels that surpass a certain volume threshold while raising quieter sounds closer to that threshold. The lower a compressor’s threshold setting, the more heavily the audio will be treated.
A compressor’s ratio determines the amount of gain reduction applied to inputs above the threshold. For example, if a compressor’s ratio is 5:1 and an input signal is 5db above the threshold, the remaining signal will be 1db above the threshold. A high ratio will also contribute to a heavier treatment.
Many compressors will give you programmable attack and release times that determine how quickly the compressor engages and disengages.

One great free plugin is the Klanghelm MJUC Jr., based loosely on the variable–mu tube compressors of the 1960s. The MJUC Jr. has a nice color and body to it, which makes it a perfect bass compressor.
The MJUC Jr.’s incredibly easy–to–use interface features three selectable parameters: compress, make–up, and a time constant switch.
The compress dial sets the amount of compression applied to the signal, the make–up determines the output gain, and the time constant selector gives the option to set the compressor’s attack and release to either fast (for largely preserving attack transients), slow (for smoothing out those transients), or auto–attack.
You’ll immediately start to notice a more consistent, evenly rounded bass tone. If your bass track starts to sound squashed and lifeless, try backing down on the compress knob until you hear more of your bass track’s dynamics come into play.
Low Frequency Enhancer
A low frequency enhancer essentially bulks up both a bass note’s fundamental frequency and its harmonics. This functionality makes it easy to get richer and more powerful low–end without increasing actual loudness.
As far as I’m concerned, Waves’ RBass is the best plugin for maximizing your bass tone. Other solid low frequency enhancers include Waves’ MaxxBass and PSP’s MixBass. But RBass really wins on how intuitive it is to set up.
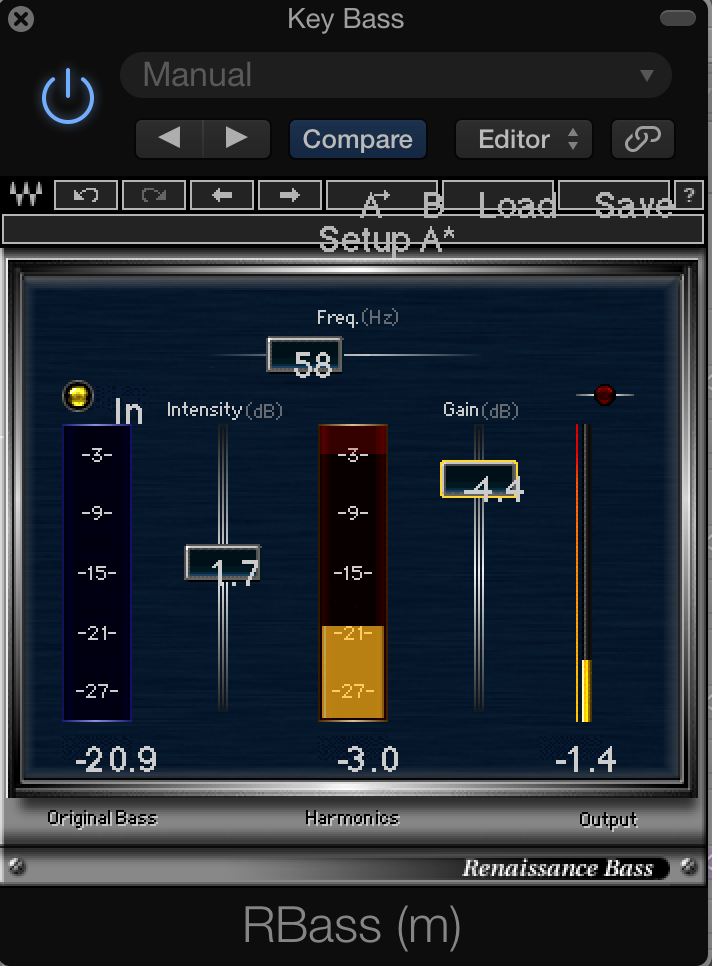
Set the frequency to the key that your song is in and dial in the desired intensity of the effect. Here, the intensity fader controls how many harmonics above the bass tone are added to the input signal. The center level meter visualizes the added harmonics.
You can also choose to remove the fundamental frequency by clicking the in button above the intensity meter, and doing so will add clarity to otherwise muddy tones.
After you have your desired low–end response, set the output fader to around –3dB and tweak accordingly. You’ll instantly notice that the plugin adds butter and punch to your low frequencies and instant weight to your drums and samples.
Be aware that if you have an excellent bass tone already, RBass may be of little help to you. RBass is great for enhancing, but why enhance something that’s already great? Low frequency enhancement is not a utility effect like compression, but rather an ornamental effect like reverb.
Since RBass creates new harmonics for your bass tracks, this plugin works especially well before a midrange equalizer.
Midrange EQ
Bass clarity and definition is made in the midrange. The truth is that a lot of the perceived heft actually occurs between 150 and 350Hz. You want to find an equalizer with both attenuation and boost controls to tame your mids before pushing your signal into an amp simulator.
By far, my favorite plugin in this class is Kuassa EVE–MP5 because of exactly how it handles midrange frequencies.
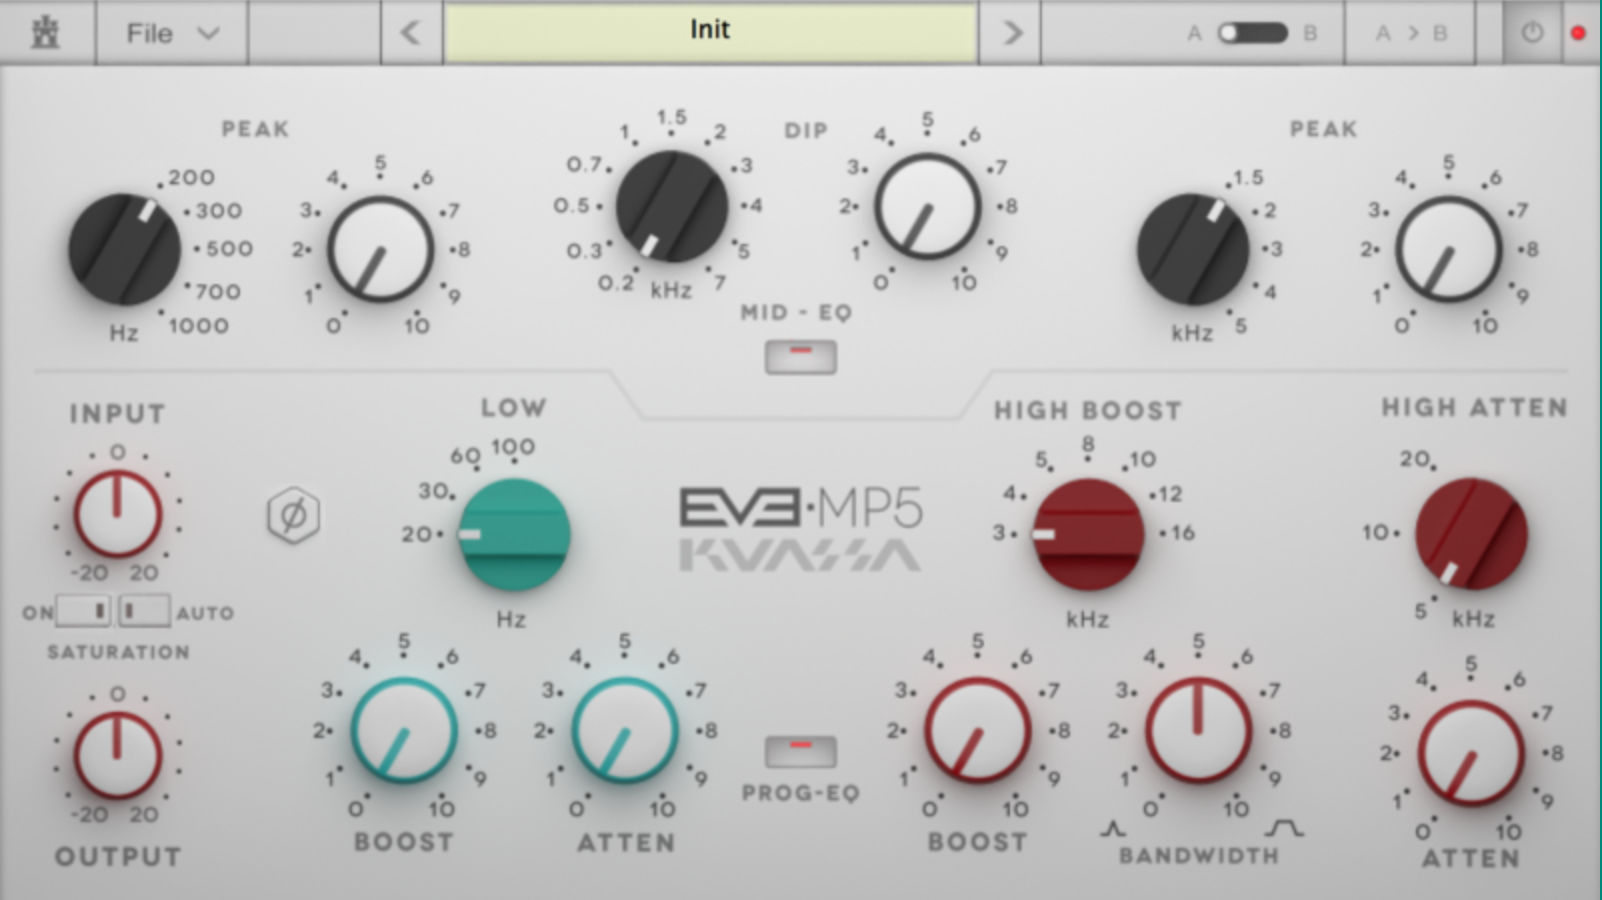
Based on the legendary Pultec MEQ–5 and EQP1A equalizers, the midrange section of this plugin features two peak filters, the first from 200Hz to 1kHz, the second from 1.5 to 5kHz. There’s also a dip filter from 200Hz to 7kHz, giving you complete control to churn out everything from chewy mids to sleek sub bass.
The result will be a richer and more focused bass sound, without adding mud to your mix. Additionally, the EVE–MP5’s low boost and high boost EQs work absolute wonders both as drum and mastering EQs.
Amp Simulator
The final step after you’ve set your midrange EQ is to add punch and zip to your final track. Adding an amp simulator at the end of your chain will give your bass tone a consistent dynamic feel by evenly saturating your signal path.
There are a handful of superb plugins to add convincing analog saturation. IK Multimedia’s Amplitube MAX is a supremely useful tool for both its powerful guitar and bass amp modeling.
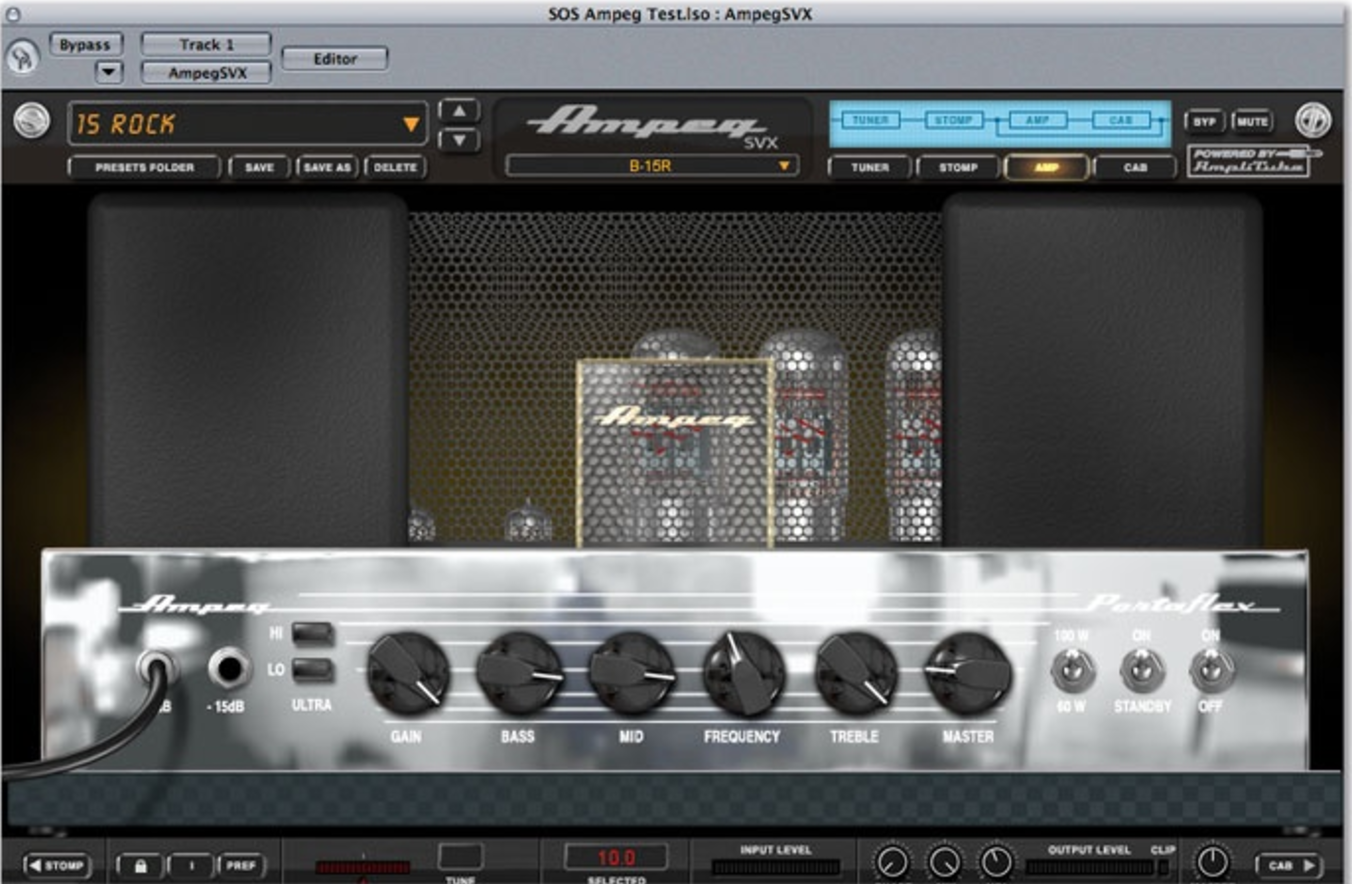
I firmly believe that everyone only needs two amp simulators, each based on the most iconic bass amps: the SVT–CL and the B–15R, both of which can be found in IK Multimedia’s Ampeg SVX Pack.
For a middier, rock–fueled snarl, select the SVT–CL plugin based on the Ampeg head of the same name. With a 3–band equalizer and mid–frequency selector, the SVT Classic is the ideal choice to get the definitive rock bass sound when paired with Amplitube’s SVT-810E, an 8x10 Ampeg “Fridge” cab simulator.
Dial in the amp settings to taste, and you’ll bring massive stadium tones into your home studio sessions in no time.
The B–15R is a faithful recreation of Ampeg’s famous B-15N — a Motown mainstay. Best known for its warm response and sultry tube saturation, the B–15N is and has been the industry standard for soul, funk, and jazz bass since its debut in the mid–1960s.
Simply slap the B–15R plugin at the end of your chain and tweak its 3–band equalizer to your desired fatness. You can also choose to run the amp simulator at 100w for more clean headroom or at 60w for more warm tube saturation.
With this unstoppable combination of plugins, you’ll be well on your way to heavy, articulate bass tones in no time. Think we missed one? Let us know in the comments.