I tend to get a lot of different kinds of repairs in my shop — repairs that not many other shops will take on, guitars that have been poorly repaired before, guitars that have been neglected for years and years.
This is a story of a sweet little Kay archtop. My client brought me this tattered and torn guitar with a story of love attached to it that surpassed a lifetime. The guitar had belonged to a man who had played it for years and years, gigged out a bit, and never put it down.
Alas, this musician passed away, leaving his beloved guitar to stay with his beloved wife. The wife didn’t play herself, but kept the guitar just as he had left it — in it’s case under the bed. There it remained for 30 years.
A Beloved Guitar Finds a New Home
My client, in turn, is a great player. He and his family have vacationed beside the widow’s house for quite some time now. Over the years, they have grown closer and closer. So much so that one day, the widow brought from under her bed the guitar that her husband had once loved so much. She gifted it to her newfound friend, my client.
Most people see the damage and defeat of a once–loved instrument. I see all the stories it has already told, and the ones it still has left to tell.
As I hear this story, my eyes gaze upon the guitar, cascading over every previously repaired crack, every sanding mark that was left by a man trying to open up the sound of this mahogany body, every worn fret that echoed the songs once chorded.
Most people see the damage and defeat of a once–loved instrument. I see all the stories it has already told, and the ones it still has left to tell.
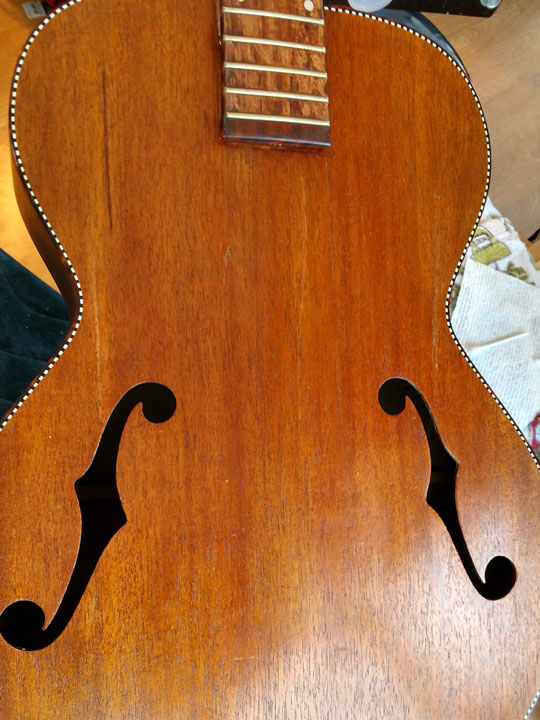
If you were to take this guitar at face value when it first entered my shop, you’d see a cheaper Americana guitar — one that has lived a rough life and has visited its fair share of repair shops.
A Massive Undertaking
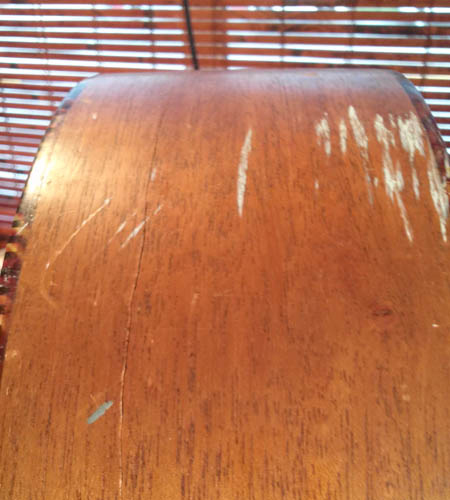
The finish had been sanded off, probably in an attempt to open up the tone and gain a deeper sound. Unfortunately, this tends to be an unfavorable method of doing so. Leaving the wood exposed to the elements without much to support the grain during the seasonal ebbs will almost always lead to cracks and dry rot wood decay.
The neck — obviously pulling up from the heel — had noticeable failed attempts at a reset: two cracks on the side, each longer than a foot. There were seven top cracks in total, five of which had been previously repaired, with glue blanketing the surrounding wood.
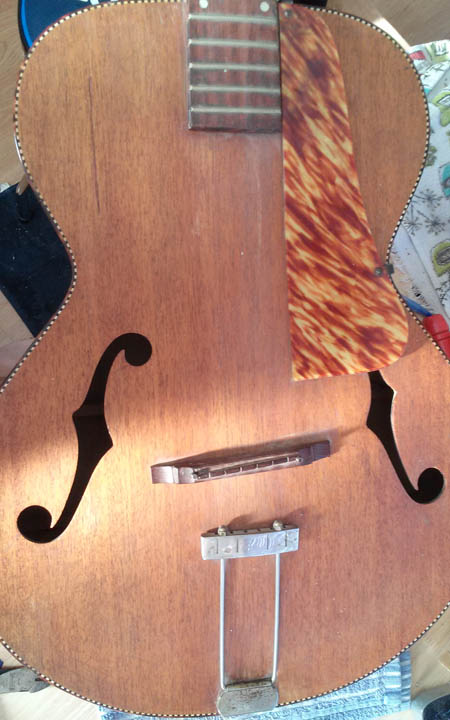
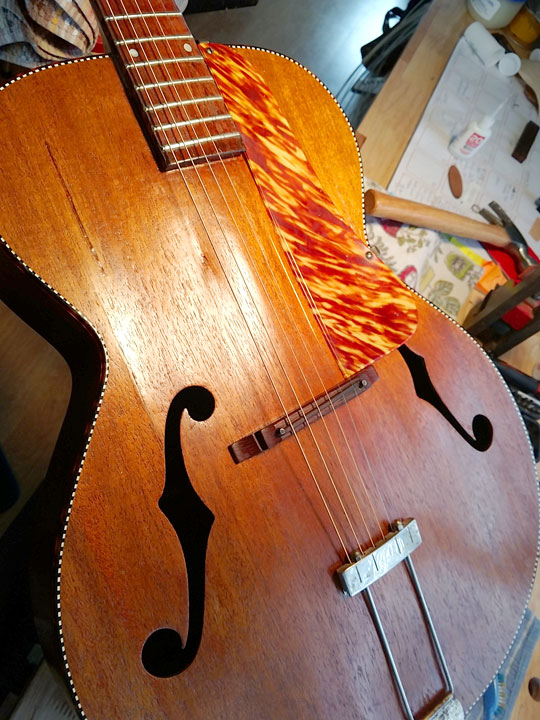
The two–piece bridge was missing its height adjustment wheels, the tail piece was loose, the few strings that remained were rusted. The fretboard had strips of adhesive residue, interrupted by oxidized frets and dried flaking rosewood.
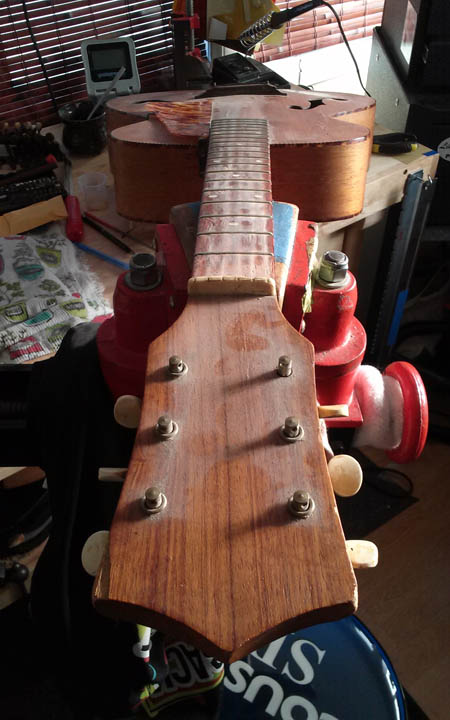
The nut was crudely cared for but still original, much like the tuning machines. The buttons had been stained or painted at one point to a vintage amber, perhaps to lessen the bright white against the dulled veneer.
The pickguard, though mounted strangely, seemed to fit the quirky binding and overall aesthetics. Dusty from headstock to endblock, this beauty had seen some time on a repair bench and in the hands of a musician.
And so the journey began…
To the Workshop
The first thing I did was remove the old strings. Pliers were needed because the metal had lost all “memory.” “Metal memory” is a term used to talk about the strength and calculated flexibility.
Next, I removed all hardware. A few stripped holes on the tuning machine screws — some mismatched screws had held on the tailpiece and the pickguard. The bridge felt a little stuck from the grime build up, but it was quick to budge after a few gentle shakes.
After a quick wipe down, the top cracks were exposed in all of their ruthless glory. A few hid under the pickguard, mirrored on each shoulder. Longer ones that had developed near the middle shot from the neck joint, likely caused by the pressure of a guitar strung to tension with a loose neck.
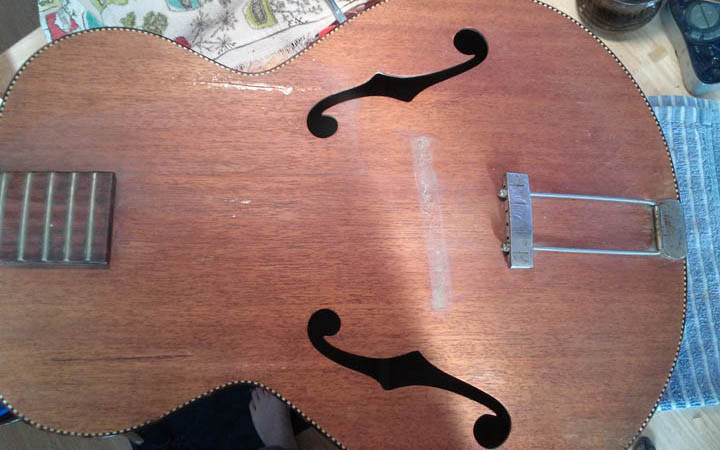
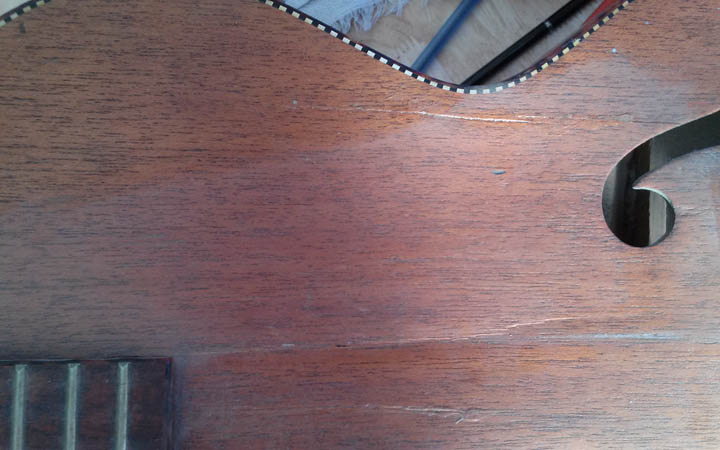
One side crack had been repaired before, and the missing chunks were filled with glue. The second crack, split along the upper hip slightly smiling, was clean and open. The white scruff marks surrounding it told a story of being dropped.
The neck was hanging to the body like a child’s first loose tooth — dangling and desperate to stay in, but without any means to do so. The remnants of a lacquer footprint under the fretboard extension painted an image of a brand new archtop in the hands of its newfound owner.
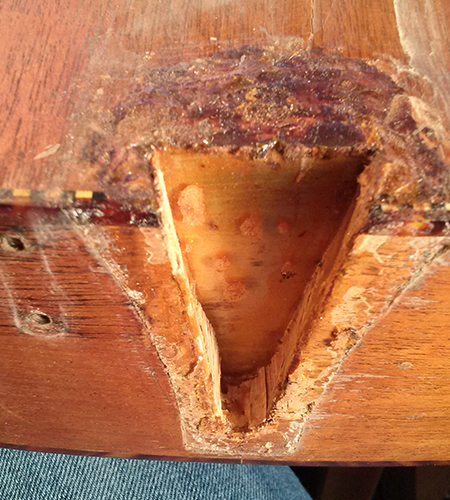
The layers of dried glue told the story of multiple neck sets — one with wood glue, one with hide glue.
As I removed the neck, the wood of the heel was very brittle and needed a few chips fabricated and glued into the missing puzzle pieces. While that dried, I went to work resetting the previously repaired and uneven top cracks.
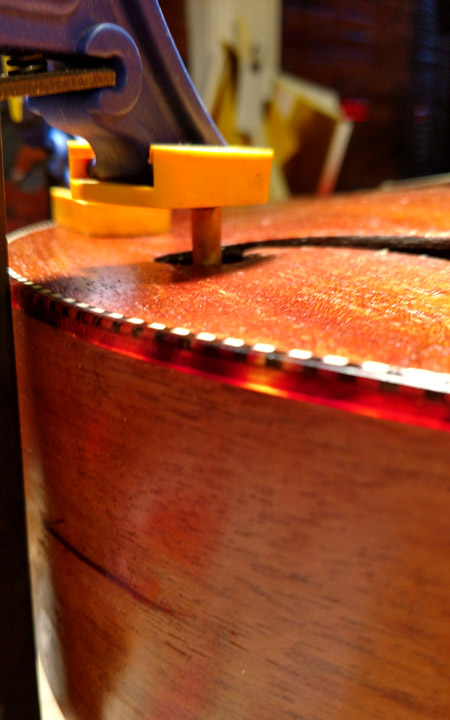
Adding to the difficulty of working with an archtop was the brittleness of this exposed mahogany wood. I had to get creative about how I added pressure only to specific parts.
I used spool clamps to close up the side cracks, as well as a magnet sandwich to lay down a flaking piece of wood.
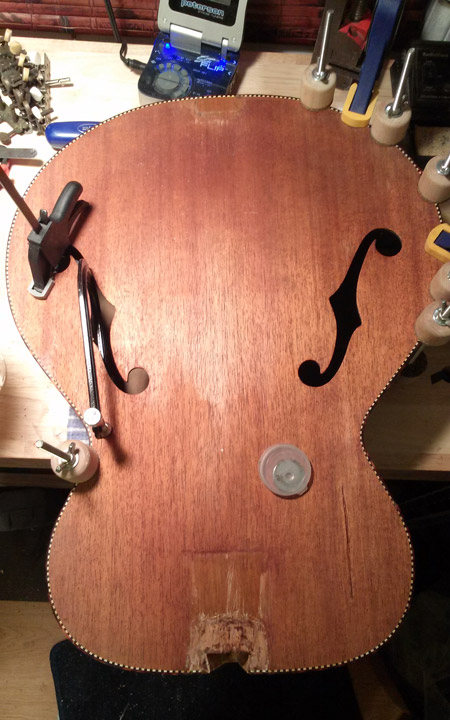
After all was set and done, the body and neck were lightly sanded. I did this only for the necessity of cleaning and deburring the wood, for it was far too thin and brittle to sand out all of the deep sanding marks left from the previous attempt.
Five wet coats of satin lacquer were sprayed. “Wet Coat” is a term used to describe the flow or amount of lacquer sprayed with each coat, meaning fairly thick. When you use this technique with satin lacquer, the outcome is a nice, not too shiny, vintage–looking patina.
Once the guitar was dry and the hardware was put back on, a good deep cleaning of the frets and conditioning of the fingerboard was the last step. Strung to pitch, she sang.
The Fine Print of Repairing Vintage
Restoring vintage instruments can come with a high price tag. It’s important not only to find an experienced repairer, but to know your budget and exactly what you're investing in.
Not all vintage instruments will yield a financial return. This one in particular was so beat up and neglected that I did just enough work to allow for the guitar to be a healthy, playable instrument again.
The full monty would have included a refret and planing of the fingerboard, a neck pocket rebuild, and taking off the top and repairing (or replacing) the braces and cracks from the inside out. All of this would have allowed for the use of a newer bridge, better action adjustment, and any other desired modifications in the future.
But as it stands, this Kay is as great as it can be and is back in a musician’s hands once again.
—
Thanks to Chelsea Clark for submitting this project to us. Her repair shop, Guitars and Caffeine, is located in LA.
Have your own projects and repairs you'd like to show off?
Submit your photos and descriptions to [email protected]