Everyone loves the sound of a vintage electric piano. But some of the allure of classic keys comes from tape and tube saturation or even the crackle and pop of your record player. When producers sample those older tracks, that old grit can help make their keys come to life.
Today’s easy drag-and-drop sampling and the ubiquity of electric piano software instruments can get you close to the Rhodes, Wurlitzer, or other classic keyboard sounds of the past, but they can also, at times, sound lifeless, cheesy, or just not quite right.
Luckily, modern producers have found clever ways to get retro or sampled sounds from hi-fidelity sources.
For example, take a listen to Anderson .Paak’s “Without You.” In the track, he samples Hiatus Kaiyote—a contemporary Australian band—but he manages to make the song sound like it was recorded in 1975, not 2015.
By running keyboard tracks through proper EQ, compression, analog modeling, and reverb, you can get the very same effect on your freshly minted keyboard sounds, without having to smash your head against an MPC.
Make Sure It Sounds Good Before You Mess With It
Most digital piano sounds are especially tricky to sell as the real deal, but solid EQ and compression are the best place to start. Use this frequency chart as a guide to tone-sculpting piano and Rhodes sounds:
- 50Hz–100Hz = Bass
- 100Hz–250Hz = Low-Mid
- 250Hz–1kHz = Mud City
- 1kHz–6kHz = Presence
- 6kHz–8kHz = Clarity
- 8kHz–12kHz = Air
Note that every patch is constructed differently (especially organ sounds), so there isn’t a cure-all EQ setting. When in doubt, use your ears and do your due diligence—it’s our job as producers and engineers to know which frequencies belong to which keys. Boosting the right (or wrong) frequencies makes a world of difference.
Use Waves’ SSL G-Channel plugin (included in the Waves SSL 4000 Collection, Waves Studio Classics Collection, and other bundles) for both its equalization and its dynamics circuit, though you could also use Waves H-EQ or any of iZotope’s equalizers to scale back the low-end woof and add presence and clarity before sending it to a compressor.
Try cutting around 3dB at 300Hz if your piano sound is muddy and lethargic. Conversely, you can boost 100Hz–250Hz by 1dB–2dB to add warmth and roundness. To reduce cheesy digital sounds in a patch, I’ll usually take out around 3dB of somewhere between 600Hz–800Hz on piano and Rhodes.
Similarly, 1dB–2dB of reduction around 1200Hz will help de-gunk patchy high-mids. To add percussive attack, I’ll also add around 3dB around 6kHz–8kHz, which yields remarkable top-end definition.
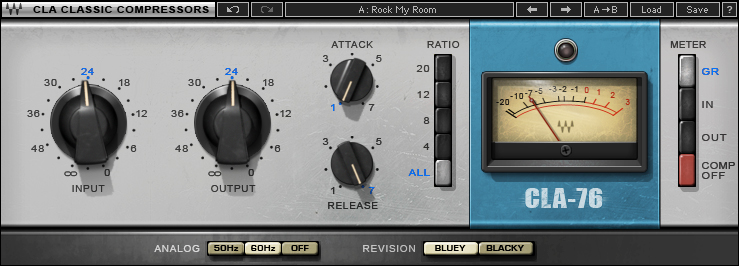
If you used an EQ plugin that doesn’t have its own compression, sending your EQ’d tracks to a 1176 simulator like Waves’ CLA-76 is an excellent choice. Aim for a 2:1 ratio and about 3dB of gain reduction.

If you’re still finding that your tone is lifeless after your initial EQ, you can use an Expander plugin, like the Noveltech Character, which will amplify existing upper-register harmonics, to enhance your sound.
Use a Single-Band EQ To Add a Low Cut After Your Compressor
Add a low cut anywhere from 800Hz–1400Hz and you'll start to hear the sampled sound taking shape. Choose a cut right where you hear the midrange frequencies start to drop out.
You don’t need to use a sophisticated, colorful plugin, and most DAWs will have native EQ plugins that’ll do the trick. I usually use Logic’s native Single Band EQ because of its simplicity. For Ableton users, use EQ8, EQ3, or the Auto Filter. For Pro Tools, use EQ III.
Keep in mind that even though you’re cutting some fundamental frequencies, this cut shouldn’t make your track sound completely thin and choked—unless that’s what you’re going for, in which case, you do you.
Add Analog Saturation and Noise
Any plugin that can emulate tape and tube saturation or the charming pops of vinyl will help give character to your keys. I like to use iZotope Vinyl and Waves Kramer Master Tape in tandem to create an ideal sampled effect, almost as if the track was tracked to mono and then sampled to tape.
Start by dialing in Vinyl’s parameters:
- Mechanical Noise adds breathy low hiss.
- Wear simulates record groove erosion.
- Electrical Noise adds a charming ground buzz.
- Dust controls the “pops.” Dial in with the Amount knob.
- Scratch determines the depth of the scratching sound, while Amount here determines how many simulated scratches are on the track.
- Warp Depth adds a phasing effect. Dial in further with Warp Model.
iZotope Vinyl also gives you two gain stages (one input, one output), a Stereo/Mono Switch, an RPM knob, and a decade-specific modeling algorithm, giving you a wealth of analog noises and countless combinations of those sounds.
For sampled piano and keyboard sounds, try dialing in around 18 percent of Wear, 30 percent (or -12.7dB) of Dust, and 10 percent Warp Depth, but each sample will respond differently to the plugin. Once you’ve set your ideal vinyl depth, kick it off to Kramer Master Tape to give it extra analog zest.
Generally, Master Tape sounds best when the input or “Record” level is just kissing the red line on the VU meter. From there, you can crank up the Flux to about 9 o’clock to get some more tape saturation on your sample for extra degraded quality. You can also use Master Tape’s Slapback to create some extra air underneath your track. However, I prefer to send the track to a post-fader reverb bus for maximum control over the reverb environment.
Use Time-Based Effects To Add Space
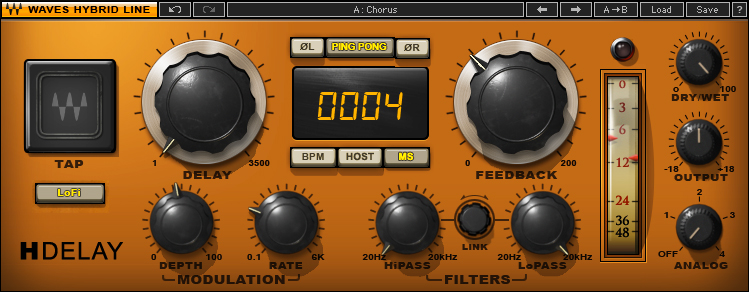
I usually use RVerb's Plate II mode (which can be found in Waves' Renaissance Reverb) at the end of the chain, which will add a little lift to the sample. But you can create some off-the-wall sounds using Waves H-Delay’s Flutter Echo and Tape Delay settings as well. Put your desired time effect on a post-fader bus and play with the effect settings to add space to the track.
I like to set RVerb to a medium-sized room, with a short delay time and a touch of pre-delay. Since it’s on a post-fader bus, don’t be shy about cranking up the effect’s depth, though it shouldn’t envelop the whole track. The purpose of adding reverb is just to add a little bit of space between the sample and the rest of the song.

Pan Your Sample To Make It Sound Authentic
Samples are not usually stereo tracks, so for added believability, try panning your sample slightly to the left or right. Make sure that your reverb bus is panned at or near the same angle as your keyboard track for optimal effect.
There you have it—a lush, sampled keys tone that will impress even the most dedicated crate diggers. Think we missed something? Let us know in the comments.


