
Guitarists who habitually use tube amps tend to be aware that the tubes themselves play a significant part in shaping the sonic personalities of those amps. In some cases it can be pretty easy to change up an amp's fundamental characteristics, too, just by changing tubes in some crucial positions—and the tube that affects the biggest sonic change in most amps is the one we call "V1" (for "valve number one"), the first preamp tube that your guitar's signal hits after entering the amp's input.
The following discussion of preamp tube swaps, therefore, will focus on the effect of changing out the tube in that position, but be aware that you will want to refer to your amp manufacturer's user's manual, schematic, or other technical information for the amp in question to ensure you are correctly locating the first preamp tube in the channel to which you want to apply these tone tweaks. If you have a two-channel amp, for example, and want to alter the characteristics of the second channel, the preamp tube you need to change might actually be the second in line (generally referred to as "V2"), even though it's the first tube in that channel.
Also be aware that in many amp designs, each of two channels uses half of the same preamp tube, since the most common preamp tube types, called "dual triodes," essentially contain two individual gain stages within the same bottle. So consult the correct documents to ensure you're locating the right tube in the first place, then have at it.
Gain = Tone, and Vice-Versa
In this article, we're mostly going to focus on altering your amp's sonic performance by substituting different tube types to induce different gain levels early in the preamp stage. You can also achieve slight alterations in frequency response by changing from one make of tube to another—to make a dark amp a little brighter or a bright amp a little darker, for example—but many new-make preamp tubes have been afloat on the market for quite some time, and along with that their manufacturing formulae might change at a moment's notice.
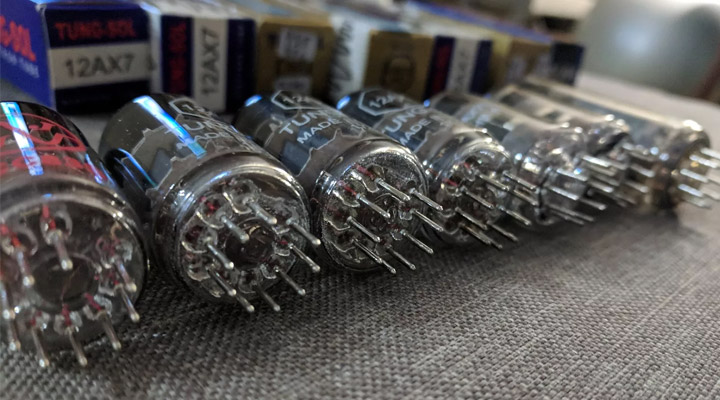
This means that we might discuss a specific tube here as "a good way of adding warmth to your amp," only for that advice to have been made irrelevant by the time you read this and purchase that specific tube to try it out… and discover that they're not makin' 'em like they used to. That being said, if you want to buy three or four 12AX7s by different makers and experiment with the ways in which each induces a slightly different frequency response, go for it. It's a relatively inexpensive means of doing some tube-tasting of a different sort.
More to the point here, though, is the fact that the gain of the first preamp tube—often referred to as a "gain stage"—very directly impacts the tone that you achieve from the amp as a whole. Which is to say, while guitarists do often use that ubiquitous term "tone" to refer to frequency-based sonic characteristics, we're just as likely to equate tone with the gain level induced by any preamp stage, and by other sonic artifacts associated with that gain, such as the proportion of clipping—clean, crunch, or all-out distortion—induced in the guitar signal at that stage.
The Gain Range: Four Levels of Hot-to-Cool Tube Types
To that end, let's consider what four compatible nine-pin, dual-triode preamp tube types can bring to the table as regards the gain-making potential of your first preamp-tube slot, and how swapping one for the other can noticeably alter your amp's performance. And yes, you can reduce the gain level of any channel in your guitar amp by just turning down the first gain control (variously labeled volume, gain, drive, etc.), but changing it up via the correct tube swap can alter the nature of that gain stage and your amp's overall response as a result, in what is often heard as a more all-encompassing alteration of the amp's sonic characteristics.
Note that all of the following tubes can be used as direct replacements for each other in most cases, although one, the 12AT7, requires a slight caveat to that statement.
12AX7 – Gain Factor 100

We'll consider the 12AX7 (called an ECC83 in the UK, or a 7025 in some older US-made tubes) as the baseline in this examination, since it's the most common preamp tube type in use, particularly in contemporary guitar amps. It's also the hottest tube in this selection—that is, it has the highest gain factor, at a factor of 100—so most amps that carry one in the V1 position are coming to you at their highest potential gain level, and that's also the state in which they're most familiar to the majority of players.
Why would you want less gain in this position? If you're going for all-out metal or shred, chances are you don't, and in such cases a good 12AX7 is likely your best bet. But if you haven't tried such swaps before, you're likely to be surprised by what a tube with a lesser gain factor will do to your amp's response, right off the bat. And even many heavy-rock styles can sometimes benefit from a less slamming tube in V1.
A good 12AX7 can sound great kicking off your amp's sonic and gain characteristics, no doubt, but this tube is also associated with a slightly harsh distortion characteristic when pushed hard in some circuit designs, inducing a lead tone that players describe variously as "fizzy", "fuzzy", "tizzy", or maybe that "wasps in a tin can" sound." Tamping down the gain a little can provide a means of taming that.
Shop 12AX7 Tubes on Reverb5751 – Gain Factor 70

One of the most popular swaps, a 5751 will reduce the gain of your first preamp stage by around 30 percent, which can often be enough to tame a fizzy overdrive tone without sacrificing too much of the power and muscularity from the amp's overall sound.
This tube has been a favorite of many professional players for just this reason, and was one of the tricks that Stevie Ray Vaughan often used in order to achieve a bolder, firmer breed of crunch from his vintage Fender amps.
Lowering the gain to achieve a better overdrive tone might seem counterintuitive, but doing so will often help you induce less distortion in the early stages of the amp, while passing a fuller, more full-frequencied and less compressed signal along to later stages. That, in turn, means you can push the output stage harder to induce a bigger, beefier crunch from those tubes without passing along the fizziness of an already-distorted preamp tube.
Shop 5751 Tubes on Reverb12AT7 – Gain Factor 60

The 12AT7 tube is often found in reverb stages or in the phase inverters of blackface and silverface Fender amps in particular. It can be used in the V1 (or equivalent) position in many amps to lower that first stage's gain a little and thereby achieve more headroom and a tighter overall tone.
Note, though, that while all of these tubes can generally be substituted for each other with no problems, the 12AT7 is often set at a slightly different bias level than the other tubes discussed here, so it might not perform optimally in some circuits. Since you're unlikely to harm the amp or the tube by trying it out, though, the best route if you've got a good spare 12AT7 handy is to just pop it in for a while, play, and see.
Some players find that a 12AT7 yields a slightly dull, cold tone when used in the V1 position, but that conclusion seems to vary from amp to amp, and indeed player to player. If you're looking to tame a first gain stage that's a little raw and hairy and needs some tightening up, the right 12AT7 might be just the trick.
Shop 12AT7 Tubes on Reverb12AY7 – Gain Factor 40

Its gain factor of 40 might look like a dramatic decrease from the 70 and 60 of the 5751 and 12AT7, but as you work your way down from tube to tube you're likely to notice only a fairly gradual decrease in volume and gain from one to the other. The 12AY7 will push your amp's front-end the least of the four, but in many cases that's exactly what you want.
This was the original tube in the first gain stage of most Fender tweed amps from the mid-'50s on, and those circuits can often sound too ragged and unhinged with a 12AX7 in that socket. Gain aside, a good 12AY7 can still sound very full, rich, and well-balanced, and it makes a great way of achieving maximum headroom and minimum early-stage fizz from many preamps in other types of amps.
Contemporary makers occasionally recommend 12AY7s in newer, non-tweed-based amps too. Brian Gerhardt of TopHat suggests it as an alternative for the V1 position in his Super Deluxe, Super 33, and the Top Boost channel of the Supreme 16. Playing against type, I even tried one in the lead channel of a PRS MT15 Mark Tremonti Signature amp I was testing out recently, and it was just the thing for converting that scorching, high-gain shred channel (great at what it does when you need it) into a channel pitched just right for aggressive blues-rock and classic-rock.
Shop 12AY7 Tubes on ReverbHow to Remove and Replace Preamp Tubes
It's relatively easy to swap preamp tubes in most amps, but read your owner's manual and any available warranty information before doing so to ensure you're doing it according to any manufacturer warnings or recommendations—and that doing so won't void your warranty (it shouldn't… but just to be safe). Also, don't touch any hot tubes in the process. If you want to swap in something different after playing the amp with what's already in there, let it cool down sufficiently first.
Before proceeding, turn off your amp, unplug it from the wall, and examine it from behind and remove any necessary panels blocking access to the tubes, and ensure that you will be able to look into the preamp tube sockets to align the tube pins correctly when putting in the new tube before you take out any existing tubes (a flashlight is often a big help here). If these tubes are easy enough to access and the sockets easy enough to see at this point, remove any metal shield over the tube you intend to swap—usually by twisting it about a quarter of an inch counter-clockwise and then pulling gently downward—to expose the tube itself.

To remove the tube, grasp it between thumb and fingers and start wiggling it gently back-and-forth and in a very slightly circular motion, while pulling gently downward. Don't squeeze too hard, wiggle too dramatically, or force it. A gentle, persistent motion should work to pop it out eventually.
Once that tube's out, note the gap between the nine pins in a semi-circle on its base, and how that will guide you in correctly aligning the replacement tube in the holes in the socket. Line it up carefully, wiggle it gently into the pin contacts, and don't force it. If the tube isn't going in relatively easily, forcing it will quickly bend a pin, and possibly crack the glass housing. Take your time, take it easy, and re-align with another look inside the socket if necessary.
If the amp's chassis needs to be fully removed from its cabinet to successfully replace preamp tubes, take it to a qualified repairman for proper service. Doing so yourself will expose you to dangerous—and potentially lethal—voltages.
While checking out these tube swaps for yourself, notice how they don't just alter the gain, but often change the tonality of that channel or preamp stage along with it. That's because the change of tube type and its lower gain factor interact slightly differently with the preamp circuit as a whole, often, for example, taming an overly bright or harsh amp, as well as increasing its headroom. Experiment when you can, with what you can, and see how preamp tube swaps might help to fine-tune your tone.