At Ceci Guitars, I build instruments with great passion in a small workshop in Italy, and have been for several years. I started because I wanted to have the kinds of guitars I couldn't buy. Over time, it has become a profound passion that pushed me to create instruments that are outside-the-box and have their own personality, no longer copies of other guitars but my original creations. At the beginning, only for me. But now, for all those who share my same curiosity.
In this article, I describe the creation of the prototype of a new guitar. I have never made prototypes until now. I have always passed directly from the idea to the finished model. For this instrument, I felt the need to approach a kind of serial production, for which I needed to check any defect beforehand and to identify all possible improvements.
This guitar, named Vera, is the current picture of my production path, in which I concentrated most of the things I consider the more effective of the previous projects, both in terms of originality and concreteness. The construction, a couple of years ago, of a small four-string tenor guitar, born almost as a joke, turned out to be a fundamental source of inspiration for this project. The tenor guitar was composed of a single central block in sapele mahogany for neck and body, with top and back aluminum plates screwed to it, to give the traditional shape of the body, leaving the sides completely open.
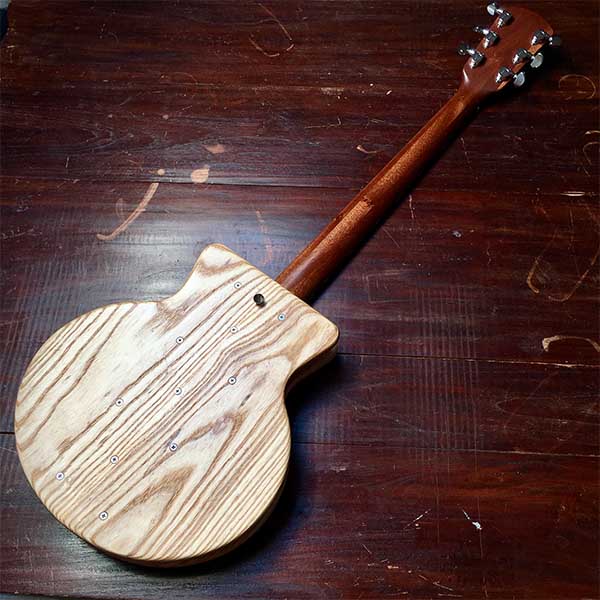
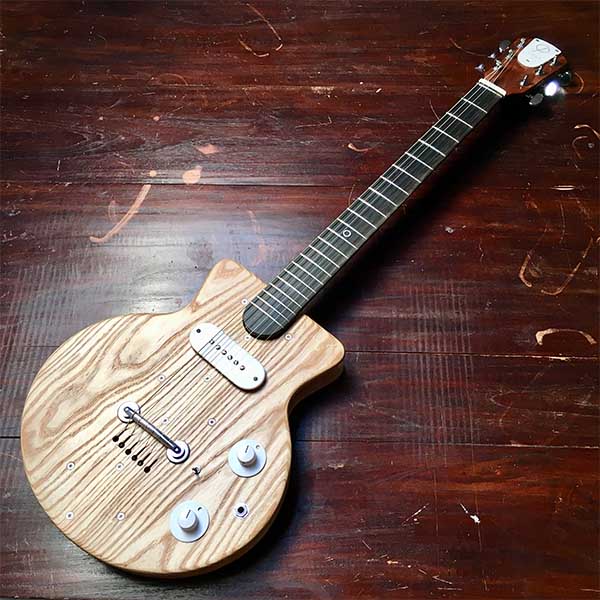
It was then natural to decide to transport the idea to the scale of a traditional six-string guitar, maintaining the same structure, but realizing the two plates in solid wood, both for timbre and ergonomic issues. Always referring to the tenor guitar project, I decided to characterize the design of the instrument by a little body and subtracting elements in order to obtain a minimalist result.
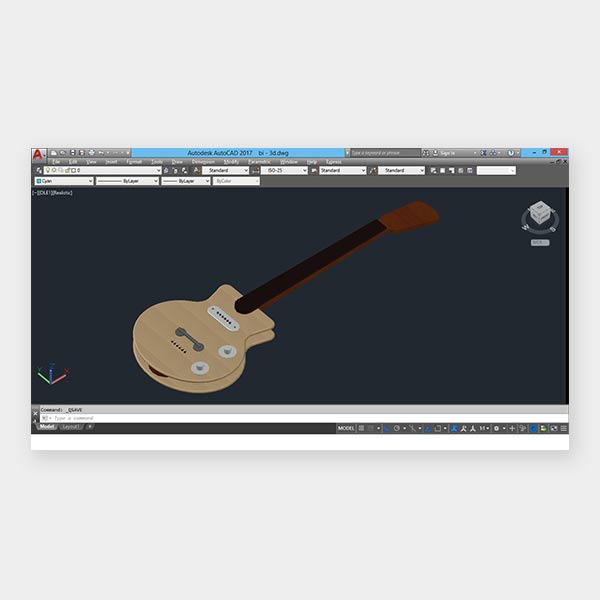
The birth of my every guitar always starts from a design phase on a computer with CAD software. The unconventional nature of this instrument required careful verification of the shapes and proportions. The realization of a 3D model of the instrument has allowed me to make the last changes to the project before proceeding with the work on materials.
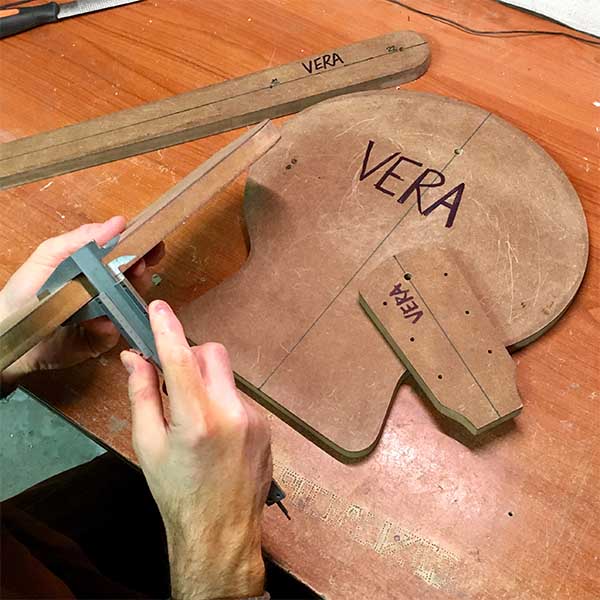
To make the steps of trimming and shaping of the guitar easier, it was essential to create templates with the precise shape of its main parts. Even more so for a guitar that is meant to be replicated many times. The templates had to be reusable.
The templates of this guitar were made starting from 2 cm panel of medium-density fibreboard (MDF), a homogeneous and easily workable material. After cutting it with the band saw and having sanded it by hand to obtain the desired shape, it was protected with a few coats of clear finish to increase its surface hardness.
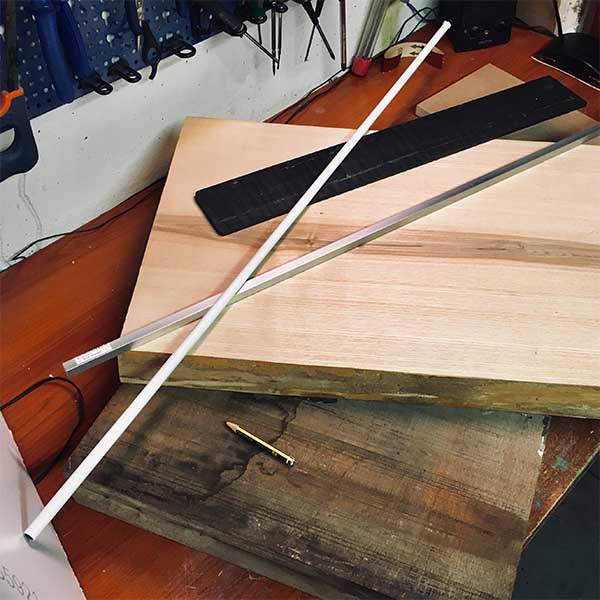
The materials selection always has great importance, because it strongly characterizes the look and sound of the instrument. In this case, the choices were pushed by the particular characteristics of the instrument and by the aesthetic and timbre objectives that were desired. I used sapele mahogany for the central block, european ash for the top and back plates, ebony for the fingerboard, aluminum for the hardware, and PVC forex for plates and pickup cover.

After obtaining a thickness of 2 cm, the sapele mahogany board was cut with a band saw and then shaped with a router machine, using its template as a guide. As you can see in the picture, the central block of the guitar is composed of three pieces of mahogany that were subsequently glued together.
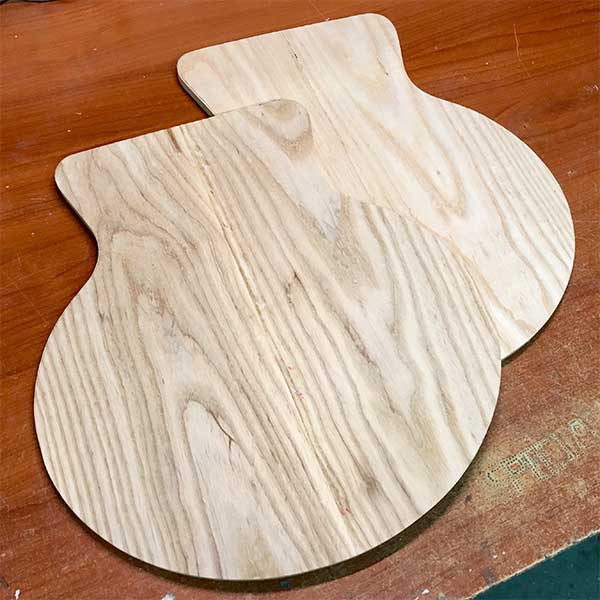
The same workmanship of the mahogany board was performed on the ash board, which was used for the realization of the two plates of the guitar. The thickness obtained with the planing was 12.5 mm (1/2 inch).
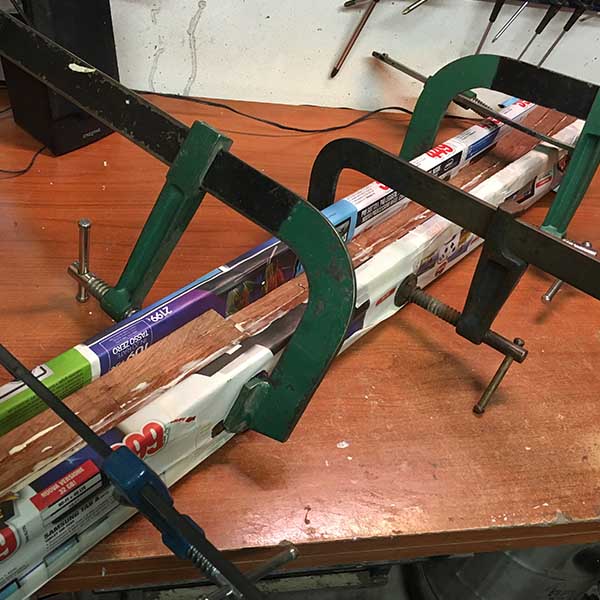
The three pieces of sapele mahogany, previously shaped, were glued together using aliphatic glue and clamps, firmly held tight for about 24 hours. The choice to create the central block in three laminated pieces is inspired by the tradition of archtop jazz guitars, which, in addition to reducing the waste of material, lets you obtain a more stable neck that is less subject to inclination variations, to be corrected with the adjustment of the truss-rod.
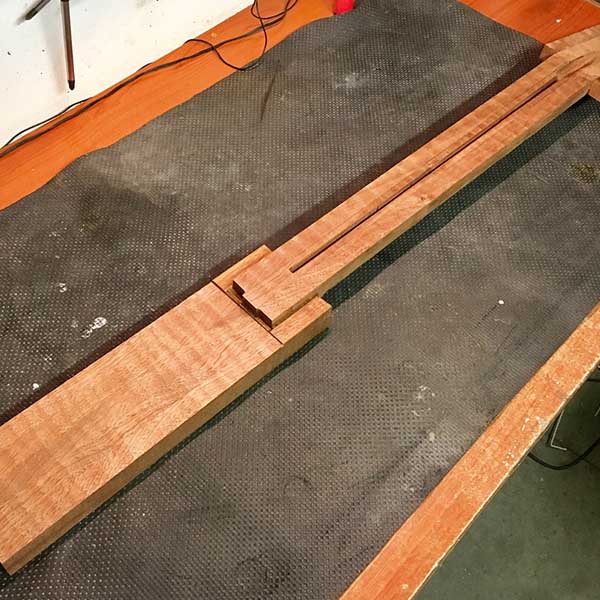
In this phase it was necessary to increase the width of the central block in two zones: the headstock and the fixing point of the top and back plates. The enlargement was achieved by laterally gluing other sapele mahogany slats. Using a router machine, a longitudinal channel was then created in the neck in which the double-action truss rod was later put into. Compared to the traditional truss rod, this makes the instrument setup easier and more precise.
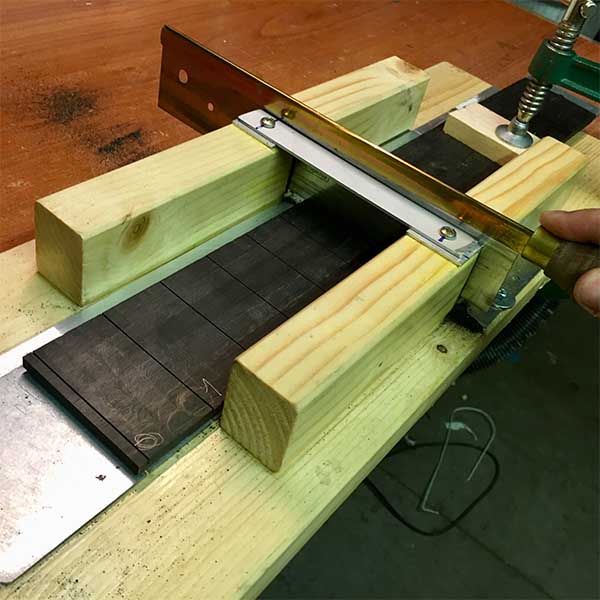
The ebony board was planed to obtain a thickness of 6mm. Using a homemade fret slotting miter box and a fret slotting saw, the fret slots were made. The precision in the fingerboard slotting is very important, because every positioning error determines irreparable intonation defects. I've determined the correct points to make the frets slot with the use of a fret scale templates.
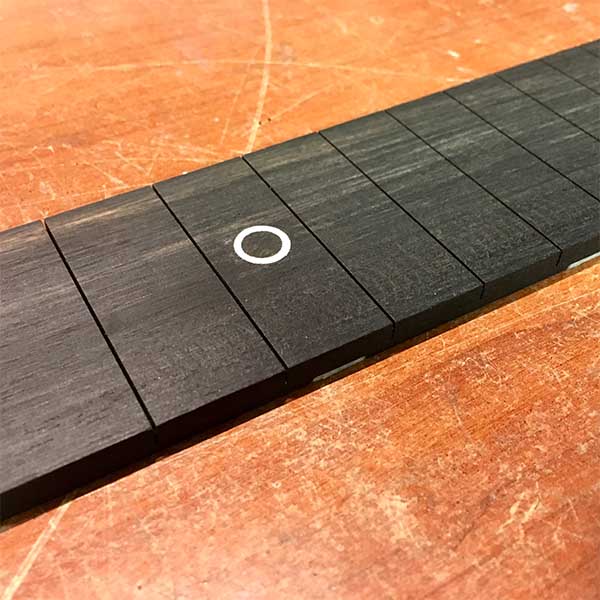
The choice of the shape, the number and the position in which to insert the fretboard inlays, for me constitutes a point of fundamental personalization of a guitar.
For this instrument I decided to insert only a large round inlay at the twelfth fret, made of white plastic on the outside and of the same wood of the fretboard on the inside. To guarantee the guitar's functionality, however, the side inlays have been inserted in the traditional positions, made of rectangular white plastic.
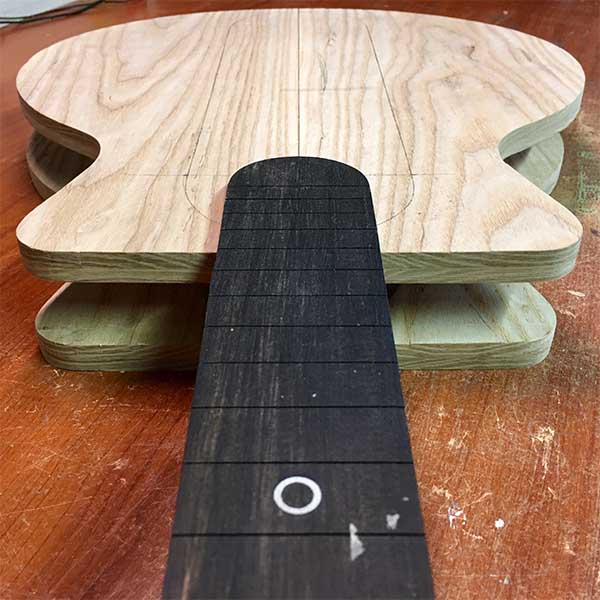
The fretboard was glued to the central block using aliphatic glue holding it firmly in place with clamps for about 24 hours. After freeing the guitar from the clamps, I carried out a first assembly test to verify the correctness of the work carried out up to this point and to adjust any inaccuracies before proceeding with the subsequent steps.
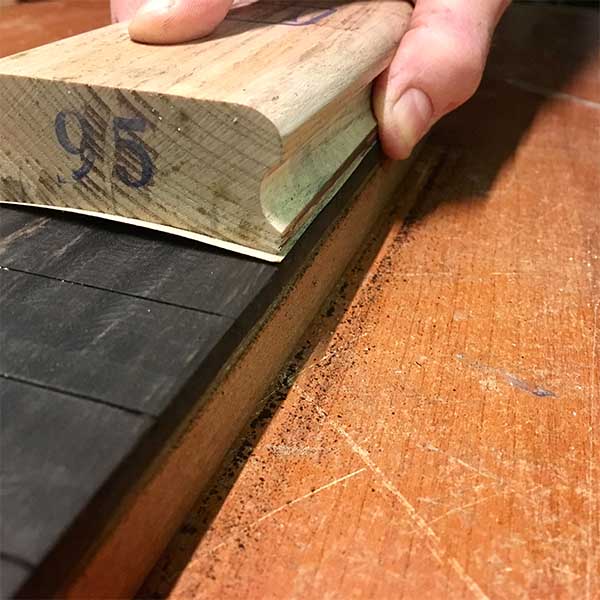
To be playable the fretboard of a guitar must have a curvature with a more or less accentuated radius. For my guitars I prefer a 9.5" radius, typical of vintage instruments. To confer the radius I used a wood block that in the lower surface has, in negative, the same radius of curvature that is intended to be obtained on the fingerboard.
The processing was carried out by affixing the adhesive sandpaper in this part of the block and passing it over the fingerboard longitudinally a large number of times until all the excess wood was removed.
Up to this step the neck of the guitar, in the back side, has maintained a rectangular section. The procedure to obtain the shaping of the neck can also be performed with electric tools but, both for my type of production, and for the satisfaction that I get from seeing the neck that takes shape, I performed the work manually with the use of rasps, following longitudinal lines previously marked in pencil on the wood.
For my guitars I chose a fat vintage-sized neck, which I consider more comfortable and correct to the feeling and peculiarities of my instruments.
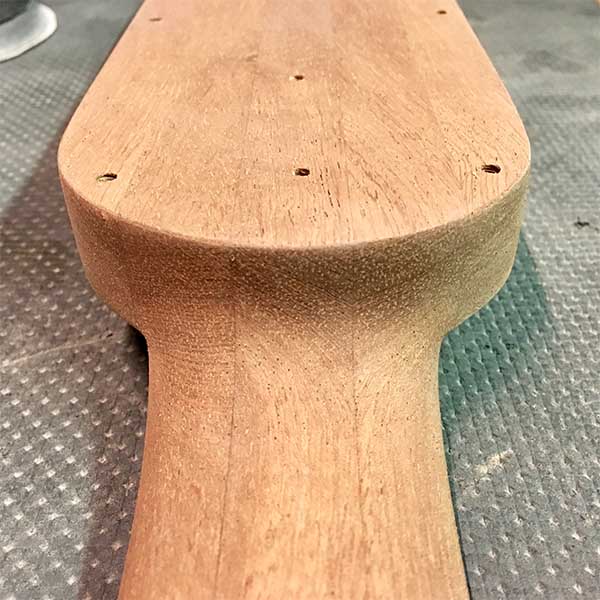
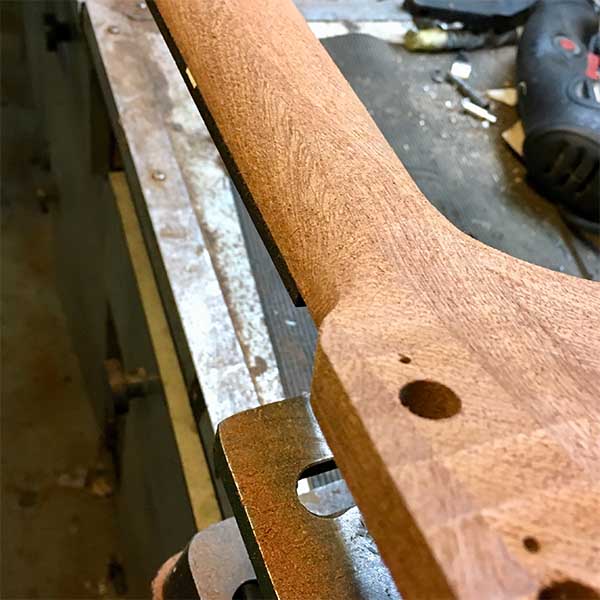
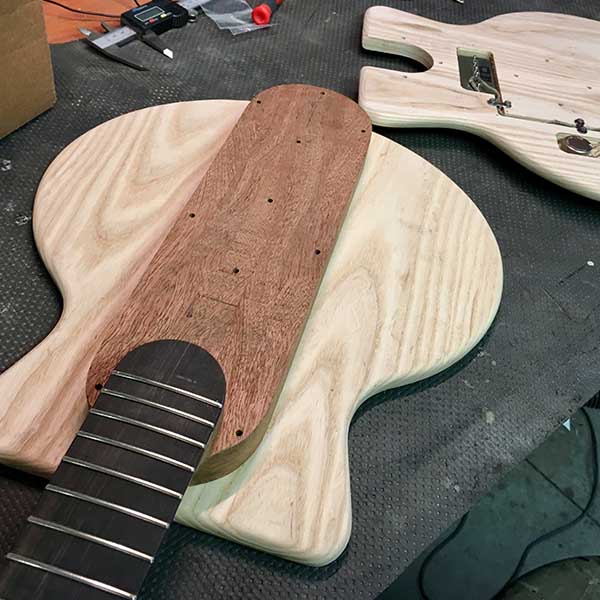
After having obtained the main forms of the central block, with the rasps I have shaped the connection points between the parts, smoothing the edges. In the photograph is visible the shape obtained between the neck and the body.
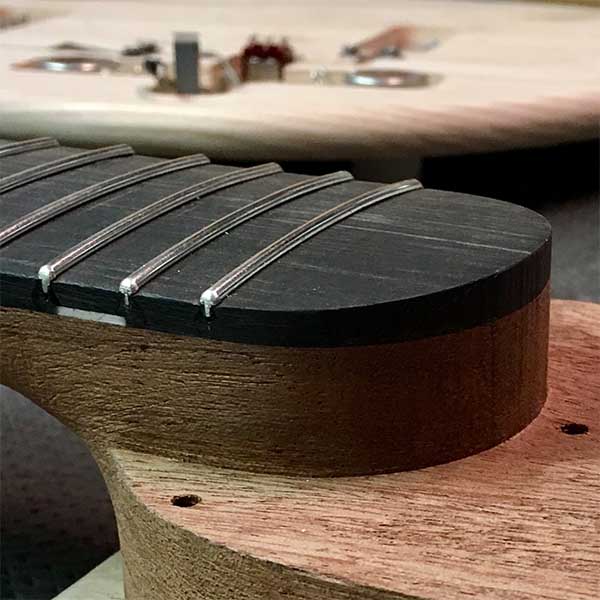
In the slots previously made have been installed the twenty-three guitar frets (the twenty-two frets and the zero fret). The work was done with the use of an arbor press with which the frets were seated firmly and precisely in their respective slots. The edge of the frets was later cut and shaped to eliminate the excess part beyond the external edge of the fingerboard.
Although the insertion was as accurate as possible, the frets still needed a procedure to level them and make sure that the top edge of all was perfectly aligned. At the end of this process the frets were polished with sandpaper and steel wool.
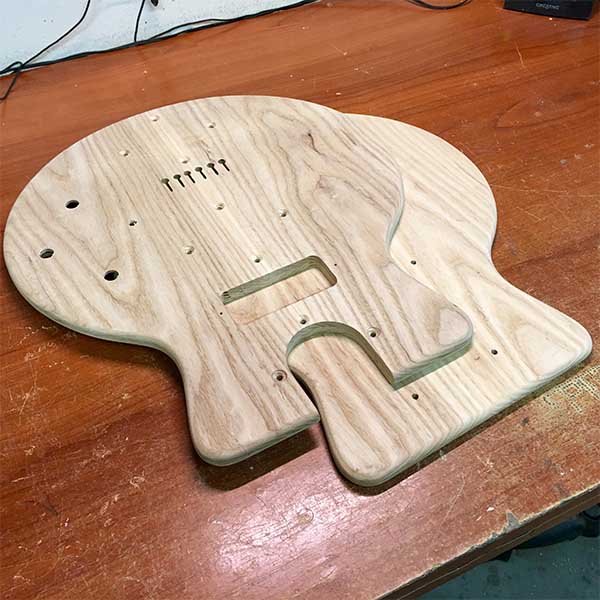
For the two plates all the necessary workings have been carried out to obtain the shape and the definitive functionality as the rounding of the edges, the realization of the holes for the pots and the cavity for the pickup. All the works were carried out with the use of a router machine and a column drill.
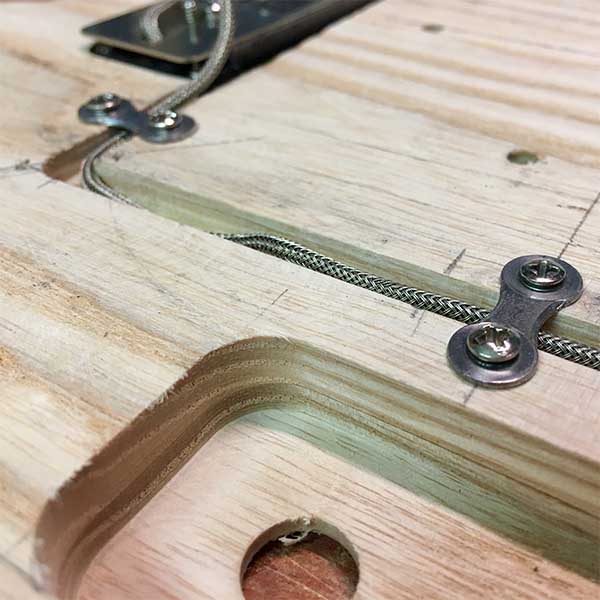
In the back side of the top plate I realized the cavities necessary to install the guitar electronics. In correspondence of the channels for the passage of the cables it was necessary to install metal elements that prevent their movement during the use of the guitar. After searching for the most suitable object and shape, I found optimal the outer plates of bicycle chain.
In the course of my production I felt that it was increasingly important to personally make different parts of the hardware of my guitars. Despite the presence of numerous bridges that you can buy, I struggle to find models that meet my needs in terms of simplicity and design. For this reason I prefer to make them manually even if the work involves a lengthening of the times.
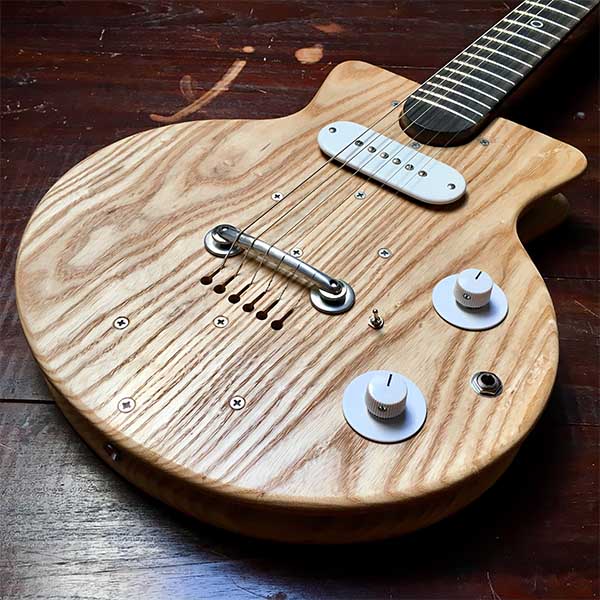
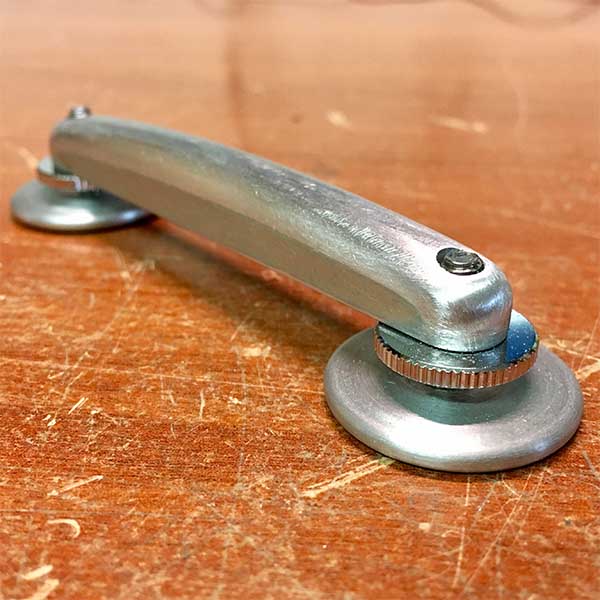
The bridge of this guitar has been shaped manually starting from a solid aluminum bar. Two side threaded bars allow to adjust the strings height. Inspired by archtop jazz guitars, I left the bridge simply resting on the top of the instrument, held in position only by string pressure. In this way the intonation of the instrument can be adjusted simply by manually moving the bridge forward and backward.
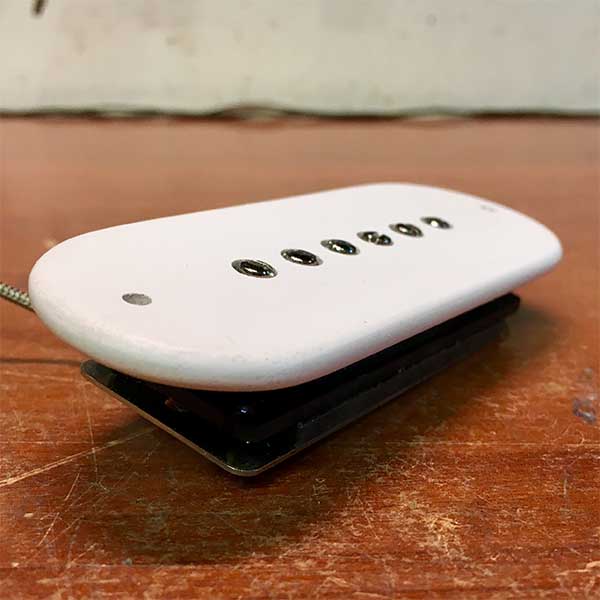
For the first time I decided to customize the cover of the pickup to fit the design of the instrument. The guitar is equipped with a single P90 made by EG PICKUPS in the neck position. The cover was made using a 5mm white forex pvc panel, in which the holes for the magnets and for the height adjustment screws were made, then cut with a hacksaw and shaped by hand with sandpaper.
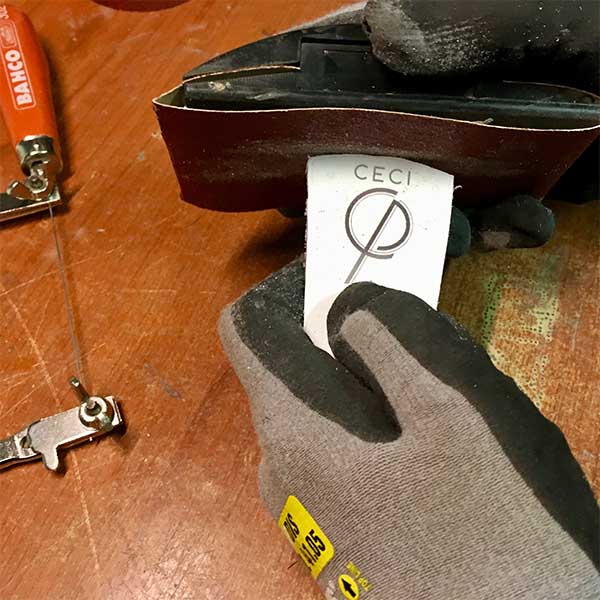
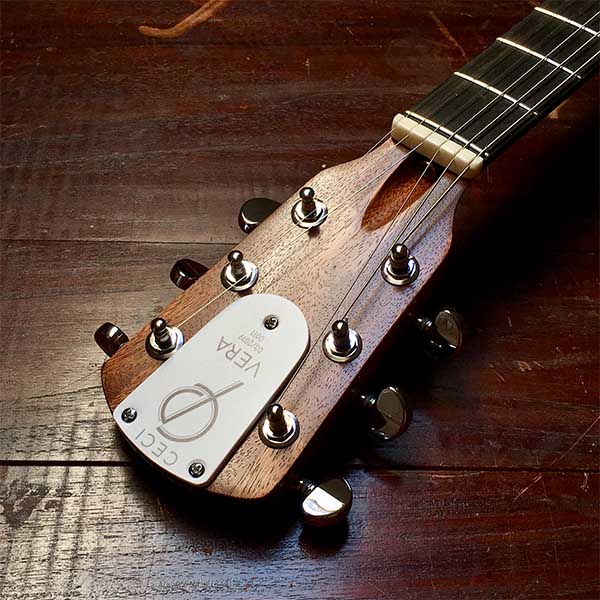
I used a forex PVC sheet also to make the logo plate. For this step a graphic design, previously realized with CAD software, was printed on the sheet. Then the forex sheet was shaped with a hacksaw and finished with sandpaper.
Before we get to the finishing of the instrument, it was necessary to proceed with a preassembly of the instrument to verify that there were no interferences between the parts or design defects not identified before.
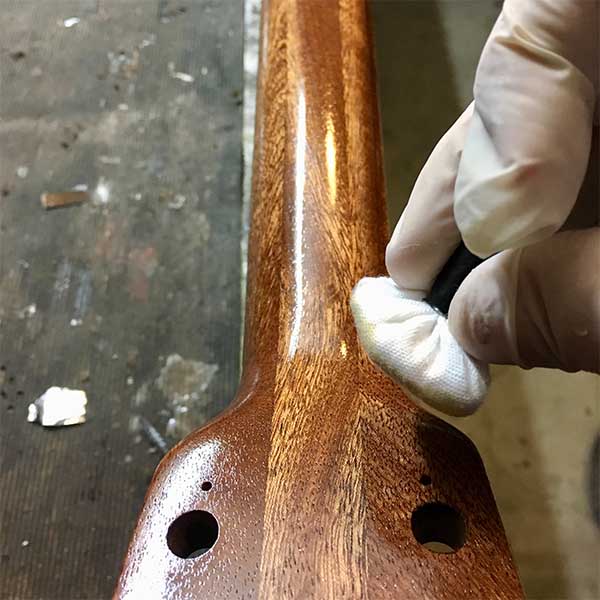
After several passes of sandpaper, with increasingly fine grain, to eliminate every possible sign or scratch from the surface of the wood, the guitar has been finished only with the application of tru-oil, leaving the pores open.
The truo-oil, a polymerized oil created for "gunstock" finish but also widely used for the musical instruments, was applied by hand with a pad in a dozen of very thin coats. After its complete drying the finish was treated manually with steel wool to obtain a pleasant satin effect.
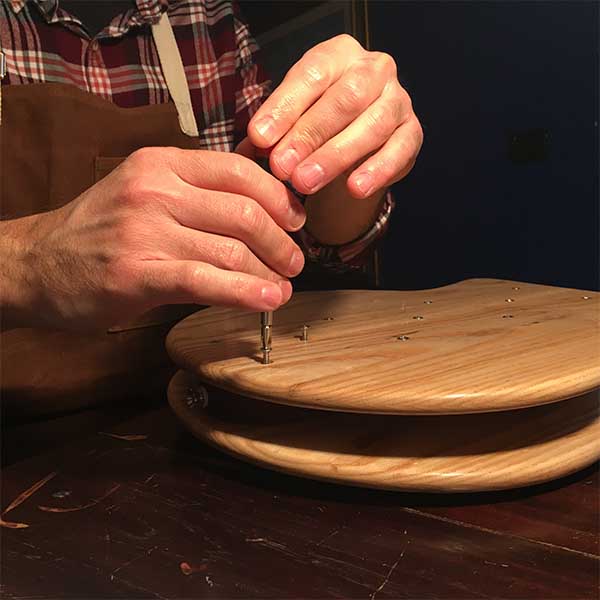
At this step all the parts of the guitar were assembled together. The approximative use of screwdrivers and wrenchs can cause marks and scratches on the finishes of the instrument, for this reason it is essential to perform this step carefully so as not to waste hours of work.
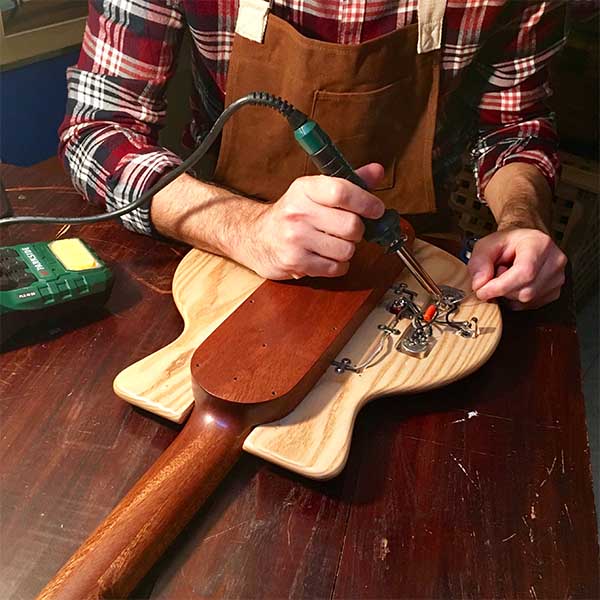
The components of the electronics has been connected using a soldering station. The circuit of this guitar is very simple, composed of a single pickup and two classic volume and tone controls.
As the only exceptions to the concept of simplicity, which is the basis of the project, I added a system called "treble bleed" to the circuit, which avoids that with the lowering of the volume the tone of the guitar lose the treble, and a selector to allow to connect the pickup directly to the jack.
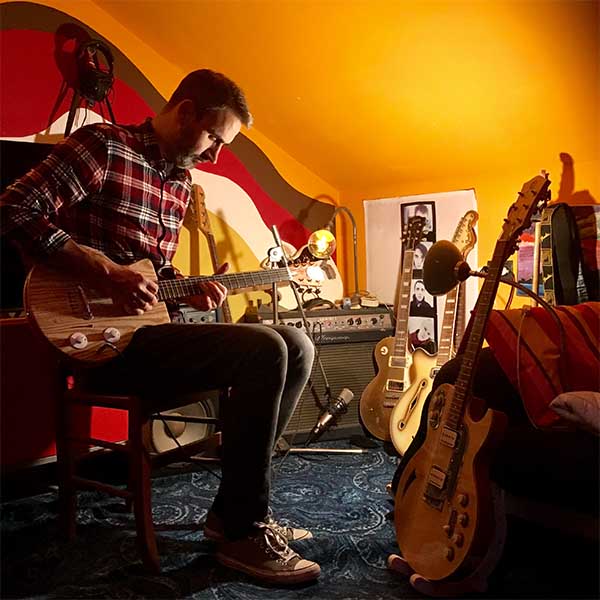
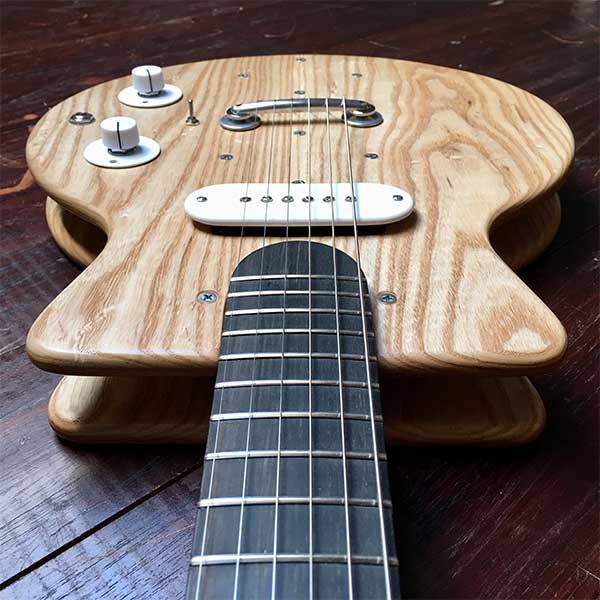
At the end of the work, after the complete setting of the instrument, I tested its sound. It's always the most exciting moment of the whole process, the climax of many days of work, even more important in the case of a prototype in which everything that until now has only been imagined, must materialize into real results.
The instrument surprised me for the remarkable volume it possesses also not amplified, due by the wide vibration freedom of the plates, and for a very personal amplified sound, with a strong acoustic presence and a pleasant crunch.