I was sitting backstage at a festival recently in southern Mexico. We had flown down for just one show, which is fine for me as we got to go through Mexico City, one of my favorites.
In a hurry, a friend ran in who was working as a guitar tech for a different band, and I knew it was almost time for their set. He looked desperate. But, when he tried to explain what audio part he was looking for, he didn't know the right terminology.

I was kind of amazed. Here was a professional stage technician who was missing some basic audio terms—stuff that should be in the vocabulary of anyone who spends a lot of time on stage. When I asked him about it he just said, "No one ever taught me."
Now, this strikes me as pretty lame. Not lame for him not knowing, just lame that there wasn't a good place to go for this type of knowledge. It's true, many things are only learned by experience, but there are definitely a ton of valuable things that we can cover in some easy to watch, five-minute videos.
So, I'm building the resource that I always wanted to see: clear and concise (and free) videos, helpful diagrams, and a place to go for advice on live music and touring production. It's called The Production Academy, and the inaugural course is called "Top 5 Live Sound Tips for Musicians."
I'm sharing my videos below (with additional info from the Reverb team). If you're a gigging musician, technician, or are involved in any way in making music on stage, these are the basics of live sound that you need to know.
Train Yourself to Recognize Frequency Ranges
At its most basic level, sound can be understood as your brain’s interpretation of your ear drums reacting to waves in the air. The frequency of a sound is calculated as the amount of waves per second. The generally recognized frequency range audible to humans is 20Hz to 20,000Hz.
In this video, we’ve split this spectrum into the five frequency ranges you should know if you’re performing or helping to put on a concert: lows, low-mids, mids, high-mids, and highs. While the specific breakdown of these ranges is up for debate, for this video, they’re divided as:
- Lows: 20Hz to 100 Hz
- Low-Mids: 100 Hz to 500 Hz
- Mids: 500 Hz to 2kHz
- High-Mids: 2kHz to 5kHz
- Highs: 5kHz to 20kHz
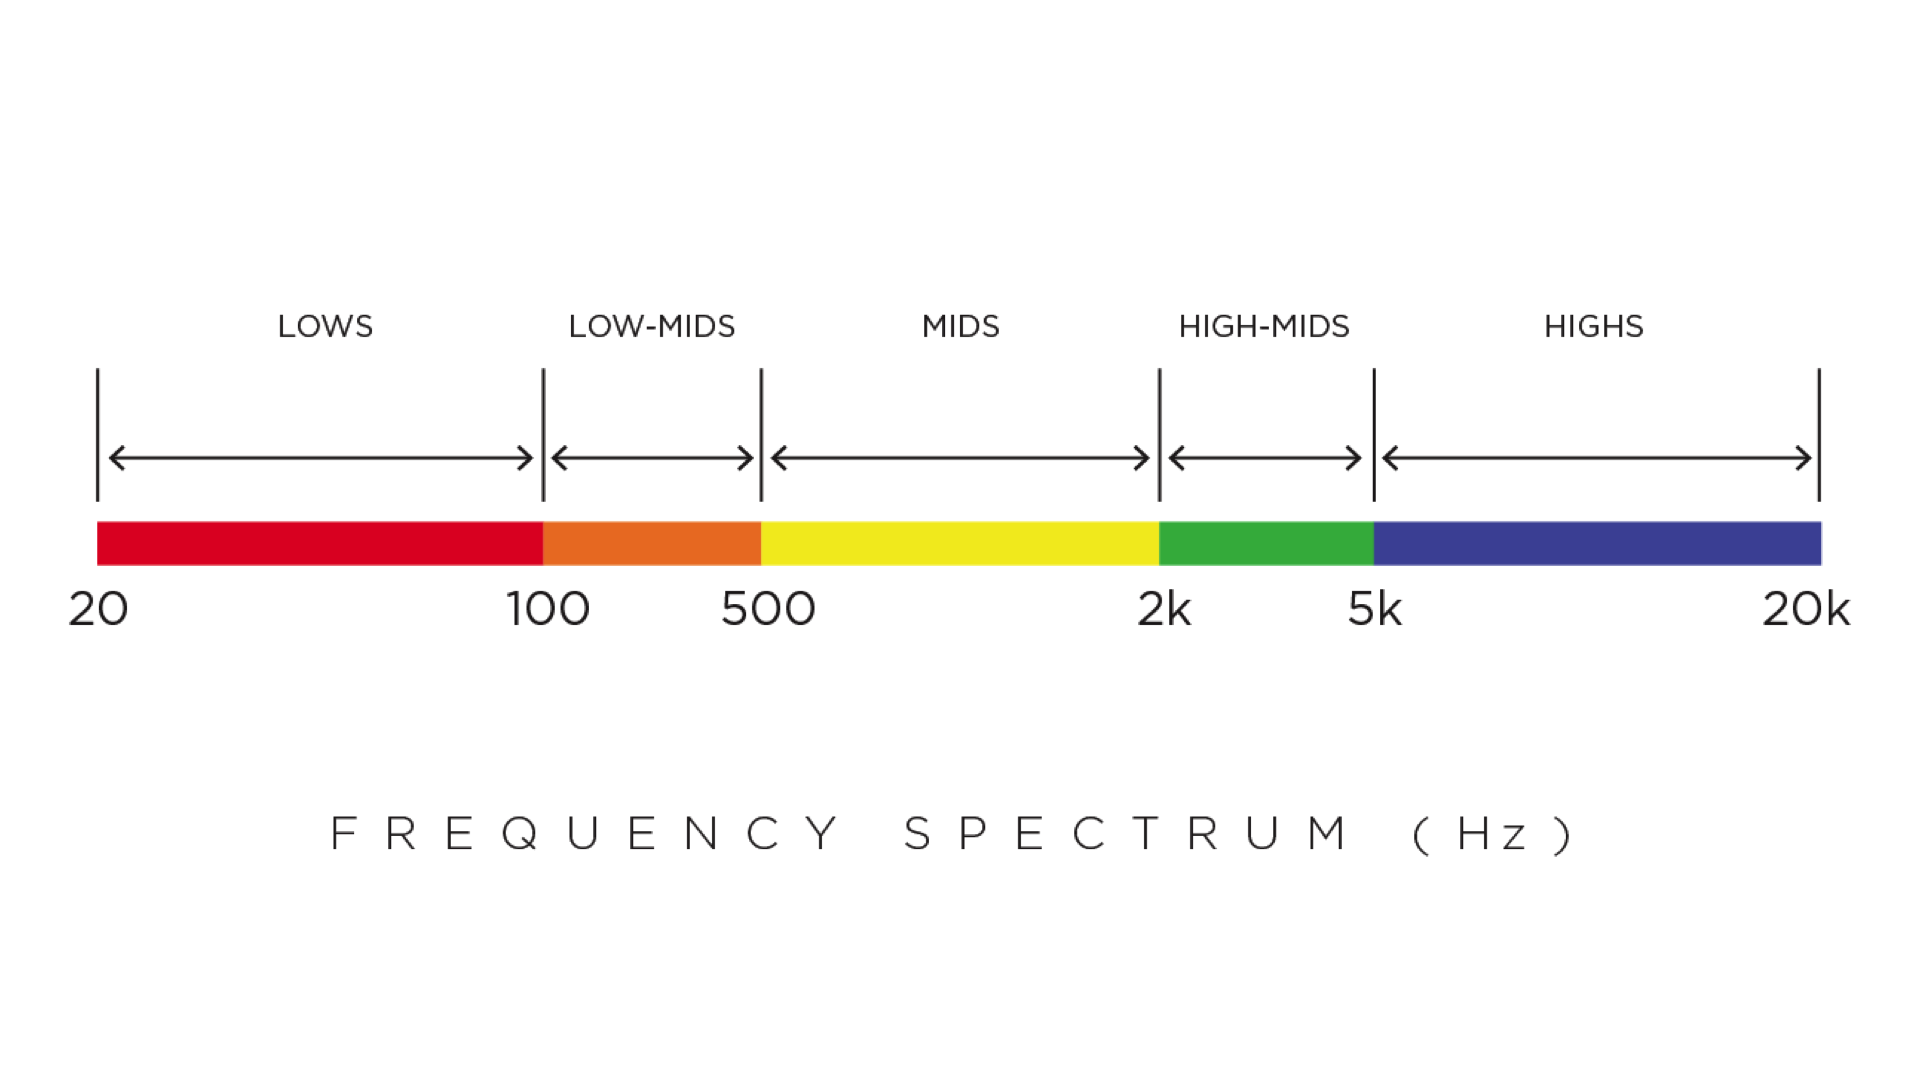
You’ll want to train your ear to be able to recognize these different ranges so that you can quickly identify problems in your mix and adjust (or ask the sound engineer to adjust) accordingly. To demonstrate how each of them sound, we’ll repeat a portion of Neko Case’s “People Got A Lotta Nerve” and listen only to one frequency range at a time.
Understand the Differences in Mics and DI Boxes
For most live sound situations, you're going to capture the sound from the stage to the mixer through a mix of dynamic and condenser microphones, along with DI boxes. Rugged, effective dynamic mics like the Shure SM57 and SM58 are ubiquitous for many instruments and vocalists. They will not require any special care, just plug them in and let the music play.
Condenser mics, which are more sensitive and more expensive, should be handled with more caution. They also require phantom power, which you’ll engage from the console. Common condenser mics for instruments include the Shure SM81 and AKG 414, while the Neumann KMS 105 is a popular condenser for vocalists.
Often, instruments like keyboards and basses will go directly into the mixing board by way of a DI box (instead of or in addition to an amp-and-mic setup). DI boxes take the unbalanced, high-impedance signal coming from an instrument and turn it into a balanced, low-impedance signal suitable for a mixing console.
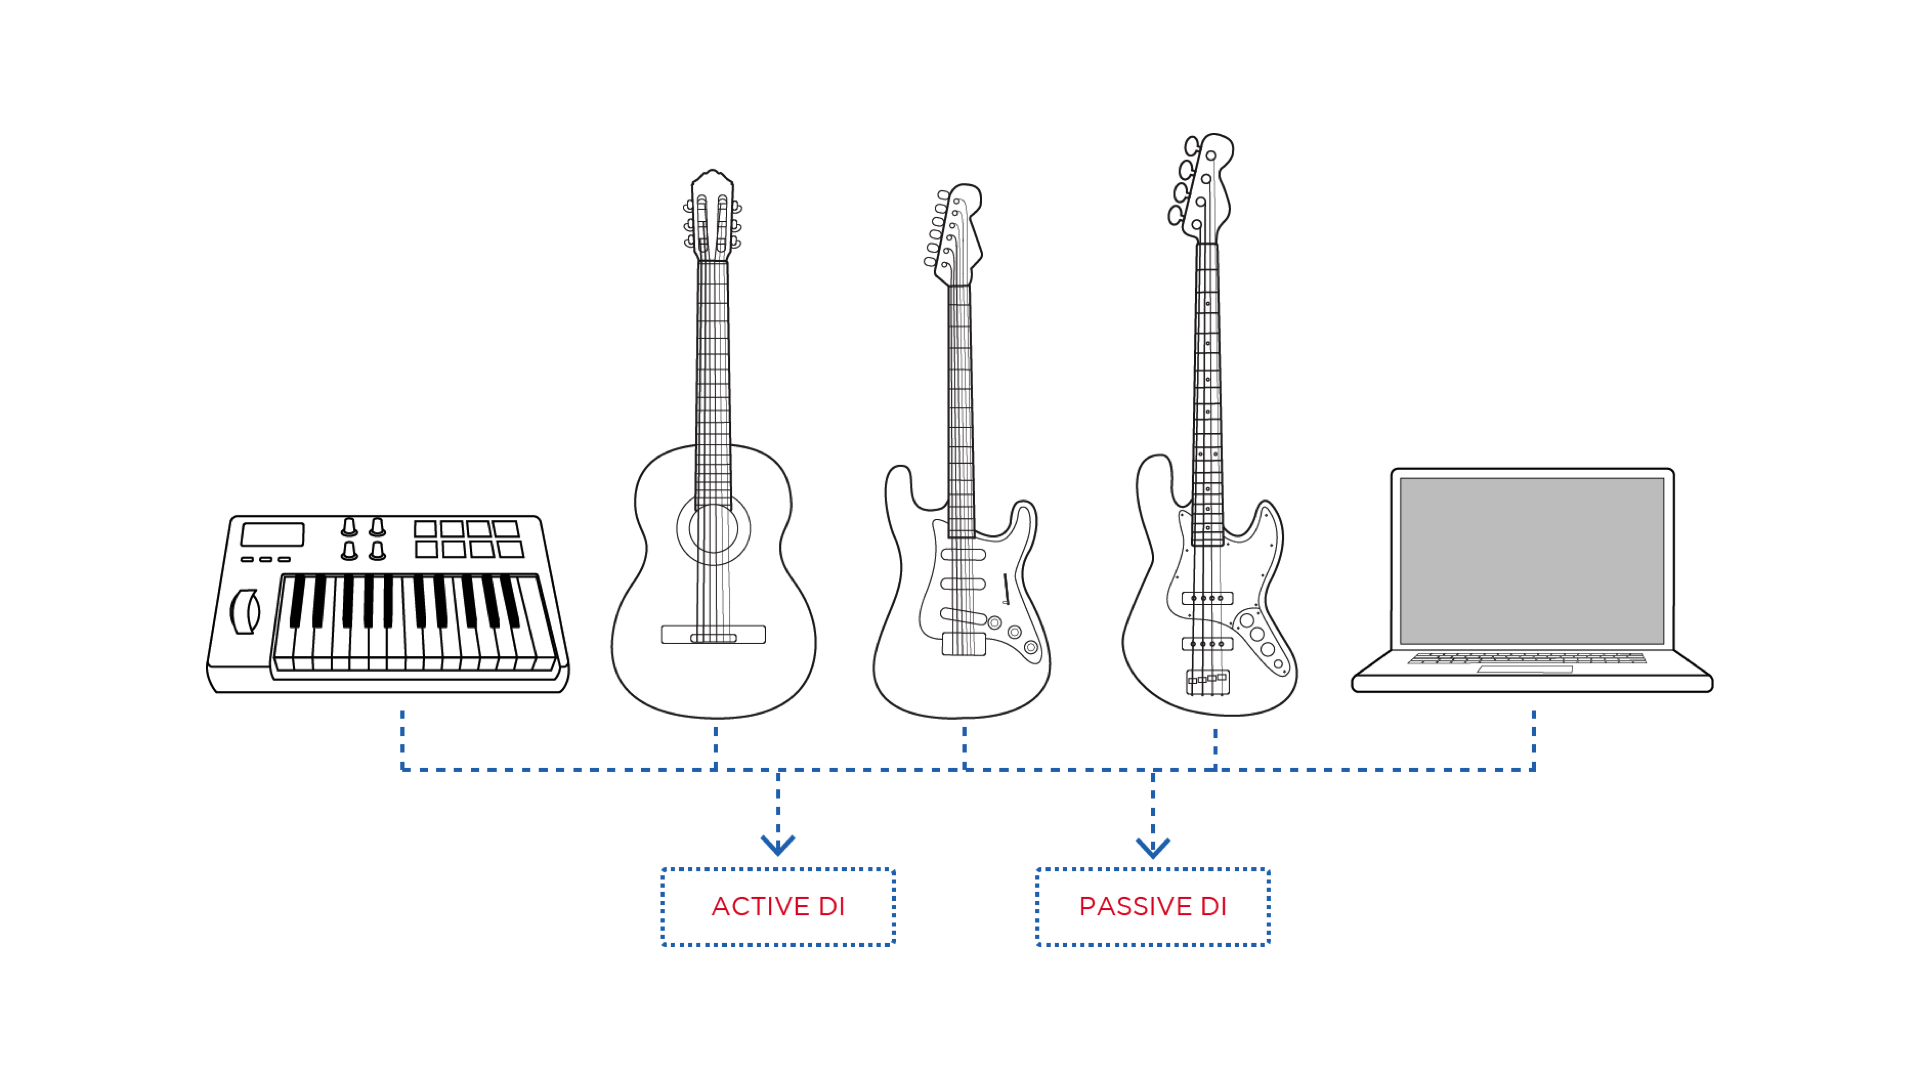
Active DI boxes come equipped with a preamp, which can help smooth and deepen the lows in a signal, making them well-suited for bass. However, they must be powered, either by an external source, a battery, or with phantom power. Passive DI boxes, on the other hand, do not need power and do not contain a preamp. Both types can be used for any instrument.
If an instrument is coming in particularly hot and is clipping at the console, try toggling the “pad” switch, which will reduce the unit’s output gain. If you hear a buzz or hum while using a DI, try toggling the “ground” or “ground lift” switch.
Know Your Balanced and Unbalanced Cables
One of the most important things to keep in mind when putting on a concert is the difference between balanced and unbalanced cables. A balanced cable needs three connections, while an unbalanced cable needs only two.
The most common unbalanced cables are called “instrument” or 1/4" cables in the U.S., “jack leads” in the U.K., or “jack to jacks” in Australia. RCA cables and 1/8" “aux” cords are also unbalanced. These cables can only be run about 20 feet before the sound quality will start to lessen. So if you’re trying to go farther, you’ll need to plug them into DI boxes and run balanced cables—like XLR or “mic” cables—the rest of the way.
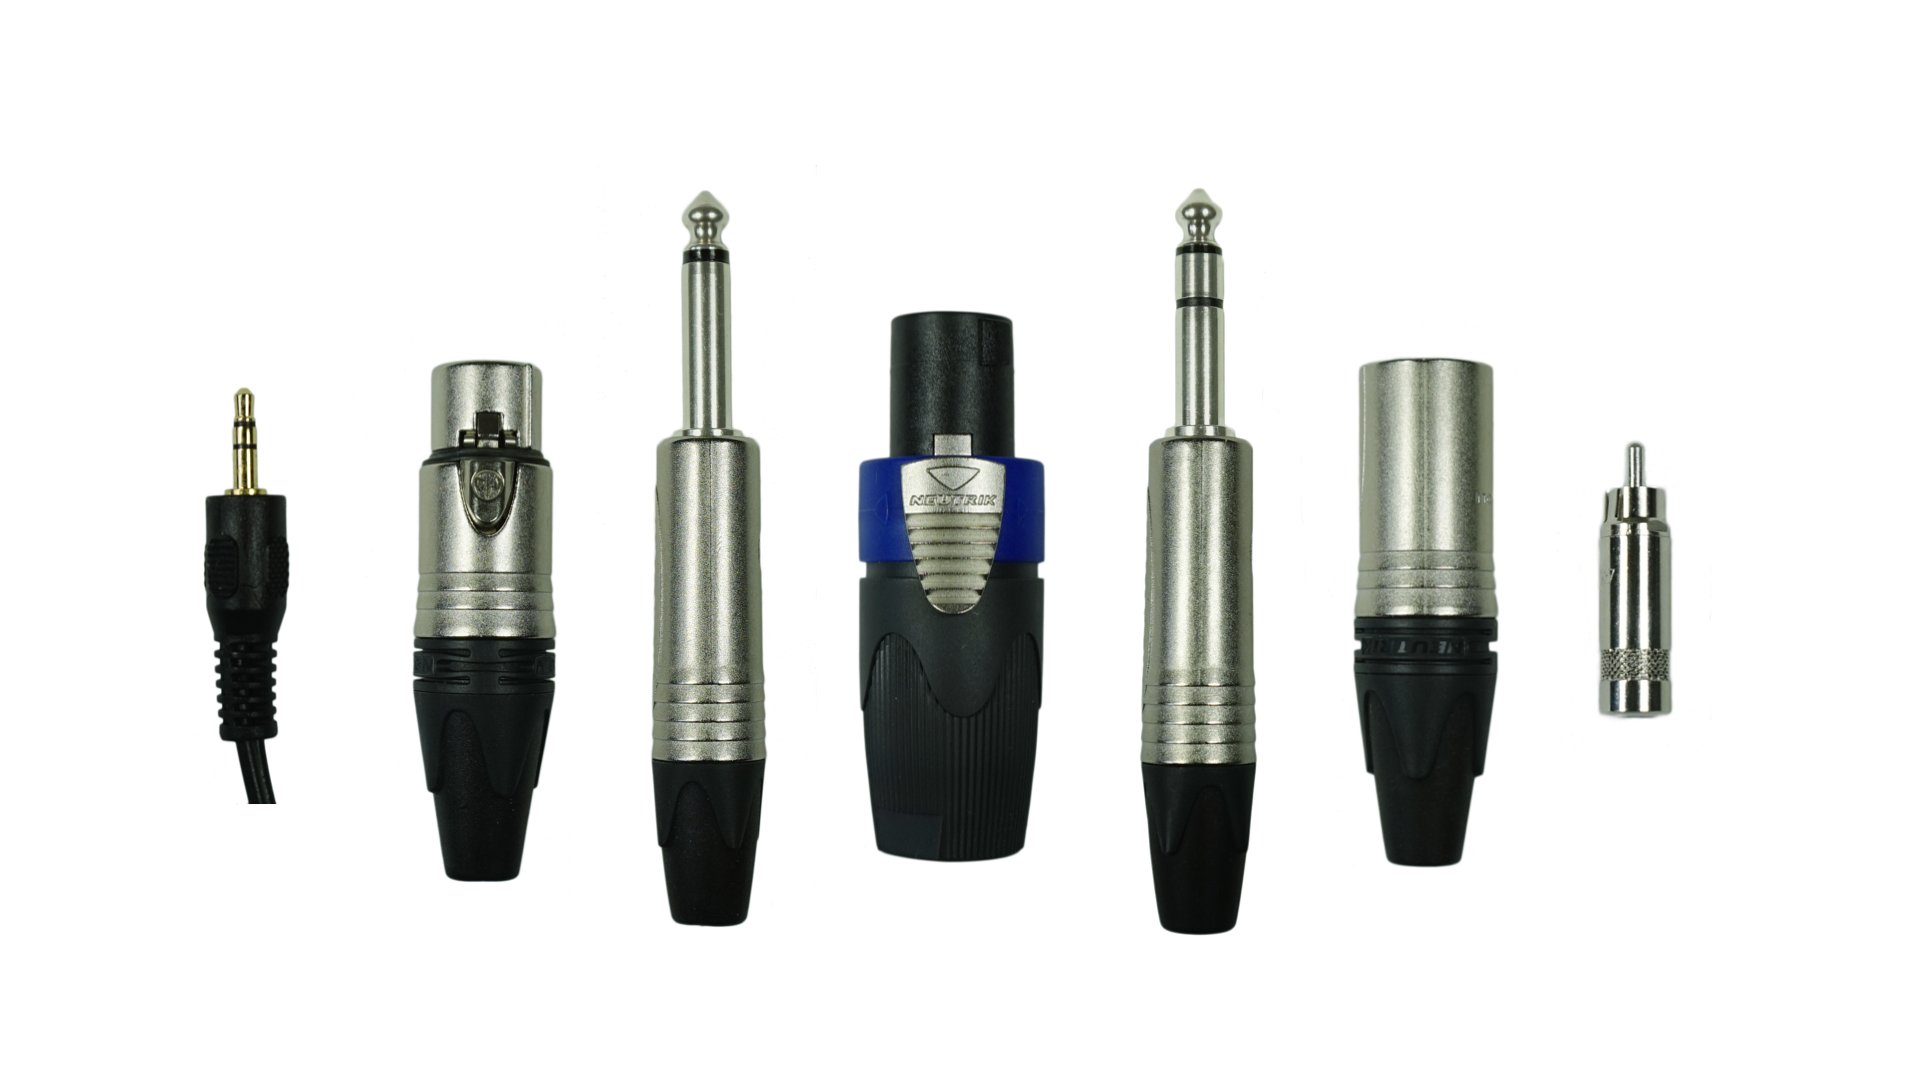
Although some 1/4" speaker cables look identical to instrument cables, they are not made for the same purposes. Be sure to not confuse the two. The body of the cable should be labeled “instrument” or “speaker” to avoid confusion.
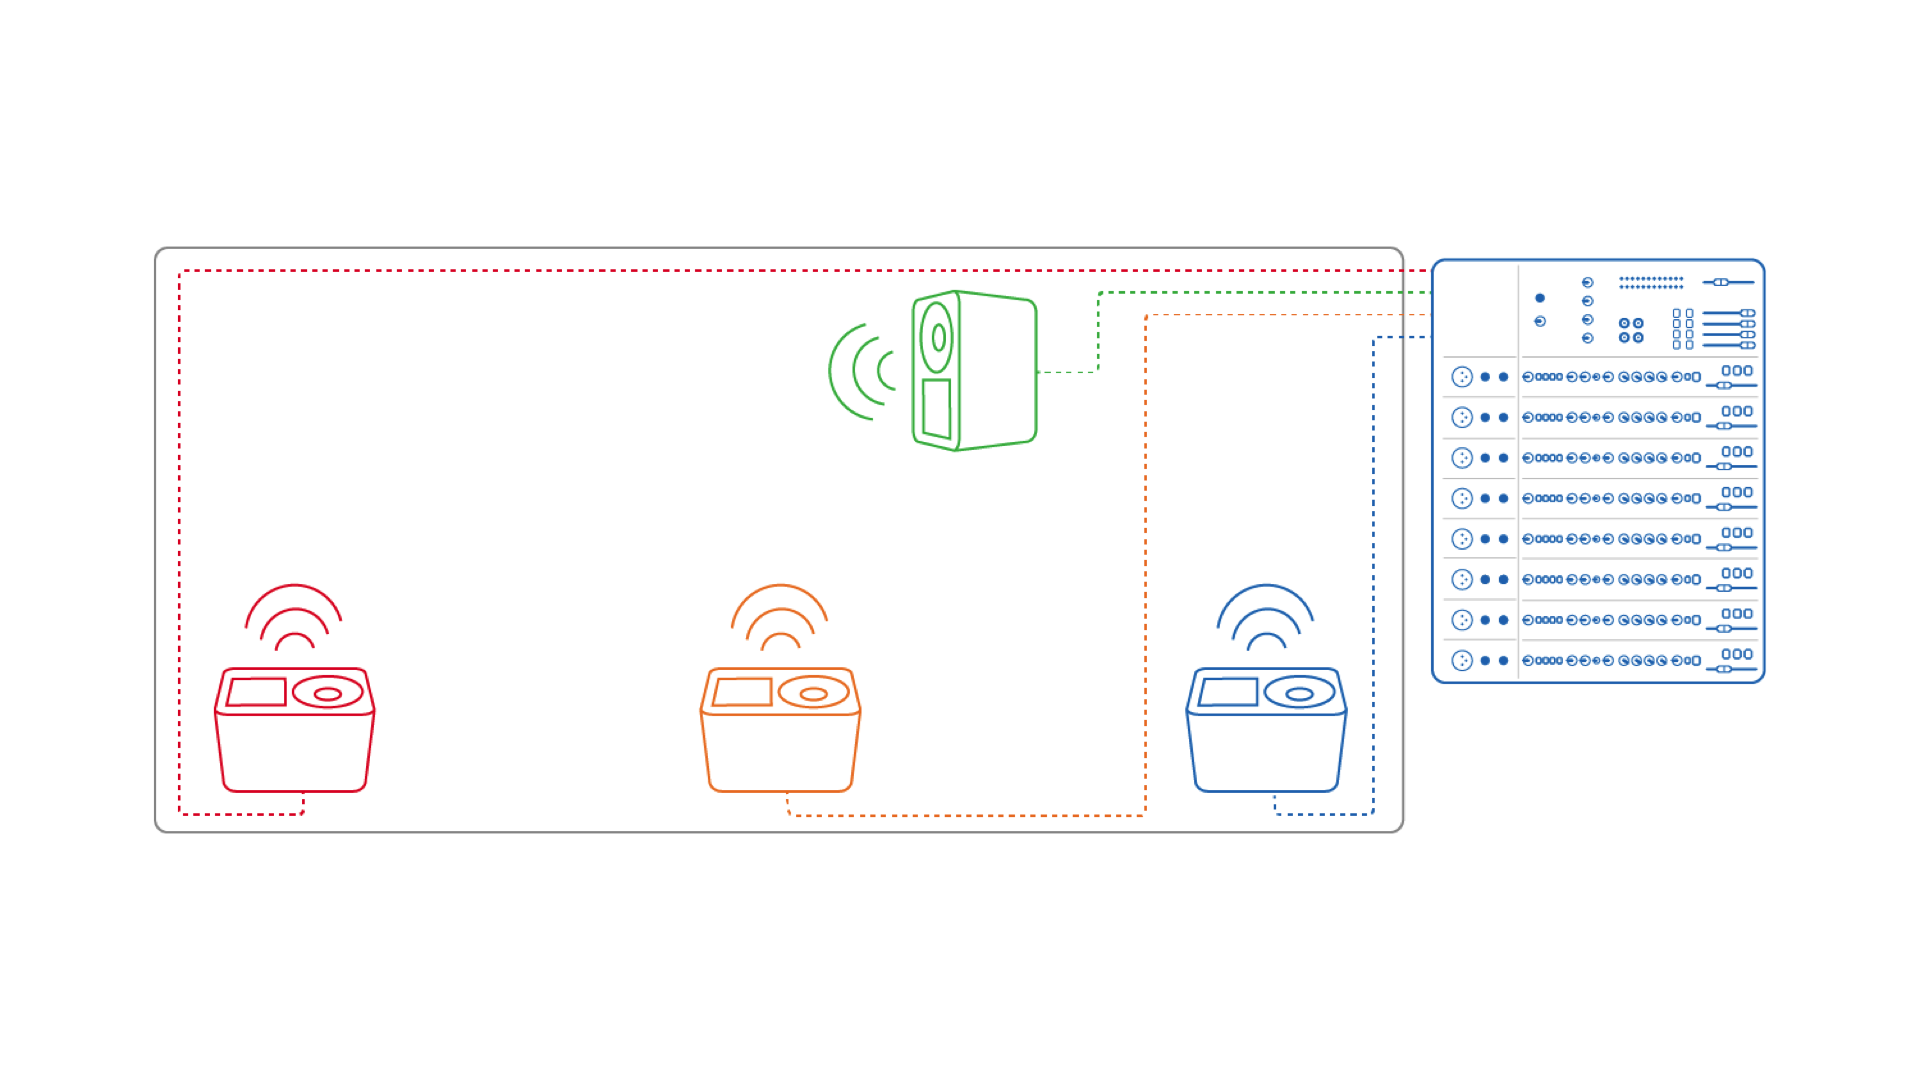
Get a Good Monitor Mix
An artist's on-stage monitor mix should not be an afterthought. Even if a soundcheck is particularly rushed, do everything you can to take the necessary time to find a good balance. The better it sounds on stage for the musicians, the better they’ll play, and therefore, the better the front-of-house sound will be.
The most common on-stage speakers are called wedges, which sit on the floor and face the players. Additional speakers at the side of the stage called “side fills” are larger and more compatible with bass frequencies. You can also add an additional subwoofer for bass-heavy acts.
In-ear monitors or IEMs are an industry standard for many professional musicians. They allow players to have a highly controlled personal mix. While they can be expensive, they're an important option to keep in mind. They can provide a great mix at a reasonable volume, while blocking much of the on-stage volume that can otherwise damage a player's ears. Especially for drummers—who can struggle to hear a wedge mix over the drums and therefore need to crank the volume even higher—having in-ears can help protect their hearing over the course of a performance.
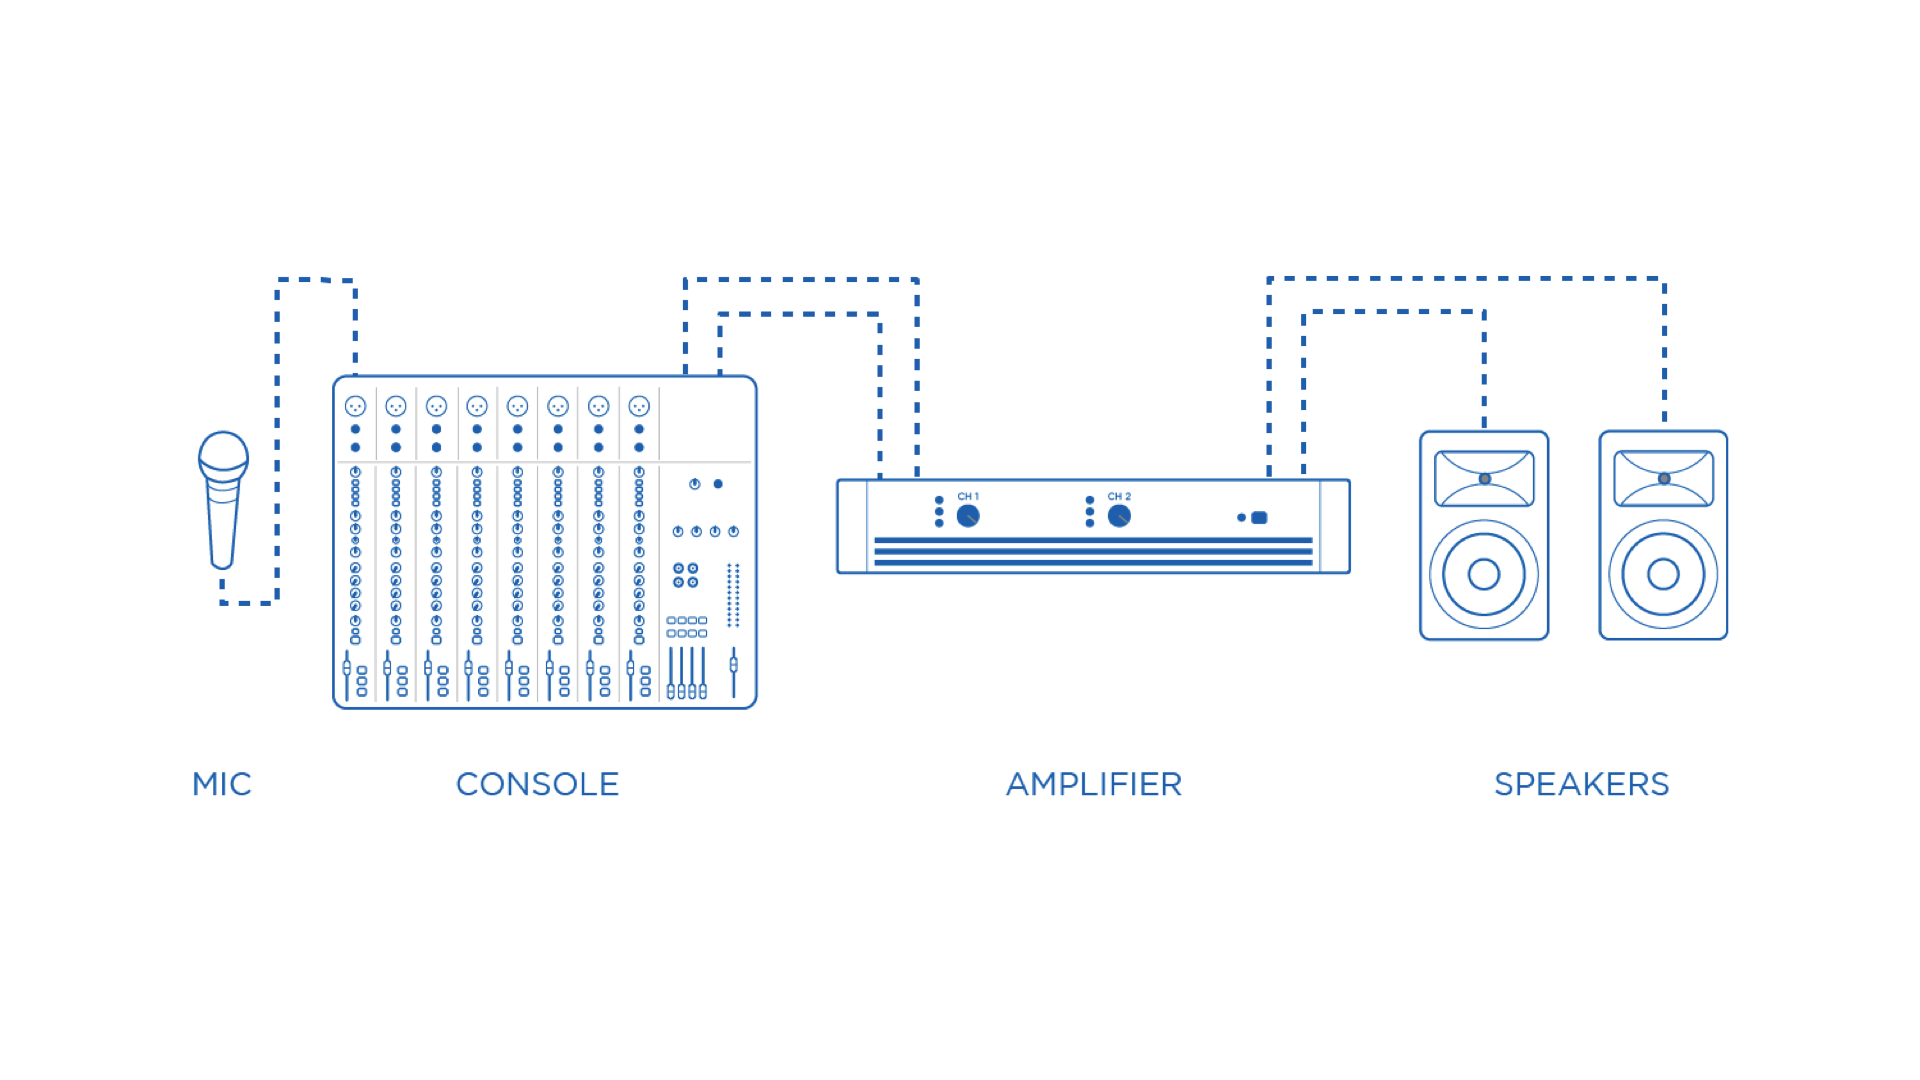
Follow the Signal Chain
The signal chain is the term for the full journey of an audio signal, from an instrument or singer to the speaker. If you have a break in the chain, then you won’t have sound at the end. Knowing how to troubleshoot and quickly find the problems in a chain is critically important, whether you're on stage or working for a band.
Be able to follow the signal, from the instrument, mic, DI, and all the various cables. When something goes wrong, it is often due to used and abused cables, but faulty DI boxes, mics, and speakers can be culprits too. The more you familiarize yourself with the chain, the more quickly you’ll be able to find its weak link.