
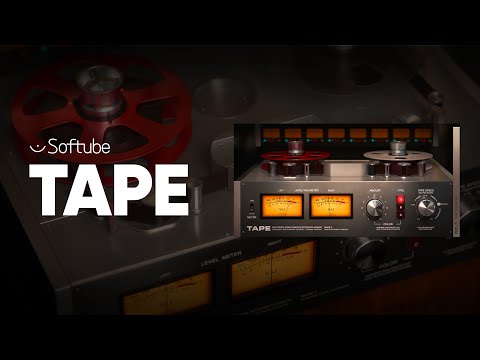
Softube Tape
New Price€42.67
Incl. VAT
Instant Download
This gear has sold
See similar gear from other Reverb sellers
Listed:over a month ago
Views:1,240
Saves:41
Offers:12

Chicago, IL, United States
Our users rate Reverb
A throwback for your in-the-box track.
What it is:
Tape machine emulation plugin from Softube.
How we use it:
Add smoothing, saturation, and weight to a mix.
Why it's cool:
Tape packs three different tape machine modules in one - ensuring a tasteful addition to most any track. Time to get reel! Softube's Tape plug-in adds cohesion and weight to your mixes. But Tape goes far beyond your average tape machine emulation. It includes three distinctly different tape machine types, and it offers the ease of use and low CPU strain that today's music creators rightfully expect.
Even in this day and age, it's common practice for computer based professional studios to run their mixes through at least one generation of analog tape. Why? Because even when used subtly, analog tape has a smoothing effect and adds cohesion and weight to a mix—it takes the recording from a collection of individual tracks into a song where everything is connected and works together. With Softube's Tape plug-in, you can have all that and more.
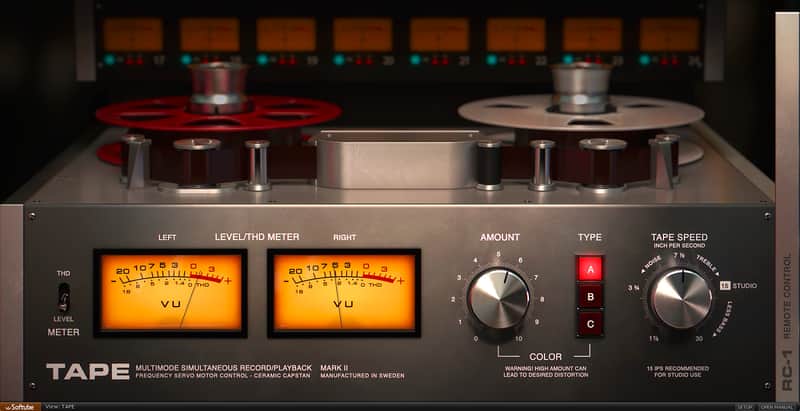
Three Machines in One
Tape includes three different tape machine types in one plug-in. Type A is based on a classic Swiss high end reel-to-reel machine, known and loved for its precision and linearity. Type B is much more colorful—it's a transformer based machine which adds extra weight and cream to the low end. Lastly, Type C is based on a British tape machine with a distinct vintage vibe.
Ease of Use
Select your favorite tape machine Type, and adjust the Amount knob to taste. In most cases, that's all you need to do to soak your tracks in analog tape sweetness. Easier still, load up one of the included presets, made by award winning engineers such as Joe Chiccarelli (Beck, U2, Strokes) and Howard Willing (Smashing Pumpkins, Sheryl Crow, Kris Kristofferson).
But Wait, There's More
Feeling tweaky? Why not start by trying the different tape speed settings—you'll find that the slower the tape speed, the more pronounced is the so-called tape head bump, which adds low end to the mix. Or open the Remote Control panel where you can control the selected tape machine's speed stability, crosstalk amount and several other tape-a-liscious features.
Dense Sound, Light on CPU
Add a single instance of Tape on your master bus to emulate what most computer based studios do today—mix in the computer, then mix down to a stereo tape machine—or go vintage style by adding Tape to every single track in your mix. Yes, your computer will be able to handle it. As most Softube plug-ins, Tape is uniquely light on your computer's processor.
Extras for Studio One Users
If you run Presonus Studio One, you can not only use Tape as a standard plug-in. Adding Tape to your MixFX slot gives you Tape Multitrack. Tape Multitrack includes all the goodies of Tape, but in addition, you get selectable crosstalk between each individual track—and you can easily control the Tape Multitrack settings from a single interface. The Tape and Tape Multitrack license is one and the same. This means that if you're not a Studio One user but at some future point decide to switch to that DAW, you will already have Tape Multitrack installed, licensed and ready to go.
In Short
Compatibility
Installation Instructions
What it is:
Tape machine emulation plugin from Softube.
How we use it:
Add smoothing, saturation, and weight to a mix.
Why it's cool:
Tape packs three different tape machine modules in one - ensuring a tasteful addition to most any track. Time to get reel! Softube's Tape plug-in adds cohesion and weight to your mixes. But Tape goes far beyond your average tape machine emulation. It includes three distinctly different tape machine types, and it offers the ease of use and low CPU strain that today's music creators rightfully expect.
Even in this day and age, it's common practice for computer based professional studios to run their mixes through at least one generation of analog tape. Why? Because even when used subtly, analog tape has a smoothing effect and adds cohesion and weight to a mix—it takes the recording from a collection of individual tracks into a song where everything is connected and works together. With Softube's Tape plug-in, you can have all that and more.
Three Machines in One
Tape includes three different tape machine types in one plug-in. Type A is based on a classic Swiss high end reel-to-reel machine, known and loved for its precision and linearity. Type B is much more colorful—it's a transformer based machine which adds extra weight and cream to the low end. Lastly, Type C is based on a British tape machine with a distinct vintage vibe.
Ease of Use
Select your favorite tape machine Type, and adjust the Amount knob to taste. In most cases, that's all you need to do to soak your tracks in analog tape sweetness. Easier still, load up one of the included presets, made by award winning engineers such as Joe Chiccarelli (Beck, U2, Strokes) and Howard Willing (Smashing Pumpkins, Sheryl Crow, Kris Kristofferson).
But Wait, There's More
Feeling tweaky? Why not start by trying the different tape speed settings—you'll find that the slower the tape speed, the more pronounced is the so-called tape head bump, which adds low end to the mix. Or open the Remote Control panel where you can control the selected tape machine's speed stability, crosstalk amount and several other tape-a-liscious features.
Dense Sound, Light on CPU
Add a single instance of Tape on your master bus to emulate what most computer based studios do today—mix in the computer, then mix down to a stereo tape machine—or go vintage style by adding Tape to every single track in your mix. Yes, your computer will be able to handle it. As most Softube plug-ins, Tape is uniquely light on your computer's processor.
Extras for Studio One Users
If you run Presonus Studio One, you can not only use Tape as a standard plug-in. Adding Tape to your MixFX slot gives you Tape Multitrack. Tape Multitrack includes all the goodies of Tape, but in addition, you get selectable crosstalk between each individual track—and you can easily control the Tape Multitrack settings from a single interface. The Tape and Tape Multitrack license is one and the same. This means that if you're not a Studio One user but at some future point decide to switch to that DAW, you will already have Tape Multitrack installed, licensed and ready to go.
In Short
- Realistic analog tape sound
- Three tape machine types included
- Easy to use
- Low CPU usage
- Includes Tape Multitrack which can be used in the MixFX slot of Presonus Studio One—adding individual channel crosstalk and single interface control of all tracks
Compatibility
- Mac OS X 10.9 or later
- Windows 7, 8, 10 (64-bit)
- Intel Core 2 Duo, AMD Athlon 64 X2 or faster
- 1 GB RAM or more
- Screen resolution larger than 1280 x 800
- 6 GB hard disk space or more, for installation
- VST, VST3, AU, AAX (Pro Tools 10.3.7, 11.0.2 or higher)
- All Softube plug-ins support both 32- and 64-bit hosts, although a 64-bit OS is required
- 44.1, 48, 88.2, 96, 176.4, 192 kHz (in both mono and stereo)
Installation Instructions
Create a Softube/Gobbler account here: https://www.softube.com/index.php?id=myaccount
Download and install the Gobbler App
- Open the Gobbler App and sign in using your Softube/Gobbler account
- In the Gobbler App, click "Install All" to install all Softube products you have a license for - use the license key emailed to you by Reverb SYNC.
- If you have new licenses, keep the Gobbler App running when starting your DAW. The first time you run a plug-in, you will get a prompt for activation. Please follow the step by step instructions. General Instructions:
- We auto-detect your computer operating system, so just click the download button above.
- Find the downloaded plugin (it's in your computer's download folder, or wherever you've chosen to save it) and double click the installer.
- A plugin installer window will open. Simply go through the installation process.
- We will also send you an email with a link to re-download in case you need it.
- If Ableton Live is closed, open it and skip to #5.
- If Ableton Live is already open, go to Preferences.
- Go to Files & Folder.
- Click "Rescan plugins".
- Find the plugin in the Ableton plugins folder in the sidebar.
- Drag-and-drop the plugin onto your track at the bottom of the screen.
- Open Logic Pro X. Newly installed plugins should be detected automatically every time Logic is opened.
- If you've downloaded an effect or utility plugin, these can be used on an insert for any track in the mixer.
- Create a software instrument track if you downloaded a virtual instrument plugin.
- Under Default Patch, go to AU Instruments and choose the plugin you just installed.
- Open Pro Tools. Newly installed plugins should be detected automatically every time Pro Tools is opened.
- If you've downloaded an effect or utility plugin, these can be used on an insert for many types of tracks (Audio, Aux, Instrument, Master Fader...)
- If you’ve downloaded a software instrument, create a new Instrument track.
- Navigate to the Mixer and locate the newly created Instrument track.
- Select the desired instrument plugin by clicking on any of the Inserts on the Instrument track.
- Go to the Reverb SYNC Software and plugin Collection.
- Choose your desired plugin.
- Reverb will auto-detect your platform, so simply click the download button.
- Continue the installation process by following the prompt.
- Hover your mouse over the smart control button.
- Click Show Inspector icon.
- Click on plugins and choose your desired plugin.