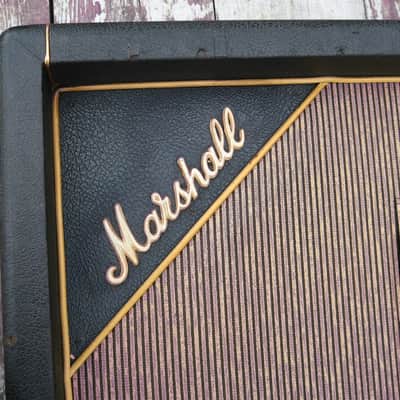

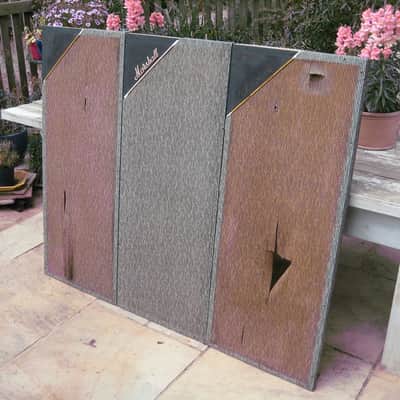

Marshall #1969 Pinstripe Cabinets with Two Matched Quads of Celestion G12M 20W T1221 Greenbacks 1967
This seller is currently away
See similar gear from other Reverb sellers

Our users rate Reverb
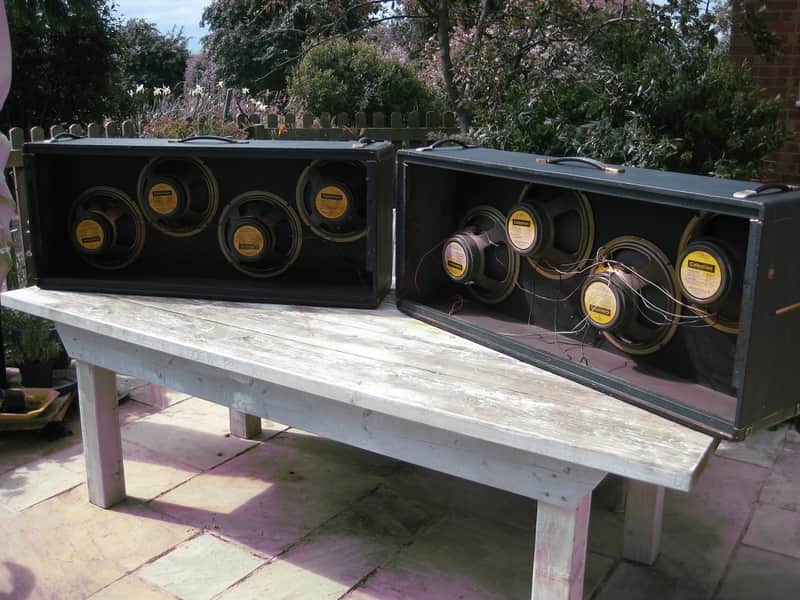
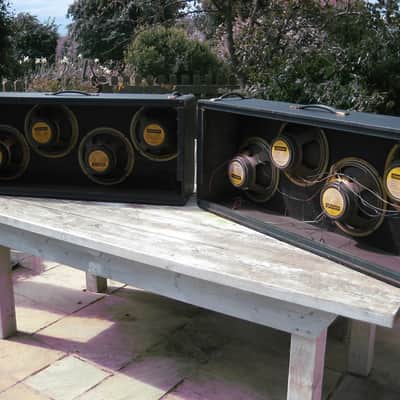
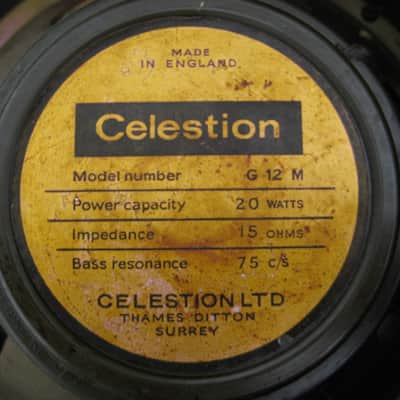
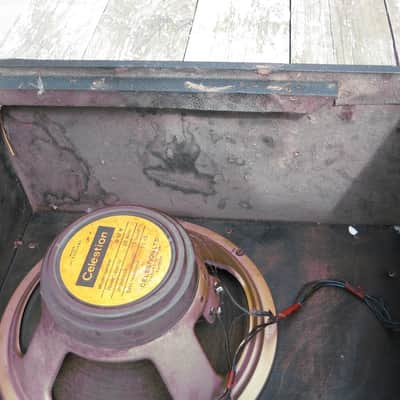
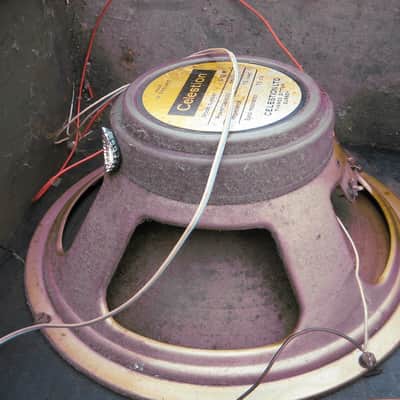
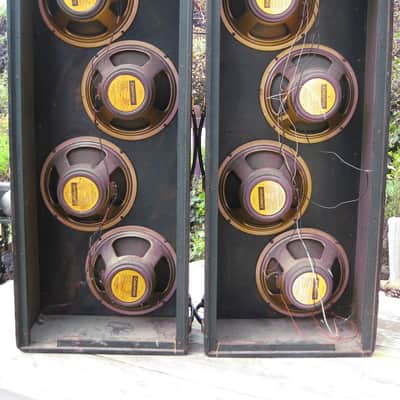
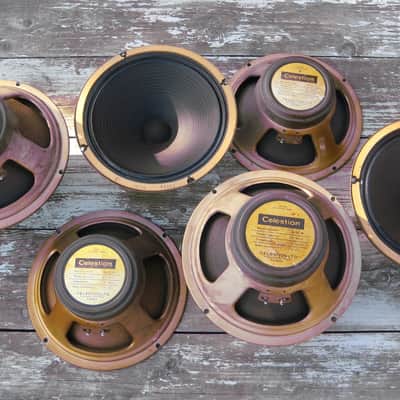
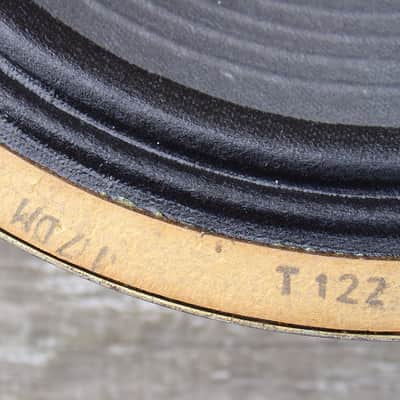
I’ve brought these out from the back of the workshop with a view to selling – a pair of Marshall model 1969 pinstripe PA columns housing two quads of Celestion 20W G12M greenbacks. They're untouched - at least for a long time, untested and unclean. I’ve unscrewed one speaker to check the gasket stamps, the model number is T1221 and the date code is 17DM (April 1967).
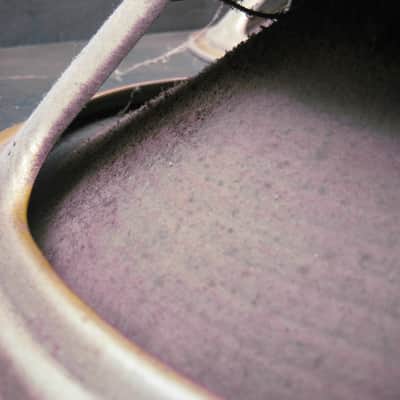
These are easily the dirtiest cabs I’ve had here… there’s decades’ worth of residual coating all over of nicotine/tar, and a thick build up of dust and particles on every upward facing surface. You can smell them from quite a distance and up close it's genuinely nauseating. Going by this and the number of deceased creatures inside it seems fair to assume they're probably humanly toxic to some degree. So remedial work begins this weekend to remove the more hazardous dirt, stabilise the cabs and discover what’s underneath. Since these are to be sold and I’m at the start of the project, I thought I’d share my weekend’s work list and post a few photos. If there’s interest I’ll update the listing as I progress. Feel free to message me if you’re interested in buying them or if you have any questions.
Worklist
Phase 1: Initial Cleanup
-
Re-home any living inhabitants
-
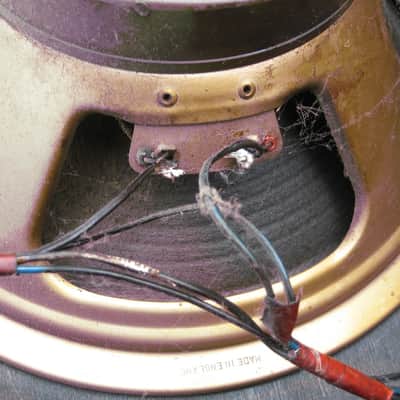
De-solder and dispose of non-original wiring
-
Mark each speaker’s position
-
Remove each speaker
-
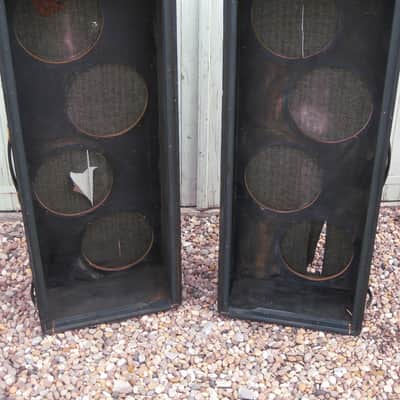
Vacuum and deep clean the cab interiors
-
Remove surface dust and residue from the speaker frames, magnet covers and cones
- Take visual stock
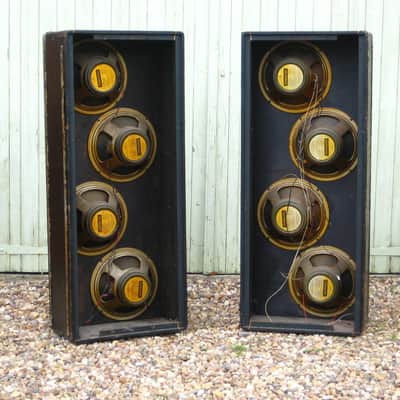
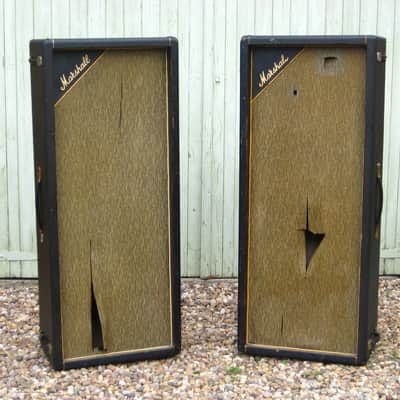
- Photos added. Six speakers are dated 17 April '67 and two dated 29 March '67. They are all T1221s. All cones are intact apart from the one which has been damaged through the grille cloth.
- Cab interiors are now clean. Amongst the dirt removed there were shards of broken bottle glass, a bottle top, a drawing pin and a knife - found between the baffle and the cloth (I said these cabs were hazardous).
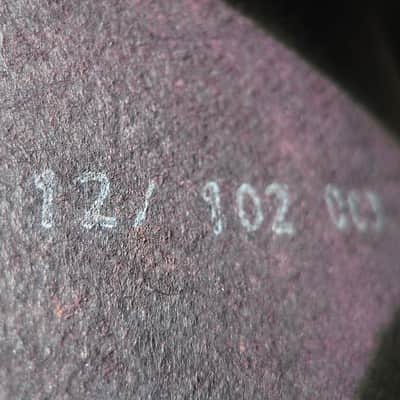
- The first cone stamp of the day has emerged from the dust: the cone is a 102 003 Pulsonic.
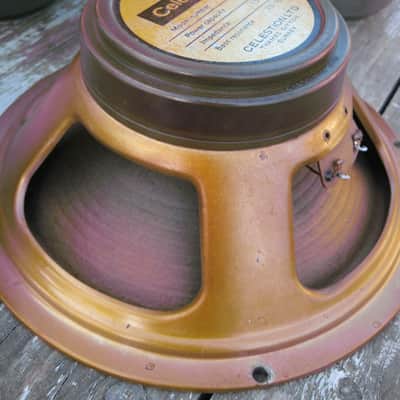
- I've taken a mini vacuum adapter with brush attachment to lift dust from each surface of the cones, a paintbrush to get into the grooves of the spiders and a toothbrush to remove the dust buildup from the underside of the frames. The cone stamps are 10/102 003 (x1) 11/102 003 (x3) 12/102 003 (x3). One speaker has been re-coned. All cones are in good condition apart from the one that's been torn. There's zero corrosion on the frames so you can tell the speakers have lived their lives indoors - in a smoky environment too, explaining the deep golden hue which is nicotine/tar build up. It's an extraordinary patina which will come off both the frames and the magnet covers with some elbow grease if required.
- Phase 2 will be to test the speakers, which is something for next weekend.
17/06
Worklist Phase 2: Test each speaker
-
Verify polarity
-
Measure DC resistance
-
Manually check for coil rub
- Results
Column 1
1. 17DM
Polarity: Normal
DCR: 12.8Ω
Rubbing: No
2. 17DM
Polarity: Normal
DCR: 13.4Ω
Rubbing: No
3. 17DM
Polarity: Normal
DCR: 12.8Ω
Rubbing: No
Polarity: Normal
DCR: 13Ω
Rubbing: No
Column 2
1. 29CM
Polarity: Normal
DCR: 13.2Ω
Rubbing: No
2. 29CM Re-coned
Polarity: Out of phase
DCR: 15Ω
Rubbing: Yes
3. 17DM Damaged
Polarity: -
DCR: -
Rubbing: -
4. 17DM
Polarity: Normal
DCR: 14.1Ω
Rubbing: No
- I’m going to test the speakers using an audio analyser to measure frequency response and to identify any sound anomalies that won’t be picked up in manual testing. This will be Phase 3 of the project and will happen the weekend after next. In the meantime I’m going to send speakers 2 & 3 of column 2 away to be re-coned. Phase 4 will be to play through them all.
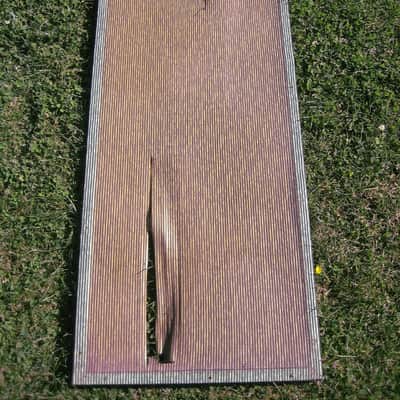
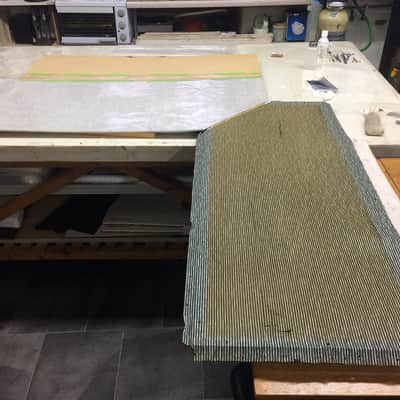
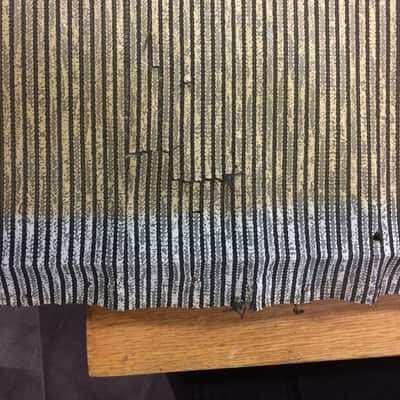
- Returning to the cabs, I’ve removed one of the baffles and posted a picture to show the edges of the pinstripe newly exposed to the air after 50 years, and the contrast between the edges and the stained central portion.
Feel free to message me if you’re interested or have any
questions.
02/07
Worklist Phase 3
I received the two re-coned speakers back yesterday morning and they look to be in great condition.
Yesterday afternoon was spent audio analysing the speakers. The results are positive. The process isn't complete though; I'm hoping for testing to be finished during the week beginning 10/07.
Over the past week I've given the exterior surfaces of the cabs a preliminary clean to remove the nicotine/tar, as well as the piping and all of the hardware. The cabs came with me on a visit to Marshall last Friday and they commented that the pair are in great condition for their age. One side of each of them has been stripped of its covering, painted black and had aluminium runners screwed in; I've removed the runners and will leave those sides uncovered.The pinstripe is being appraised by a textile conservator. I've posted a few pictures to show these cloths alongside one in exemplary condition from the same year.
I have Phase 4 pencilled to get underway during the week beginning 17/07. In the meantime, tasks for the project include: deep cleaning the cab exteriors, repairing blemishes to the vinyl, making good the uncovered surfaces, restoring the logos and considering replacements for the non-original end handles.16/07
Update:
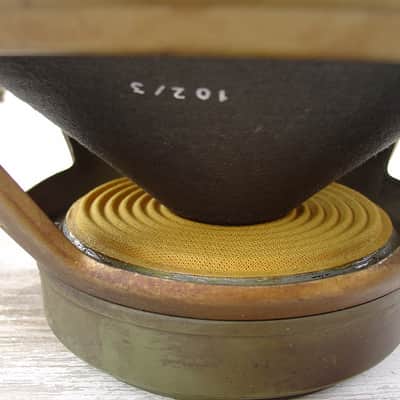
The two speakers I sent away have been re-coned with a pair of new-old-stock Pulsonic 75Hz 102/3 stamped cones from the reserves of a specialist repair company recommended by Celestion, based in the UK. That makes the cones manufactured between 1971 and 1973/4 when the Pulsonic factory burnt down, and the best fitting match I could find for the other six speakers in these cabs. Photos showing the workmanship have been added.
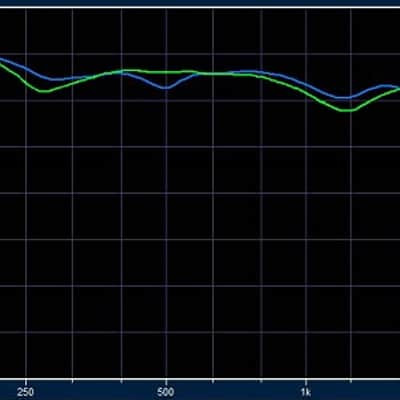
The speakers have been tested using an audio analyser and the results are excellent. The test was conducted using an XTZ Room Analyzer in a normal room with the microphone placed five feet from, and centrally facing, the column. The columns were open-backed and the pinstripe was used in its torn condition. The frequency response of each speaker was measured individually with four full range (20 – 20,000Hz) sine sweeps producing an average measurement which, presented in graph form, shows smooth, benign curves at the same sound level range across the typical guitar frequency range of c.80 – 1050Hz for each speaker. After each speaker in each column was tested individually, all four speakers in each column were wired in parallel and connected to two channels of the amplifier to measure the frequency response of each combined set of four, and both columns show consistency of response across the typical guitar frequency range to within a range of ±5dB. Overlaying the graphical results of all four speakers in each column together shows the columns are matched to each other, over the same frequencies, to within a range of ±4dB. The test was conducted by a former Director of Technology at Wharfedale, who described the speakers as being in acoustically superb condition and said they are remarkably closely matched. A graph showing the overlaid results of each column has been added. The green line represents the left column in picture 3 of the listing, and the blue line represents the right. All testing results will be provided with the cabs.
The tone of these columns will be largely affected by the condition of the cloth. The feedback I’ve received from the textile conservator I’ve consulted has confirmed the likely chemical degradation process the pinstripe has undergone, and sight unseen they have suggested various methods of conserving the fabric, cleaning the pieces and repairing the tears. I’m considering the next steps on that.
With the cabinets now having been relieved of their nicotine coating I’ve made enquiries about finding replacement handles or having them reproduced. I have the fittings, the metal strip inserts and packing from the original handles; just the 8” leather handles themselves are missing. If I go ahead with a reproduction, I will use a complete, original Marshall leather handle I have from the same year as a template.
Phase 4 is still pencilled to get underway week beginning 17/07.
23/07
Update
The baffles remain out of the cabs pending face-to-face meetings with the textile specialists I've consulted to see what's the best that can be done with the pinstripe. I hope this will happen week beginning 23/07, otherwise early during the week beginning 31/07. Until the baffles are finished and re-fitted, phase 4 won't happen. When it does, I'll put video/audio up on the listing. I'll update again during next week.
30/07
Update
I've had three face-to-face meet-ups this week about the pinstripe; with two leading textile conservation experts and with the Head of Heritage and Archive at Marshall. In each meeting, talking about the cloth, I felt I was in my element.
In all of the restoration projects I undertake, my aim is the same - to restore the instrument faithfully in the spirit it was created in, as originally as possible and to optimal playable condition. Earlier in this project I'd made a decision to replace the pinstripe with replica cloth after having diligently asked four experienced senior professionals for their advice on repairing the original. From each I received the same answer: in their experience it couldn't be done adequately, either practically with regard to the acoustic quality, or aesthetically. So choosing to replace the cloth at that point, having heard for myself the distorting affect of the tears during the audio analysis, I felt was doing the best I possibly could for these cabinets. I've since been reminded that nothing is impossible, and faced with a challenge you need to ask yourself what it's worth to you to try to meet it. And for all the practical, pragmatic reasons there are for replacing the cloth on these cabinets, what appeals to me most in my project work is tending to what's there. Having discovered conservation as a professional discipline and seeing possibility, my instinctive feeling is to face down the challenges, those being: 1. to stop further deterioration of the cloth, 2. to restore the acoustic quality and 3. to improve the aesthetics. It was very cool to have the pinstripe looked over in a white-walled lab under spotlights...
In practical terms, both conservators independently identified the same range of issues with the cloths in their current condition. Both identified, for example, the loss of plasticiser from the PVC as being the cause of its stiffness and brittleness, and both said this was likely to cause detrimental acidity levels in the cloth. The surface of the backing fabric on one has a pH of 4.5, with a pH of 4/3 being critical. That could be treated with a washing application but whether it could be done without distorting the dimensions of the cloth or causing further damage is an unknown; the backing fabric is apparently made of short stranded cotton yarn and is weak. In terms of treatment, both said that the cloth would have to be removed from the baffles for any work to take place and both suggested similar methods for reinforcing the cloth from the back. Both identified similar limitations and risks involved with the processes.
Both remarked that the conservation of plastics was a topic of interest in contemporary textile conservation, and one suggested the complexity of this speaker cloth restoration, together with the scientific challenges of conserving the PVC and of the overall acoustic quality - and the modern musical cultural significance - might make this project of interest to academics as a subject of study. I've been given some names to contact to make enquiries. Taking this information to Marshall and discussing their experience dealing with vintage pinstripe has made me think that finding out if there is academic interest is worth investigating, and Marshall have expressed interest in whether I decide to do that and the outcome.
For now, no staples have been removed from the baffles. I'll make some further enquiries and consider all options. If conservation work is to take place outside of an academic environment, I'm inclined to ask if I can undertake it under the supervision of the conservator, so that I can take on the skills myself. All of which is going to take time and require adjustment to my anticipated Phase 4 date. I know no work would start on the cloths until September.
Right now, I'm continuing to bring together the other elements needed for the cabs - the handles, original stud feet, speaker jacks, jack cups, screws and screw cups. I've asked Marshall to make a set of back panels as they are missing and needed. I've asked for them to be made without screw holes so I can create holes in line with the original holes in the frames.
I'm not sure whether to leave this listing up on Reverb because my project completion target has obviously shifted. I'll update once more at least when the fittings are in place.
29/04/18
Update
The work on the cloths has now been scheduled and begun by the textile conservator. The start date had to be pushed back from September to the new year due to the volume of work at the conservator's workshop, then delays outside of anyone's control pushed the start date back to Spring. The cloths made it up onto the bench at the start of April. I have been apprehensive about updating the listing since then as I am unsure of what progress has been made or what the ultimate outcome will be, however an encouraging message via Reverb reminded me that it is in the spirit of mutual discovery that I started writing about this project, and that triumphs are as worthy of sharing as disappointments. In terms of the speaker cloth element, I can't tell which way this one is going to go yet...
Just under three weeks ago I paid a visit to observe the work in
progress at the conservator's workshop. The cloths have been
carefully detached from the edges of the baffles except for at the
diagonal corners, which the conservator preferred to leave attached.
We discussed the method of cloth removal before the work started and
decided over all other options that an incision would be made along
the 4mm crown of each staple, allowing for the cloth to be lifted
from underneath without losing any material, or losing the staples
themselves. When the cloth is reattached with new staples, the plan
is to lightly hammer the existing staples down flush to the edge of
the baffle. This is in keeping with the conservator's philosophy of
retaining the integrity of the 'object', and also, if you have ever
tried to remove old staples (with 16mm legs) from a baffle you will
know they are likely to snap and cause problems.
One other note on the
removal of the cloths: I'm pleased to say that contrary to the
warnings I had received that the pinstripe may split at the corner
folds on removal because it would be brittle, no damage has occurred
and actually both pieces of fabric are very supple and seemingly
strong.
A cleaning process has been started on both cloths
and at the point of my visit I was told it had been finished,
although I found myself unable to clearly distinguish the difference
in discolouration from their original state. I knew that it would be
difficult if not impossible to remove all of the tar staining, however
I had hoped that a scientific, analytical approach would be taken to
the task; in this respect I have since had to reflect that the cloths
aren't actually in a laboratory, and that the resources of a
functioning business are limited. I am still trying to rationalise my
original hopes and expectations, and on the final outcome I
can see I will be making a judgement on whether it is worthwhile to
pursue the cleaning aspect further. In terms of the smell, a
lingering odour remained although thankfully not as badly as
before.
With regards to the tearing, I had been briefed
that it would not be possible to 'heal' the splits in the pvc, and I
was able to see the result of the conservator's initial approach on
one small area of the cloth which confirmed this. The area of the
horizontal split had been re-tensioned with a patch of gauze adhered
to the back of the cloth with glue. This brings the two ends of the
split very close together but they don't quite meet. In theory, I
think the two ends could be made to meet directly and bridged from
behind, but I have been advised that this could cause issues when
trying to re-tension the entire cloth back over the baffles at the
end of the process, and could cause weaknesses elsewhere in the cloth
afterwards. I am one for trying and finding out - however again I may have
to accept that non-lab conditions don't allow for this kind of
experimentation. On one of the cloths, there are two areas that have
been previously patched from behind and the glue used has made those areas of pinstripe harder than the surrounding areas, and this will be a
challenge to rectify cleanly.
I have uploaded some
pictures which give an indication of the work in progress.
If
I ask myself whether the challenges are being met in this exercise I
can say, theoretically, in terms of stopping further deterioration of
the cloth - yes, chemical degradation has been slowed by the
treatment and cleaning process (although it can't be halted); in
terms of restoring the acoustic quality - yes, the repair and
re-tensioning of the cloth will even the sound distribution and
eliminate mechanical distortion whilst the synthetic mesh gauze used
will maximise acoustic transparency in the repaired areas; in terms
of aesthetics - they won't be perfect the way things are going but
there will be an improvement. I'm comforting myself with those
thoughts for the time being while I wait for the final outcome.
In
the meantime I have had the back panels made up by Marshall and they have
done a great job; I also have the correct stud feet, speaker jacks
and jack cups. I haven't found a stock of leather that's quite right
for the end handles but the search continues and once I have found it
I have a maker standing by who will get the job done
efficiently.
Then I'm looking forward to getting into the final part of all of
this, phase 4.
I'll update again during next week.
06/05
UpdateThe cloths are still away and I'm now hoping to bring them home during the week beginning 21st May.
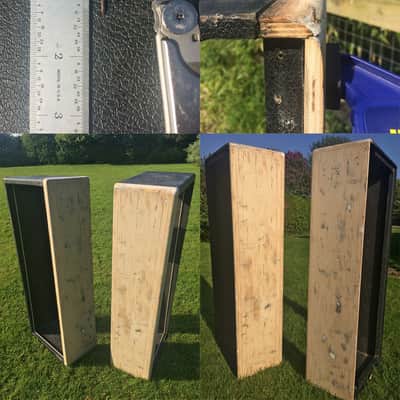
This weekend, work has been undertaken on refinishing the cabinets. I have taken the black painted sides down to bare ply with 40 grit paper. The feet that were once attached to the sides were obviously snapped off at some point because the tangs were left in the wood, requiring extraction. Once you get a grip on them and start pulling they just keep on coming. They are deceptively long. The paint was pretty thick, stubborn to remove and deeply ingrained at some points, so a little paint stripper was used to complete the job. The sides don't have to be spotless as they are going to be repainted black, however it is essential they are made smooth, and it's good to start with a blank canvas. The paint removal revealed there has been some hole-making and infilling activity before, probably before the runners were attached, although what the holes were for is not immediately clear. There are a pair of them on diagonals in each corner of both cabinets, surrounded by random clusters of others. Once the paint was removed I took the sides down further with 80 and 120 grit papers then infilled all runner holes, gouges and dings with wood filler. Tomorrow I will sand to a final finish then prep for a first coat. I am using a vinyl matt and will decide if that needs a finish of its own once I've seen the result of 2/3 coats.
I've finished the piping now which I'm pleased with. I've put a lot of hours into the piping alone. The nicotine staining has all but gone and they are just off-white in colour now. I'm looking forward to offering up the baffles so I can see the contrast between this piping and the short sections of piping on the baffle diagonals which are still the original brown/orange.
I'll update again during next week when the cab repainting work is completed.
27/05
Update
A little later than anticipated, the cab repainting work is nearly completed.
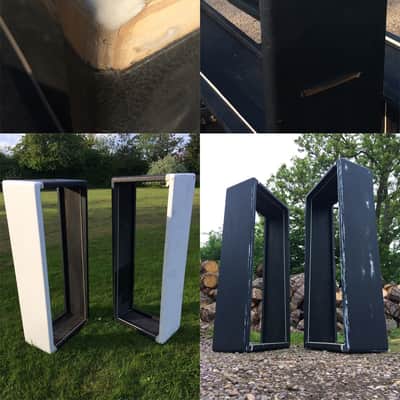
Before the wood filler was taken down to a 120 grit finish I undertook a little remedial work on one of the cabinet joints ready for a first primer coat. This was on the bottom back corner of one of the cabs where the butt jointed bottom panel was separating slightly from the side panel. There are several 1-3/8 inch nails driven along the length of these joints and on this side there was a surplus toward the front and few at the back, so I extracted one from the front, straightened it, clamped the panels square and drove the nail in at the back to close the gap and stop the movement.
After final wood filling I applied three coats of primer allowing 12 hours between coats and sanding to 120 between each. Once that was finished I applied the first coat of undiluted black vinyl matt emulsion with a short pile roller to give a good smooth finish. Once this was dry I located the feet holes from inside the cab and drove a sharp needle up through them to penetrate to the exterior, and used the tangs on one of the replacement feet to worry out the holes ready for them to be attached.
I also experimented with final finishes at this point; I had been considering various wax compound finishes but have decided against them in favour of a liquid wax application which will be hard wearing, resistant to temperature and will allow a gradual build up to achieve the right finish - something that will hopefully match the overall light-reflecting quality of the vinyl.
I then sanded back the exteriors to a P820 finish and applied second coat of neat vinyl matt. I'm asking a local firm sand this back to what they consider to be an appropriate grade before they apply a diluted final coat with a spray gun. I'm also speaking with another local firm on Tuesday about dipping and re-plating the feet, which in the usual manner are a little gnarly and have a touch of rust to them. I'd leave them normally, but in this case I'm interested to see how they'd come out after an acid bath and a new coat.
With regards to the cloths, I had hoped to have these back this week. They are ostensibly finished and I have seen photographs of them, however on careful study and reflection I have found it difficult to reconcile not only my hopes for the outcome but also my expectations according to the job spec. A dialogue on that has taken place this week and continues into next.This item is sold As-Described
This item is sold As-Described and cannot be returned unless it arrives in a condition different from how it was described or photographed. Items must be returned in original, as-shipped condition with all original packaging.Learn More.
| Listed | 9 years ago |
|---|---|
| Condition | Good (Used) Good condition items function properly but may exhibit some wear and tear.Learn more |
| Brand | |
| Model |
|
| Finish |
|
| Categories | |
| Year |
|
| Made In |
|
Product safety information may be available here.
