Part one of this two–part series on maximizing productivity in Ableton was focused on organizing defaults, presets, and file structure. By putting your favorite and most–utilized tools right at your fingertips when first you open the program, you can save admin time and get straight to creating and noodling.
This week, we’re going into further detail about how to organize and optimize the tools you have in Ableton specifically for songwriting.
Organize Your Clips
Writing a song means adding more tracks, and more tracks mean that you can easily get lost in a project that grows massively. Lots of time can be wasted trying to find that one synth track. Here are a few ways to prevent that sort of problem.
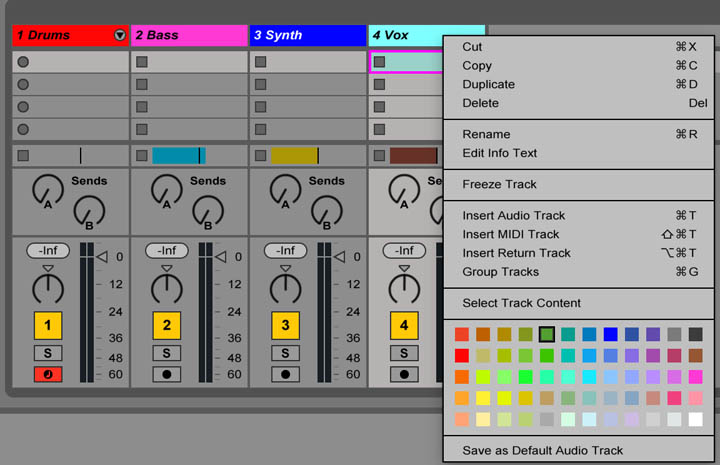
Name your tracks by right–clicking and selecting Rename. Name your track with the type of instrument or sound used, and you’ll have a much easier time navigating your project.
Additionally, Live renames audio files in the project folder to reflect that audio clip in your project. So if you rename that clip “Sub Bass Take 1,” it will show up in your project folder as “Sub Bass Take 1.” If you ever accidentally delete that clip from your project and don’t realize it until much later, it will be a lot easier finding that properly named clip and putting it back in.
Color–code your tracks. Sure, naming tracks and color–coding them may seem redundant, but it can be helpful to associate a color with an instrument or sound. If you color all of your synth tracks blue, then when you see blue while scrolling, you’ll know to stop there.
Optimizing Your Songwriting and Beat–Making Process
There are quite a few things you can do to organize a project and make it easier to write and arrange your music. If you’re using the Session View to get you ideas together, you’ll likely want to organize based on Scenes, or the row of clips that can be triggered by the play buttons along the Master Track.
Rename scenes according to the section of your song or beat. For example, you can work on creating simple song that has three sections, and, in turn, three Scenes: intro, verse, and chorus. Name each Scene as such, so that when you come back to the project a few days later, you can quickly recap what was happening in each part of the song and finish the production.

I’ve gone back to projects from my first few years of working in Live, and I can’t make heads or tails of what I’m looking at in terms of structure. This simple organization means you’ll be able to return to a track literally whenever and have a clear idea of what’s going on.
If you tend to write on the fly by triggering clips that you have laid out in several different Scenes, Live has a great tool for quickly putting those all in one place.
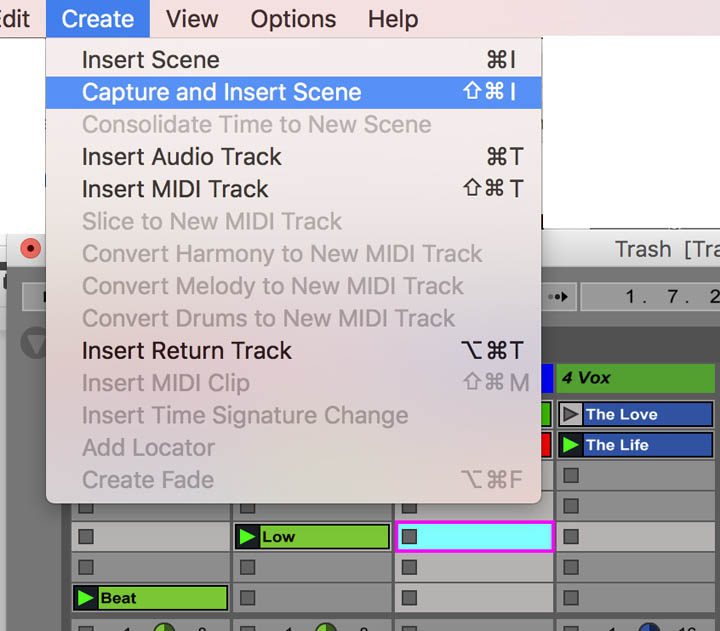
While those clips are playing, just go to the menu bar at the top of the screen, select Create and then select Capture and Insert Scene. This will create a new Scene with all of those clips inside of it. Now, name that Scene something recognizable.
Another great thing to do with your Scenes is changing time signature or BPM without going to the Arrangement View. Those parameters can be added to to the Scene name. Then, you can start to build the pace of the song before you even fully arrange it.
If you want to make notes or remind yourself of something you need to do in a project, you don’t need to get out your notebook. Live has a feature called Info Text that gives you access to writing in the Info View.
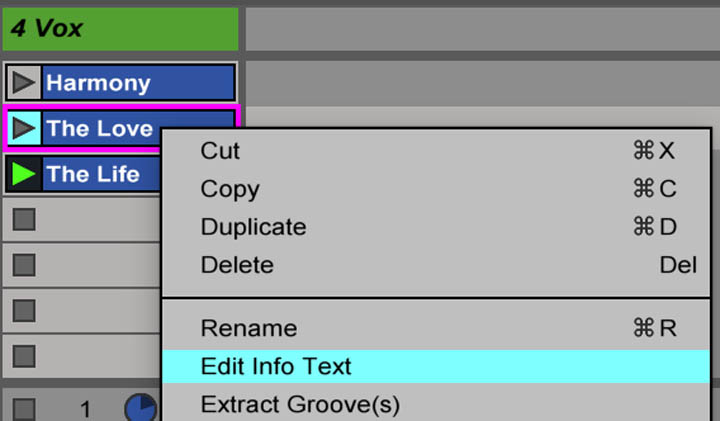
The same place you get info on how a device or parameter works is the same place you can write messages. Since Live doesn’t have a built–in place to put the key of the song, you can right–click on Master and select Info Text, then write “C Major.”

Now, when you hover over the master track, you will see in the Info View “C Major.” Let’s say a clip or a device needs more work. Right–click on the device title or the clip, click Info Text, and, for example, type, “Needs a 7 in the 3rd chord” or “Need to add distortion macro.” This will keep you organized and sane, not having to remember what you were thinking days or years ago about how your song could improve.
Organizing With Add Locators
In the Arrangement View, Add Locators are a lifesaver. Used in the Scene names to help you visually see where you are in the song, they also act as time–based play buttons.
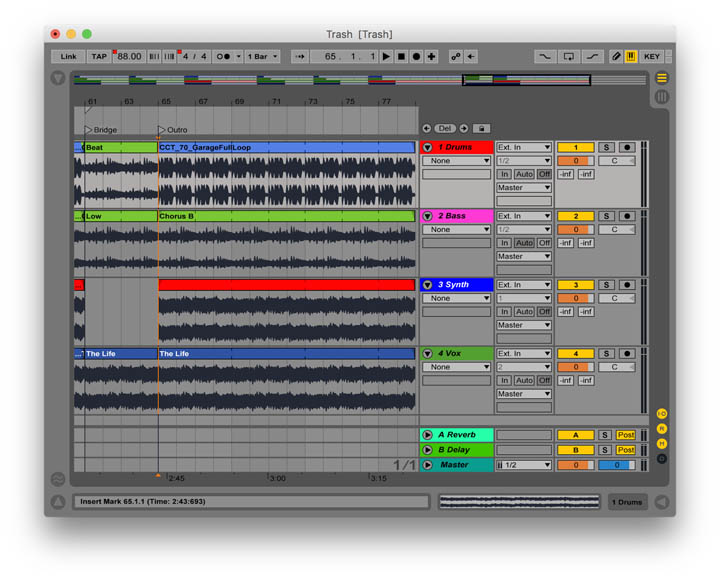
Click on the chorus Add Locator, and you will jump to the chorus right away. It beats clicking around randomly on the timeline trying to find exactly where the chorus starts. It’s as simple as right–clicking in the Scrub Area between the first track and the measure numbers and selecting “Add Locator.”
This is also where you go to set time signature in the Arrangement View. Keep in mind that if you set time signature and BPM in the Session View, the only work you will need to do is set Add Locators.
Organizing With Group Tracks
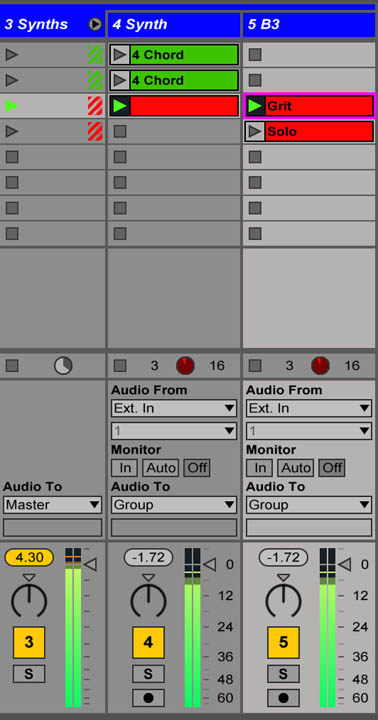
Using Group to bring together similar tracks is very helpful. Group does a few things. It channels ever internal track’s audio to the group track so that processing can be done in one spot instead of multiple tracks.
This frees up CPU, as well as making it easy to add effects and automate mutes and volume. Group also gives you a mini Scene. You can launch all of the group track’s clips as a group scene that’s independent of the overall project scene.
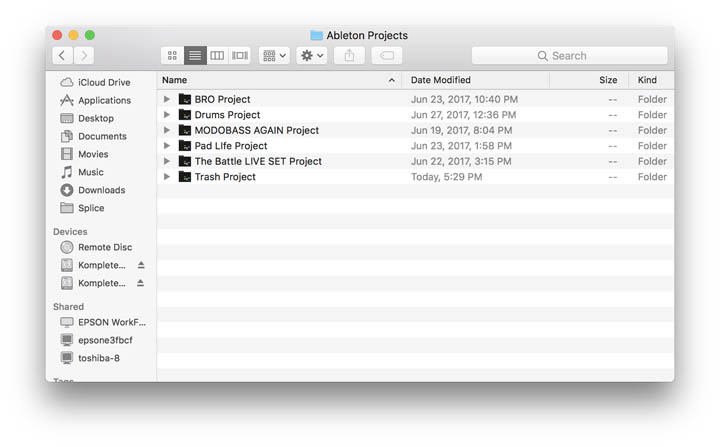
Share and Save
When you save your projects, you should not just save them anywhere on your computer, but save every project in one folder. That way, when you are searching for a song you wrote five months ago, you'll always know exactly where to look.